With 500 hours of video uploaded every minute on YouTube, how can you make your videos stand out with so much stuff out there?
The best way to ensure that your videos rank on the YouTube algorithm is to use a simple yet powerful video editing tool that’s great for beginners who want to create videos that look amazing! Because the sad truth is that most viewers will pass over videos that don't appear clean and professional while skimming through content to find one to watch.
Let’s look at the different options available to you as a creator to edit your videos.
Table of Contents
- How to upload and edit a video on YouTube
- How to easily edit a YouTube video like a pro with VEED
- Best practices on how to make and edit YouTube videos
- What is the best editing software for YouTube

[#TOC1]How to Upload and Edit a Video on YouTube[#TOC1]
The YouTube video editor is great if you’re working with a shoestring budget and cannot afford expensive video editing software or just want some light video editing.
Thankfully, YouTube provides a free video editor for YouTube that’s available on the site itself called YouTube Studio.
This is a good option if you want to give your videos a more polished look by adding high-quality music and end-screen links to your other material.
Let’s look at the steps you need to take to use the editor and learn how to edit videos for YouTube.
How to open the YouTube Studio video editor
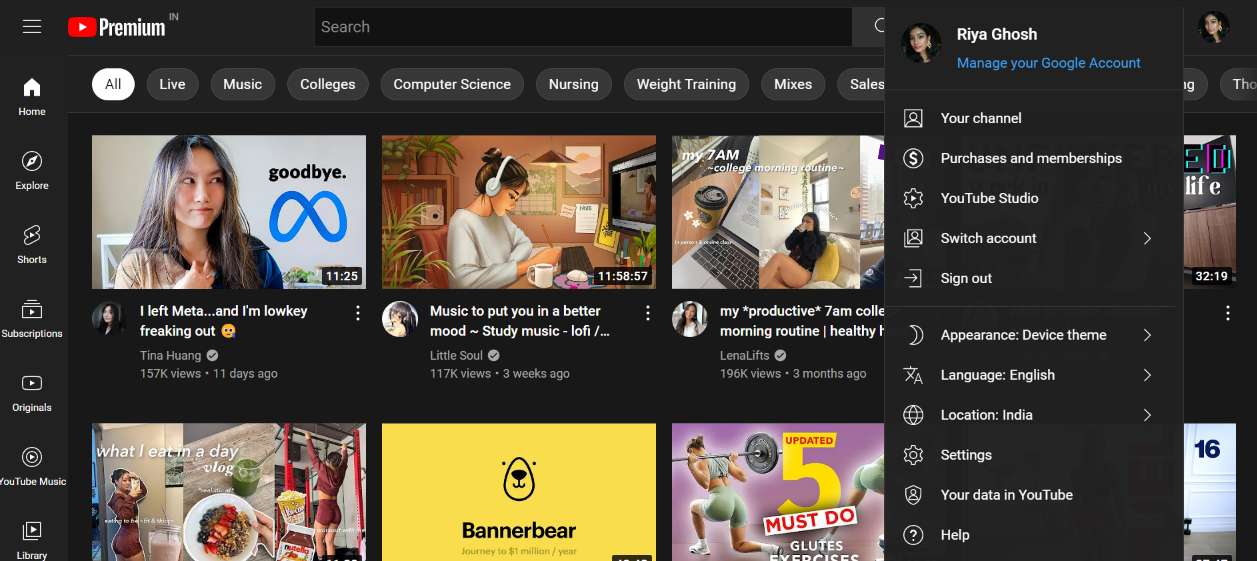
1. Click YouTube Studio from the drag-down menu when you click on your account.
2. In the left sidebar, select "Content."
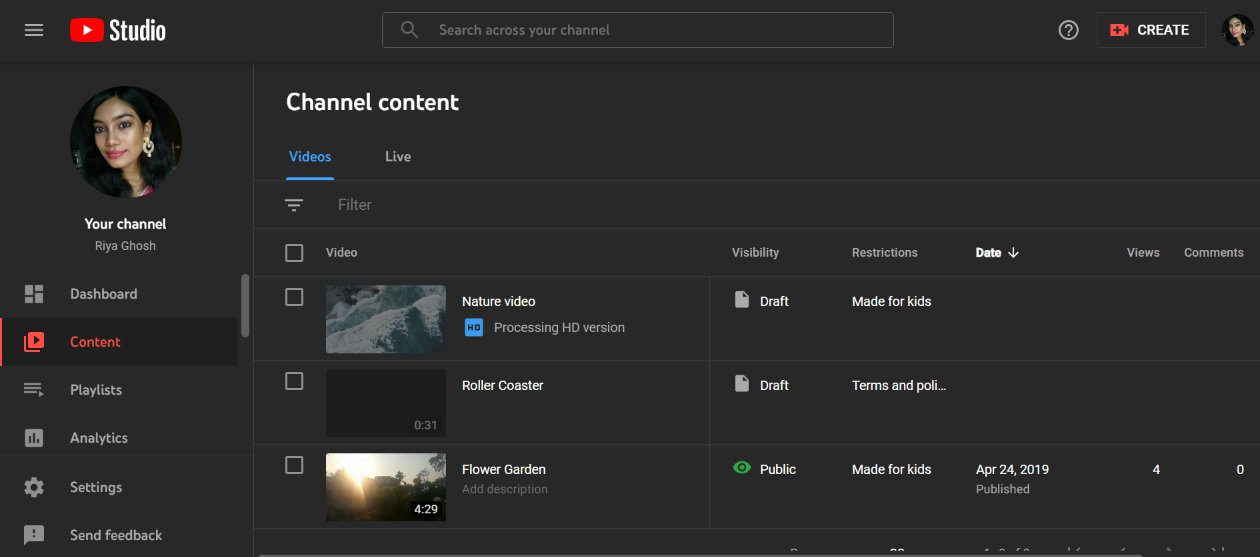
3. You'll get a list of all the videos you've posted. Edit the video by clicking on the thumbnail.
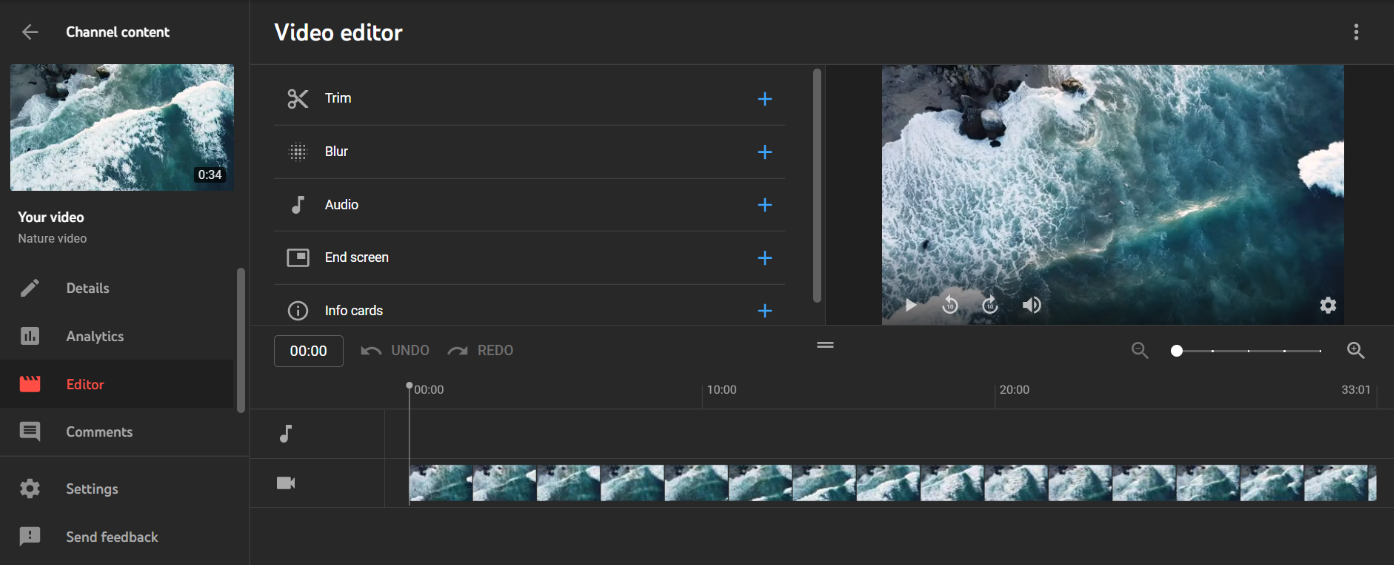
4. To use the various editing tools, go to the left sidebar and select "Editor."
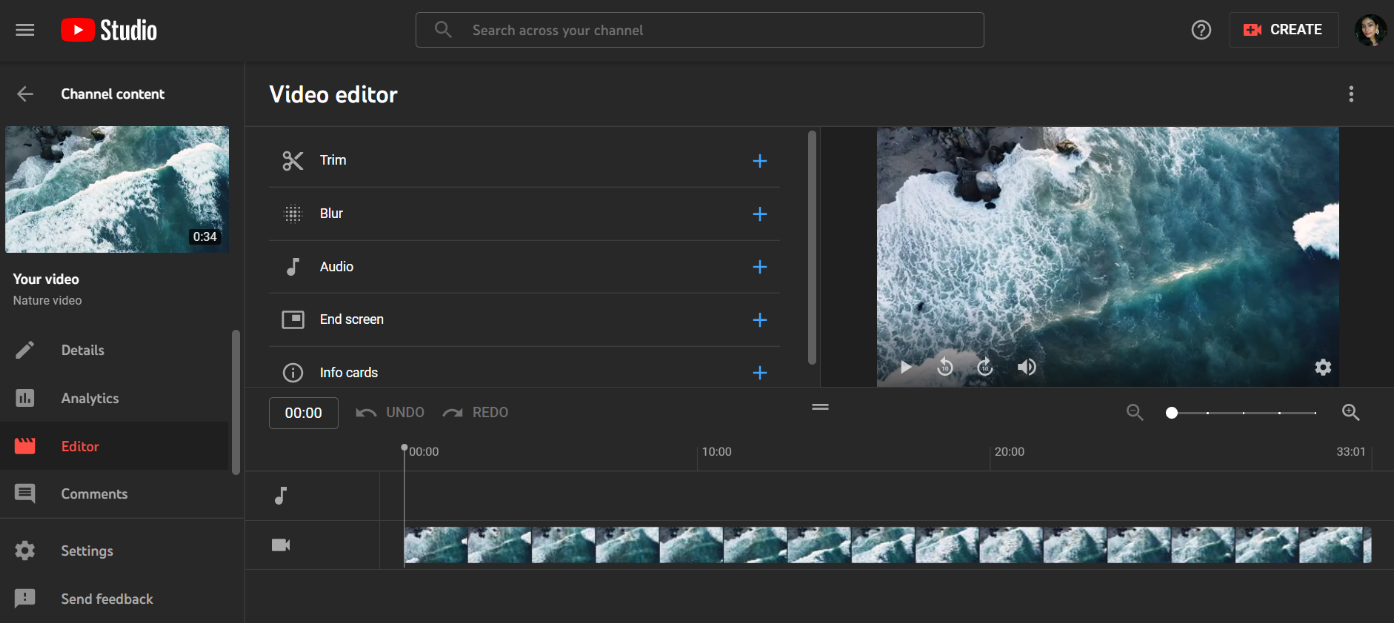
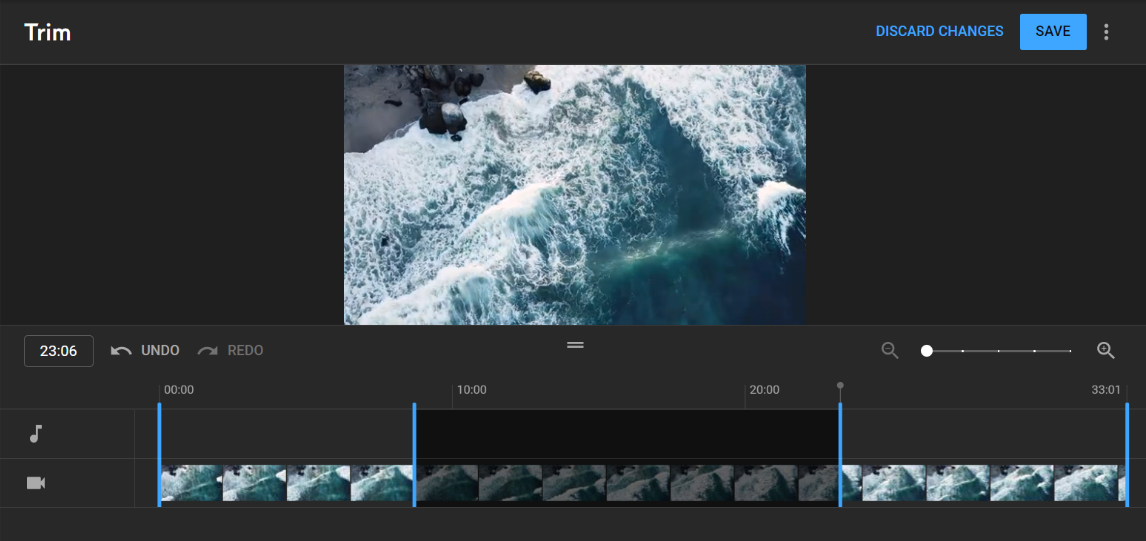
How to Trim a Video in the YouTube Editor
In this section, we’ll look at how to trim a video in the YouTube editor.
1. Under the video preview, click on the option labeled "Trim."
You can see the blue bars at the bottom of the screen.
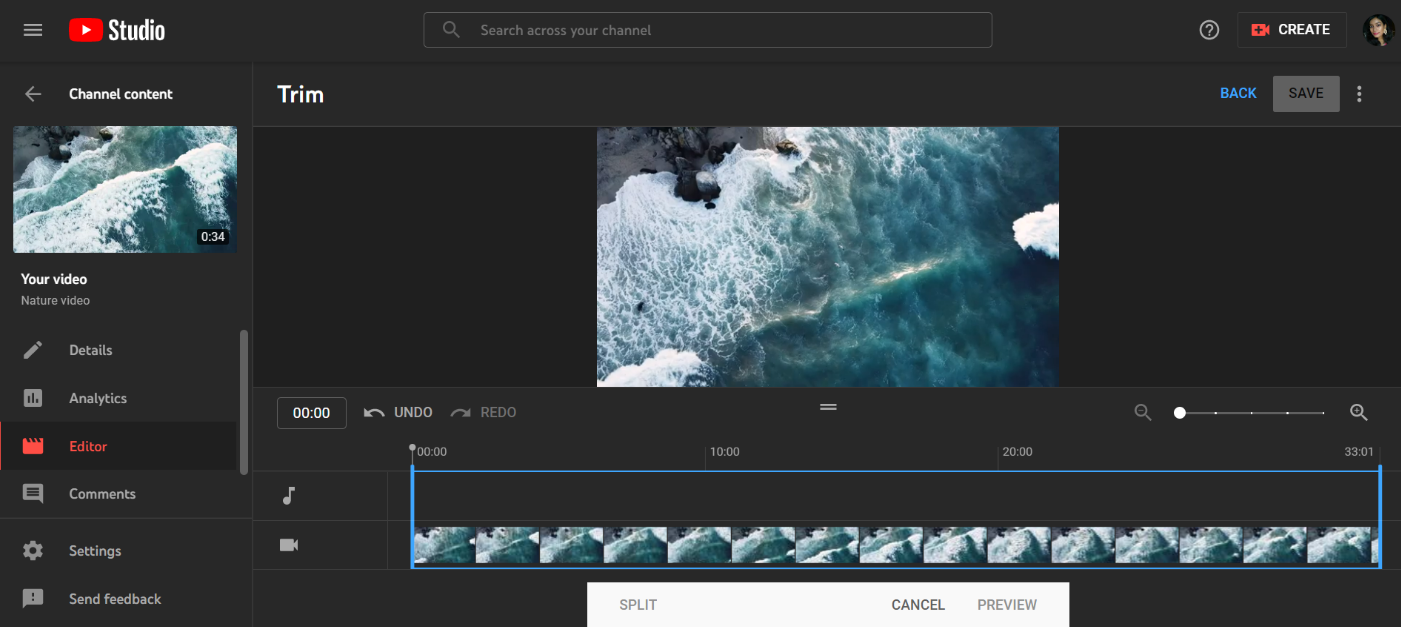
2. You may adjust the start and finish points of a video by dragging the blue bars on the left and right edges of the video timeline.
3. In the "Preview" menu at the bottom of the screen, you may have a look at the changes before they become live.
4. When you are through making alterations to the video and want these changes to be saved in the published video, click the "Save" button that’s located at the very top of the screen. You must first click the Preview option at the bottom of the screen in order to save your changes to a video.
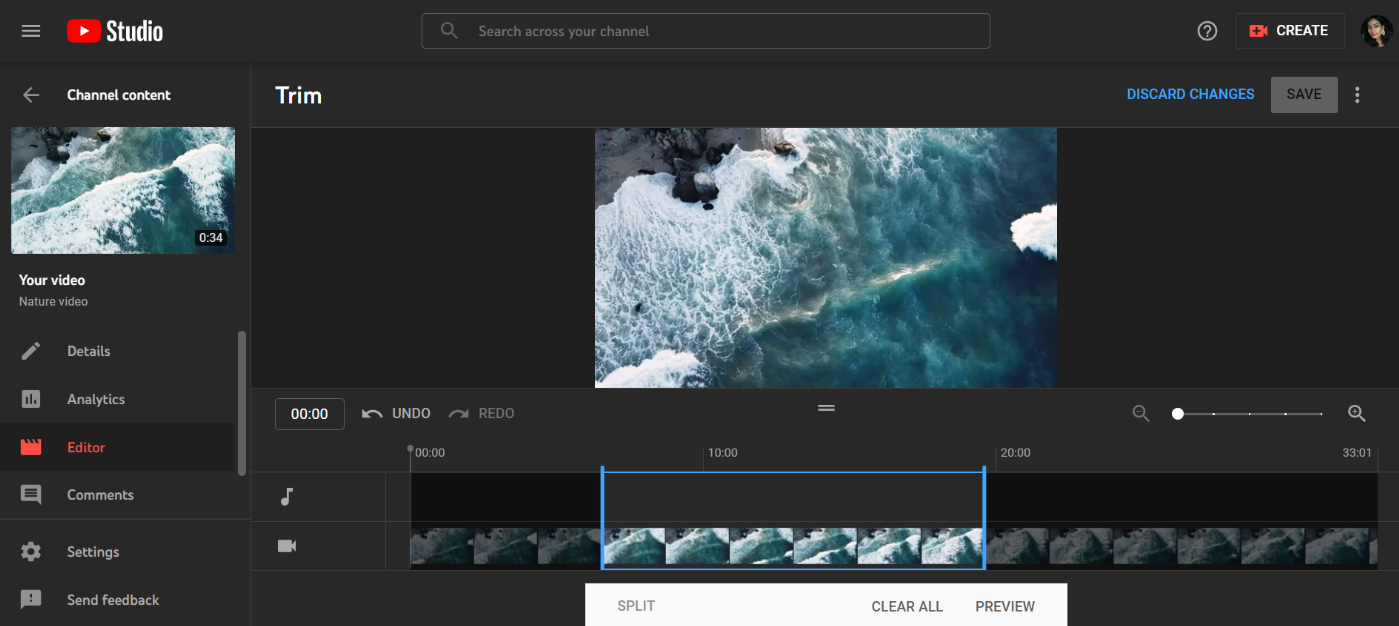
How to Cut a Part of a Video Out of the Middle
1. Open the video in the YouTube Studio video editor you wish to work on.
2. Under the video preview, select "Trim" or "Edit Trim."
3. Place the vertical bar in the timeline at the point where you would like the editing to start.
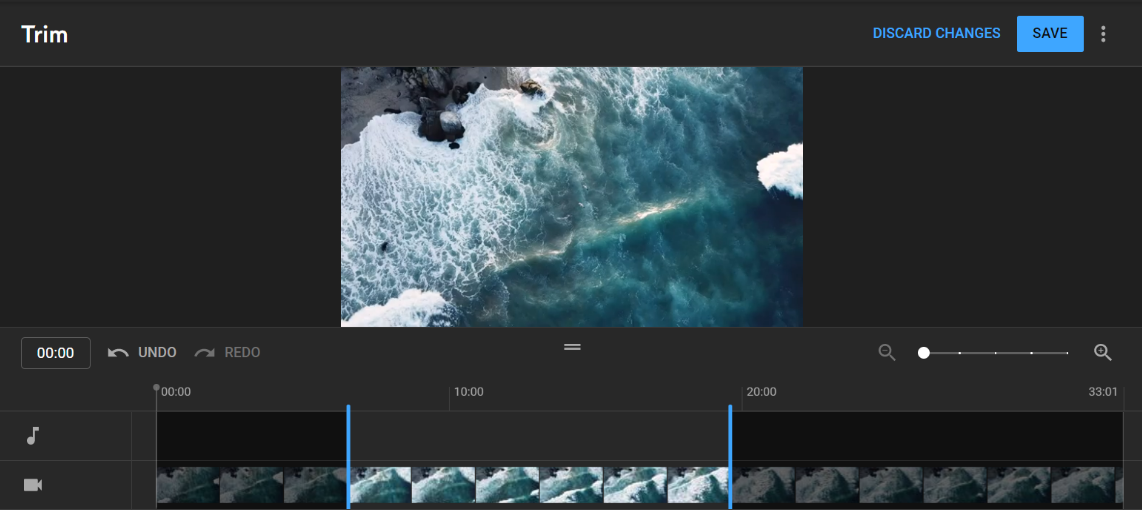
4. Simply select "Split" from the menu in the bar at the bottom of the screen.

5. Drag the vertical bar to the end of the cut by clicking on it and dragging it across the timeline. The video will be cut at a dark spot, which you should be able to see. The two timeline bars may be dragged to adjust the split.
6. When you're ready to make the edit, click "Preview" to see how it looks.
7. In order to save all of your edits to your video, click "Save" at the top of the screen.
How to Blur a Person or Object in a Video
You may also use the video editor on YouTube to blur out certain aspects of the footage, such as people's faces or registration plates.
1. Open the video editor for YouTube Studio and navigate to the video you wish to edit.
2. In the timeline, select "Add Blur" to add the effect.

3. "Blur Faces" or "Custom blurring" may be edited by clicking "Edit." For example, if you select the option to blur faces, the software will automatically scan for faces and apply the blur effect to them when it finds them. Draw boxes in your video and YouTube will automatically reposition them to cover any moving elements in your film, regardless of how fast they change. This gives you more control over your blurring.
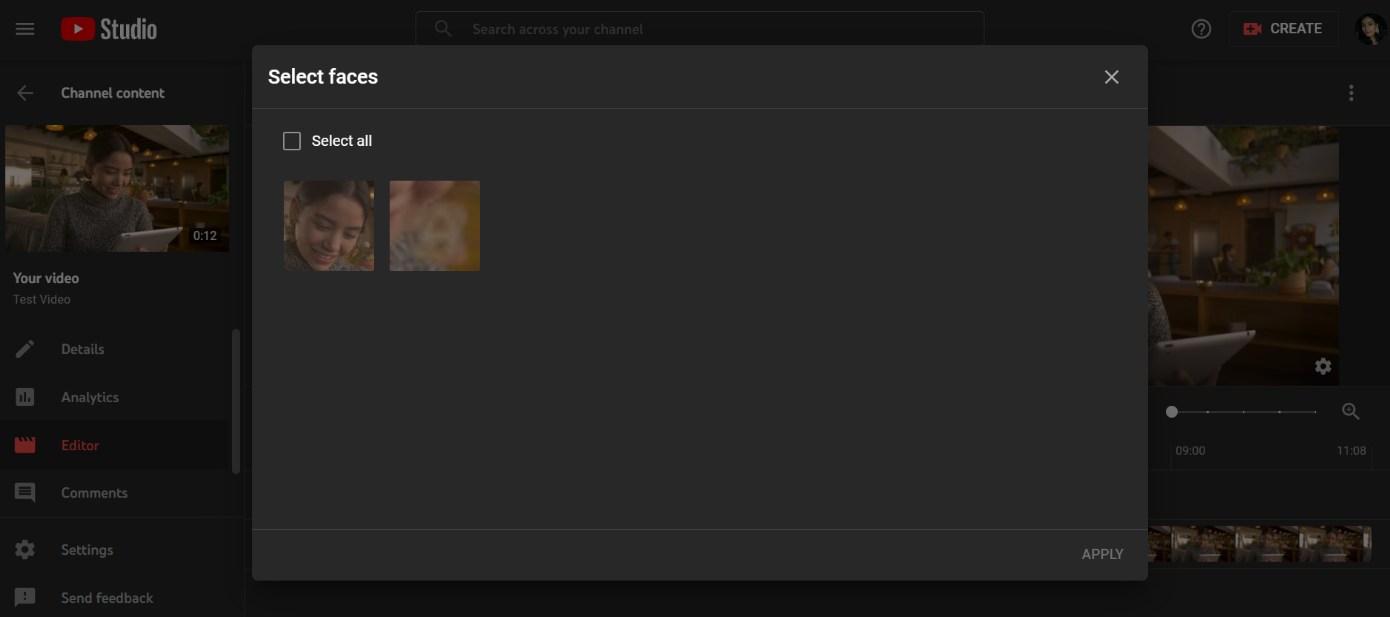

4. When you are done, click the "Save" button.
[#TOC2]How to Easily Edit a YouTube Video Like a Pro with VEED[#TOC2]
Best all-in-one simple but powerful video tool for beginners
So you’ve decided you need something more powerful than the simple YouTube editor.
Look no further because VEED is an all-in-one video tool you can record, edit, collaborate, and share videos.
Editing videos can be tricky, especially if you’ve never done it before, but with VEED, you don’t have any complex learning curve like other professional editing software. You can quickly and easily make videos like a pro, even if you’ve never used an editing tool.
Wondering how VEED compares to the YouTube editor? We’ll cover them side by side later in this guide.
Here’s how to use VEED to edit your YouTube videos.
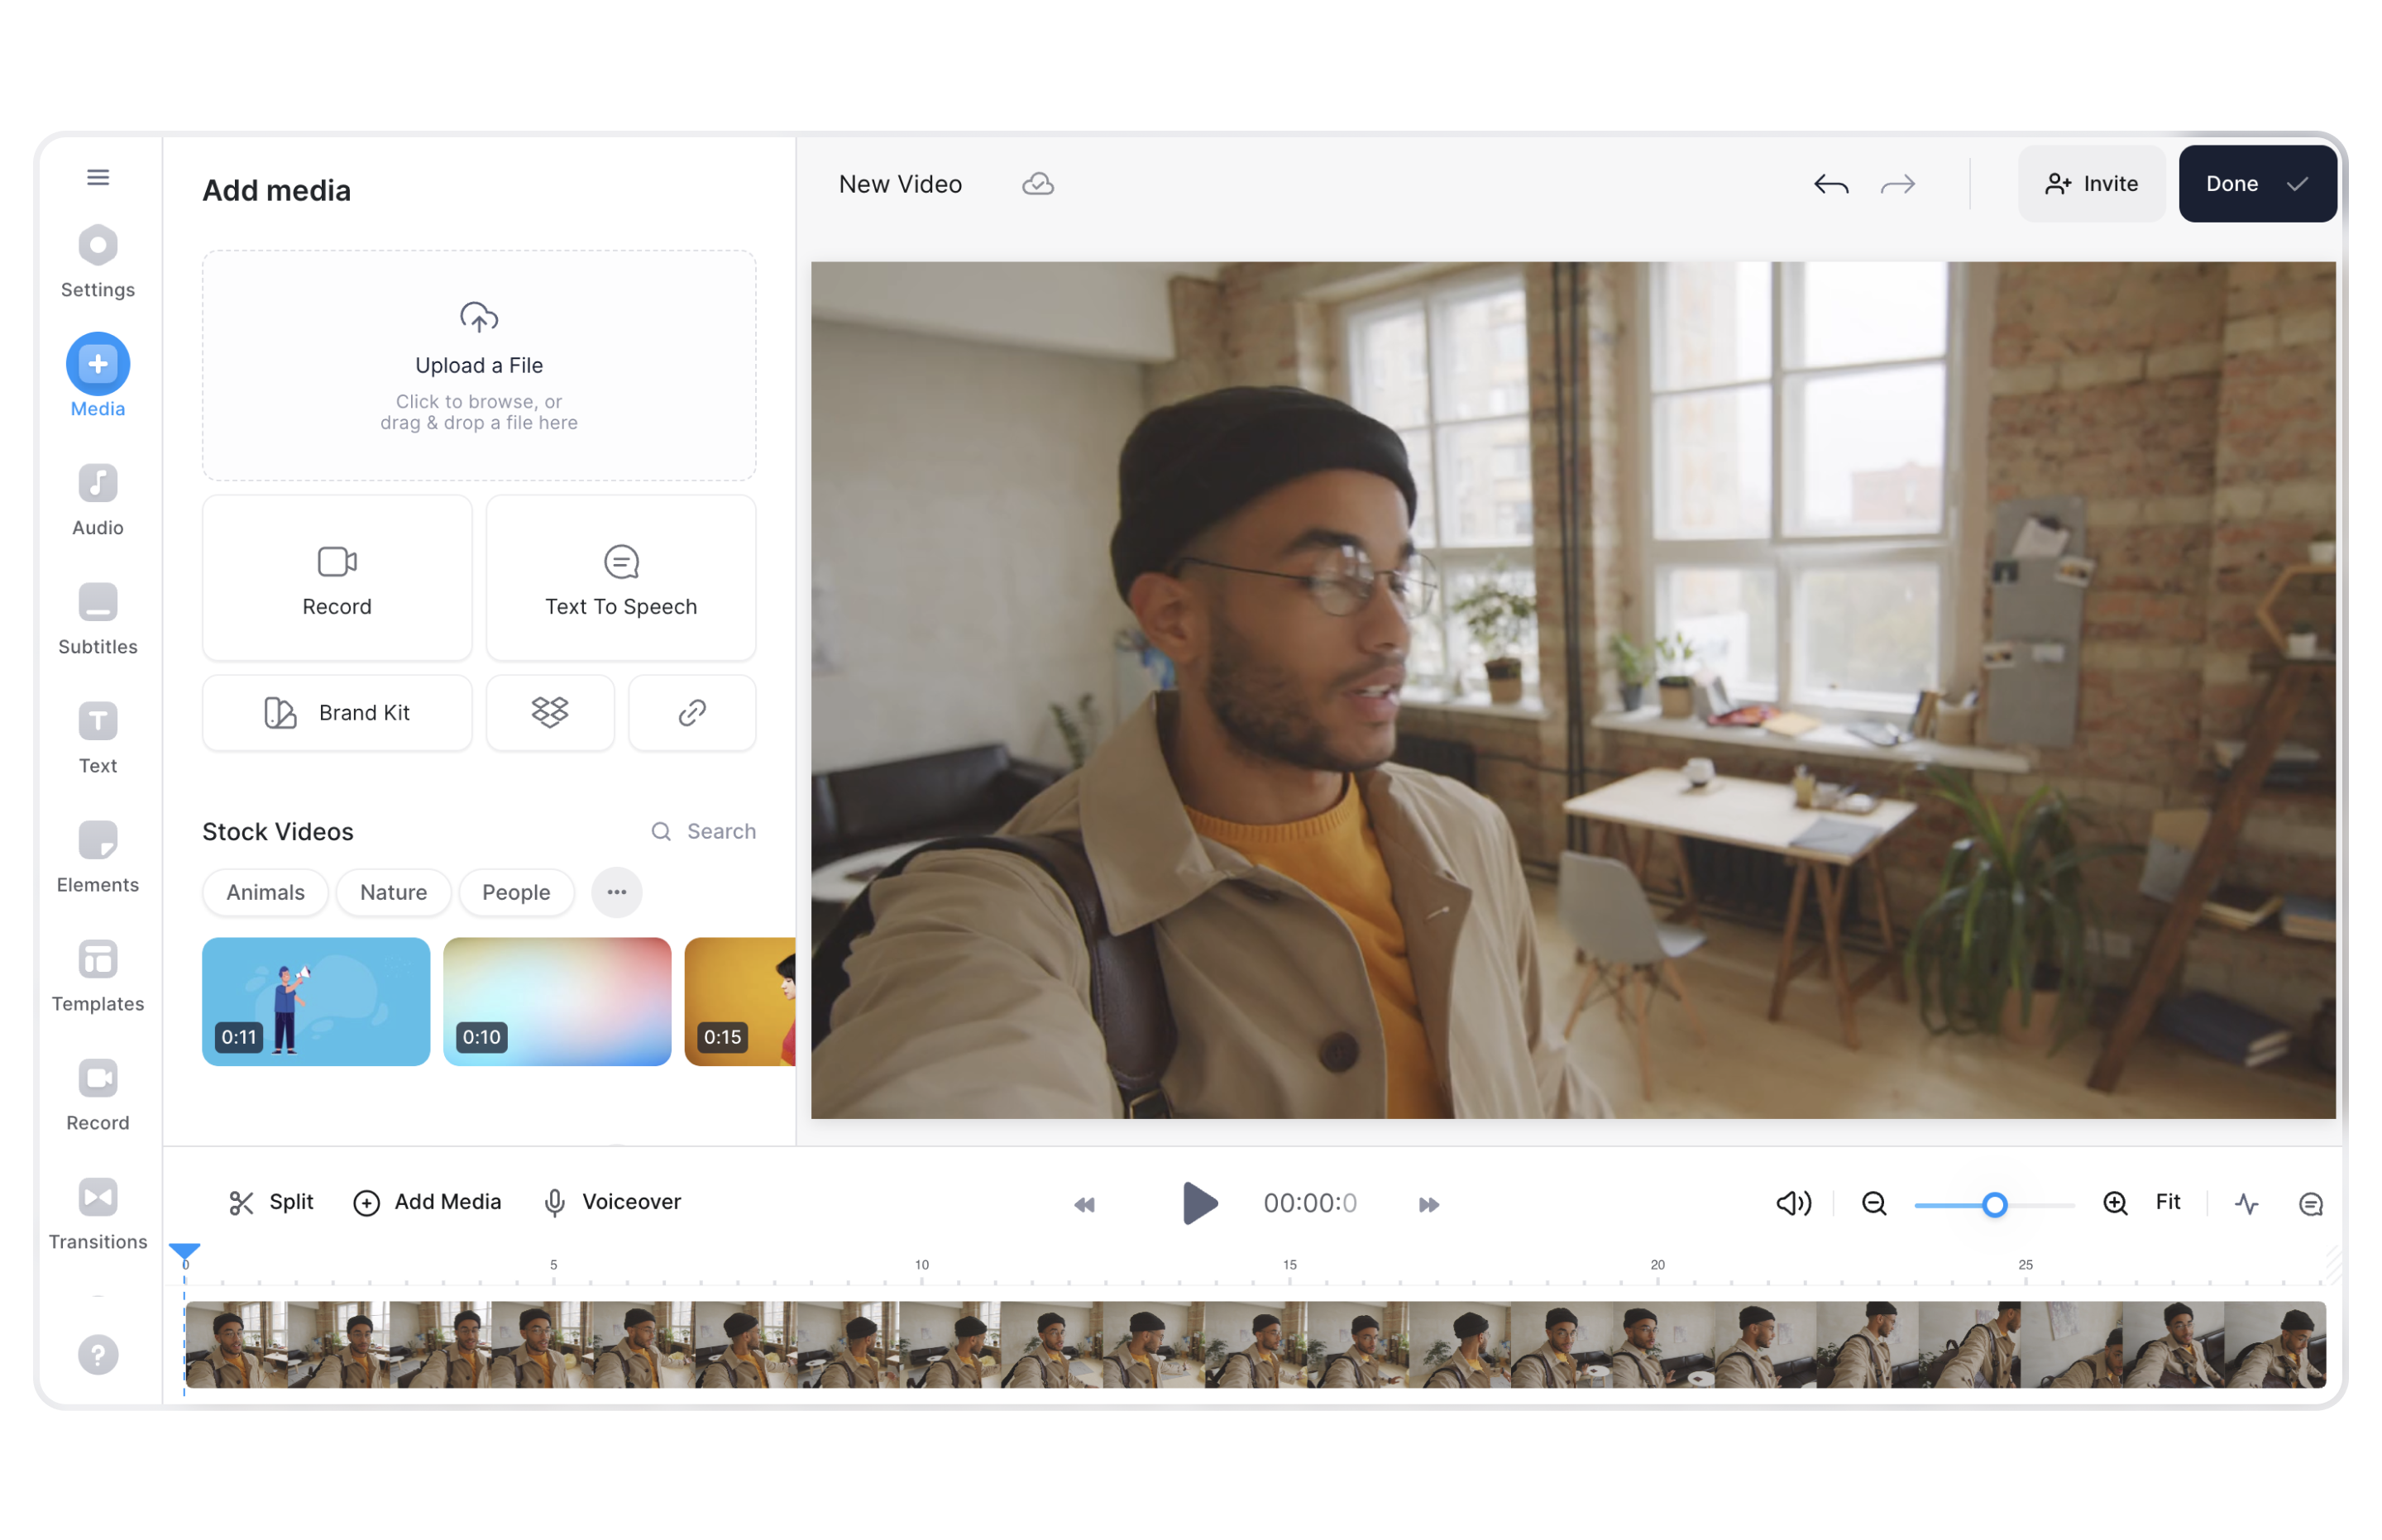
1. Once you’ve signed up to VEED, you’ll want to click on the purple button that says Create Project.
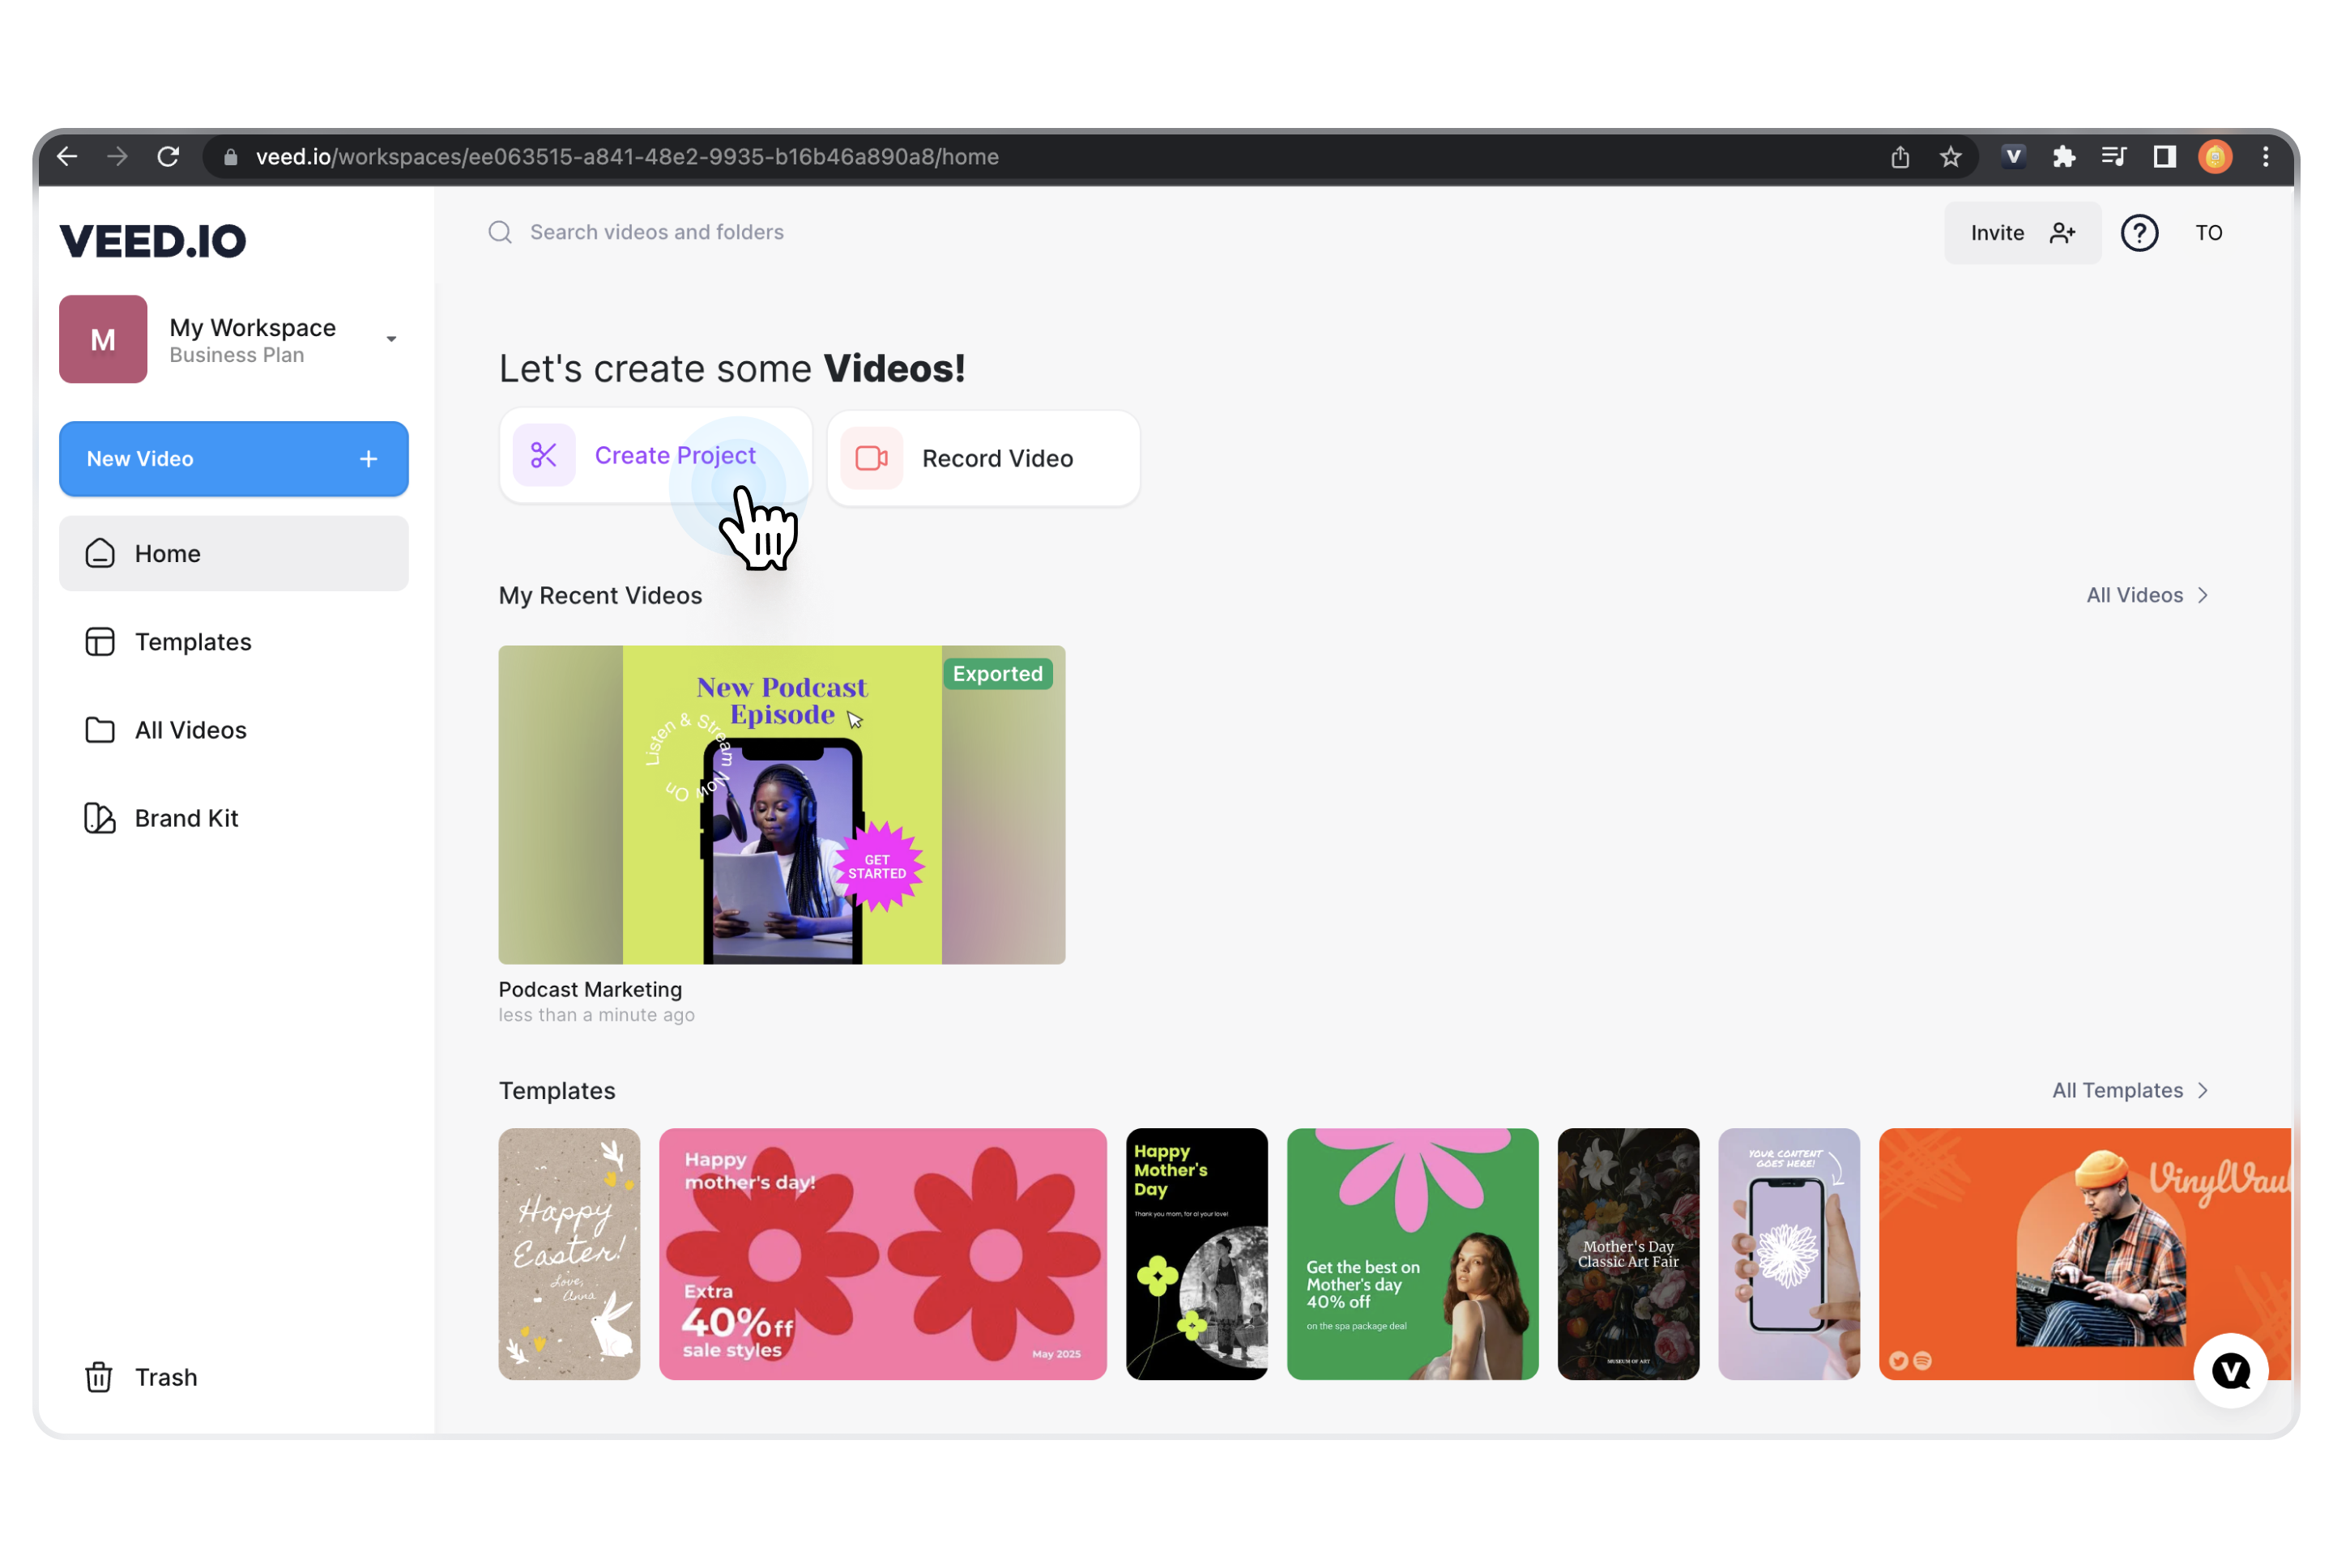
2. Select an upload method. You can upload a YouTube video by loading up the file from your device. You can even pick from templates if you don't already have a video ready to go.

For the purpose of this guide, we have selected to edit a new video.
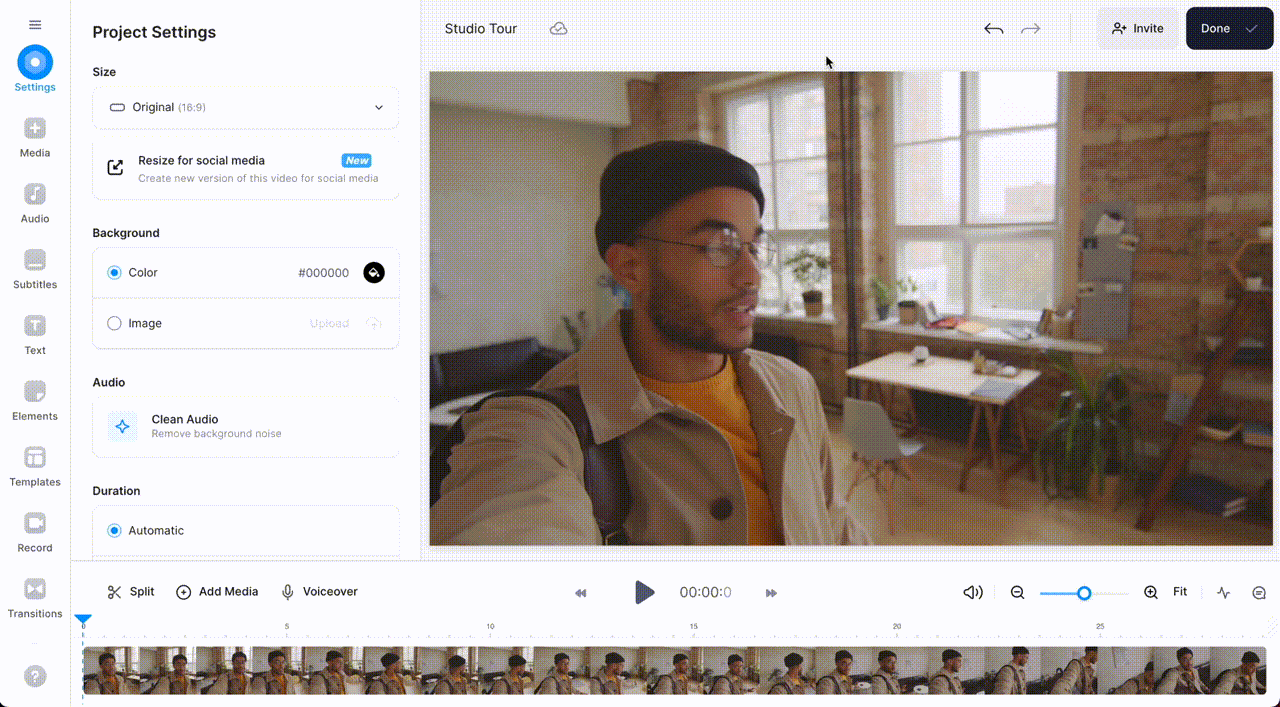
3. The first thing you need to do is change the name of the video so that it’s easier to find it later from your dashboard. Next, you’d want to select the size of the video according to the destination which in this case is YouTube.
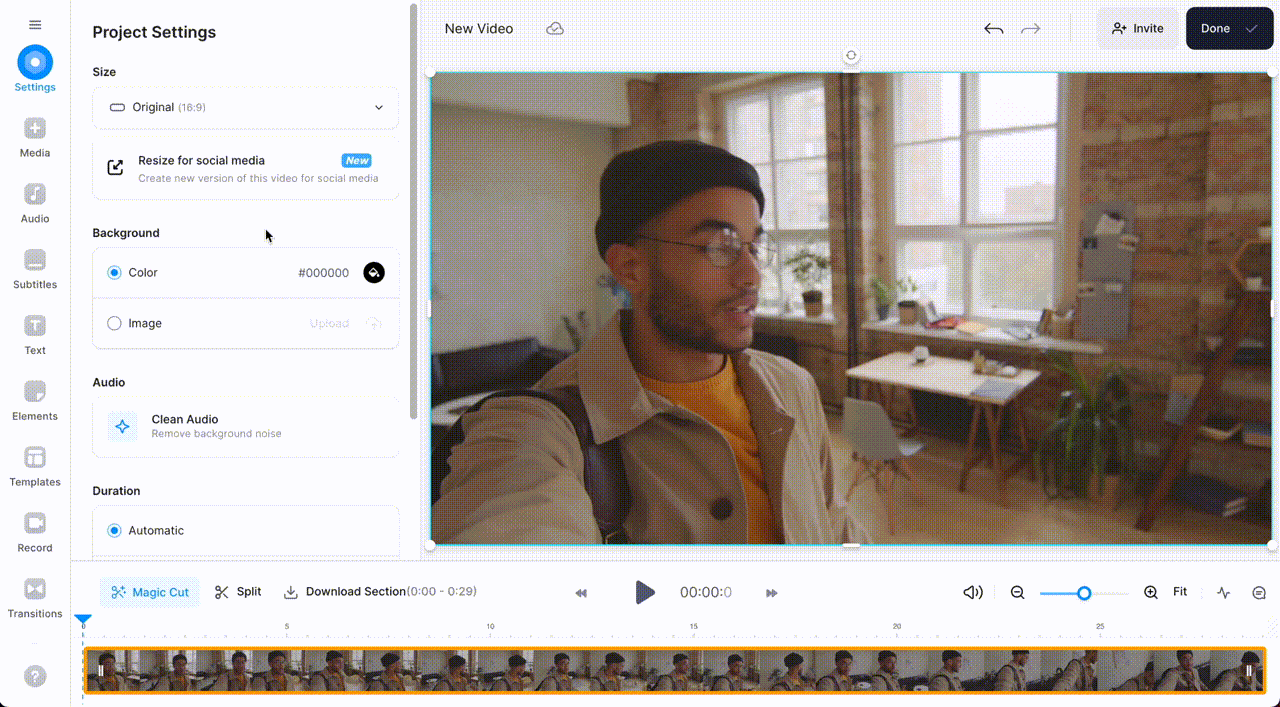
5. You’ll see a list of editing options on the extreme left-hand side of the screen where you’ll see the options for adding media, audio, subtitles, text, elements, transitions, and filters and you can even draw on the screen.
You can experiment with the different options till you create a video you love.
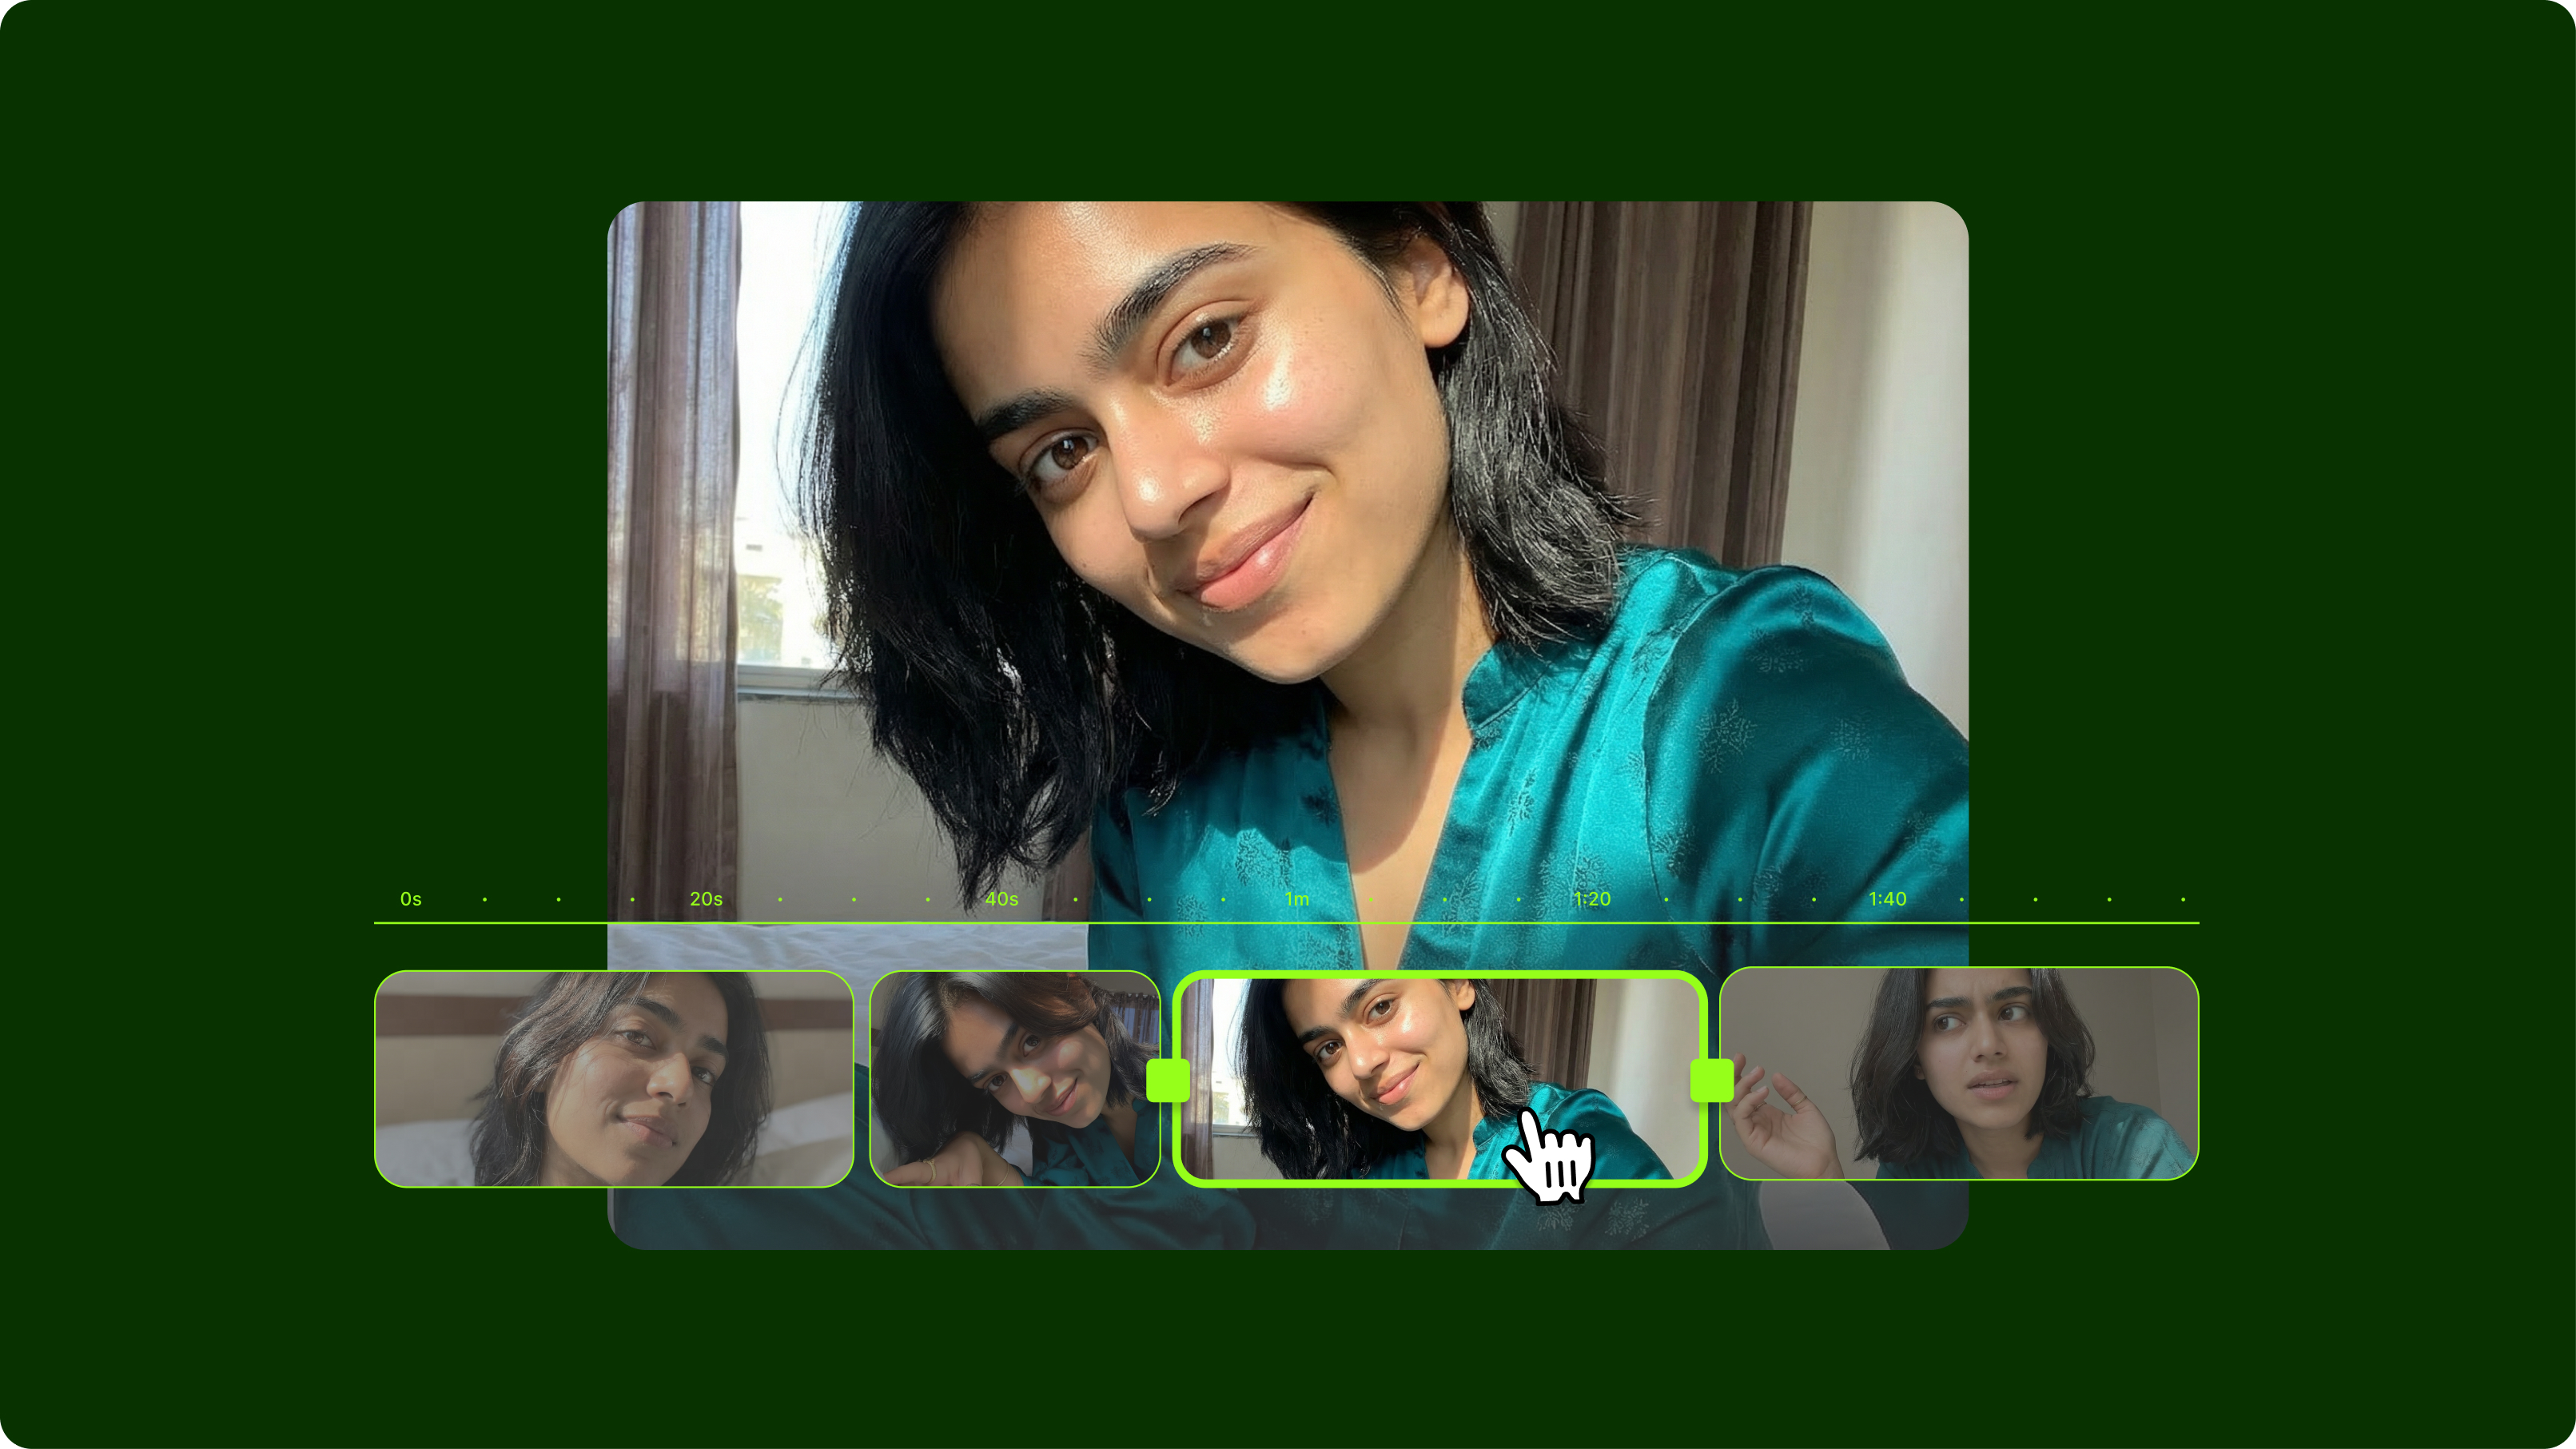
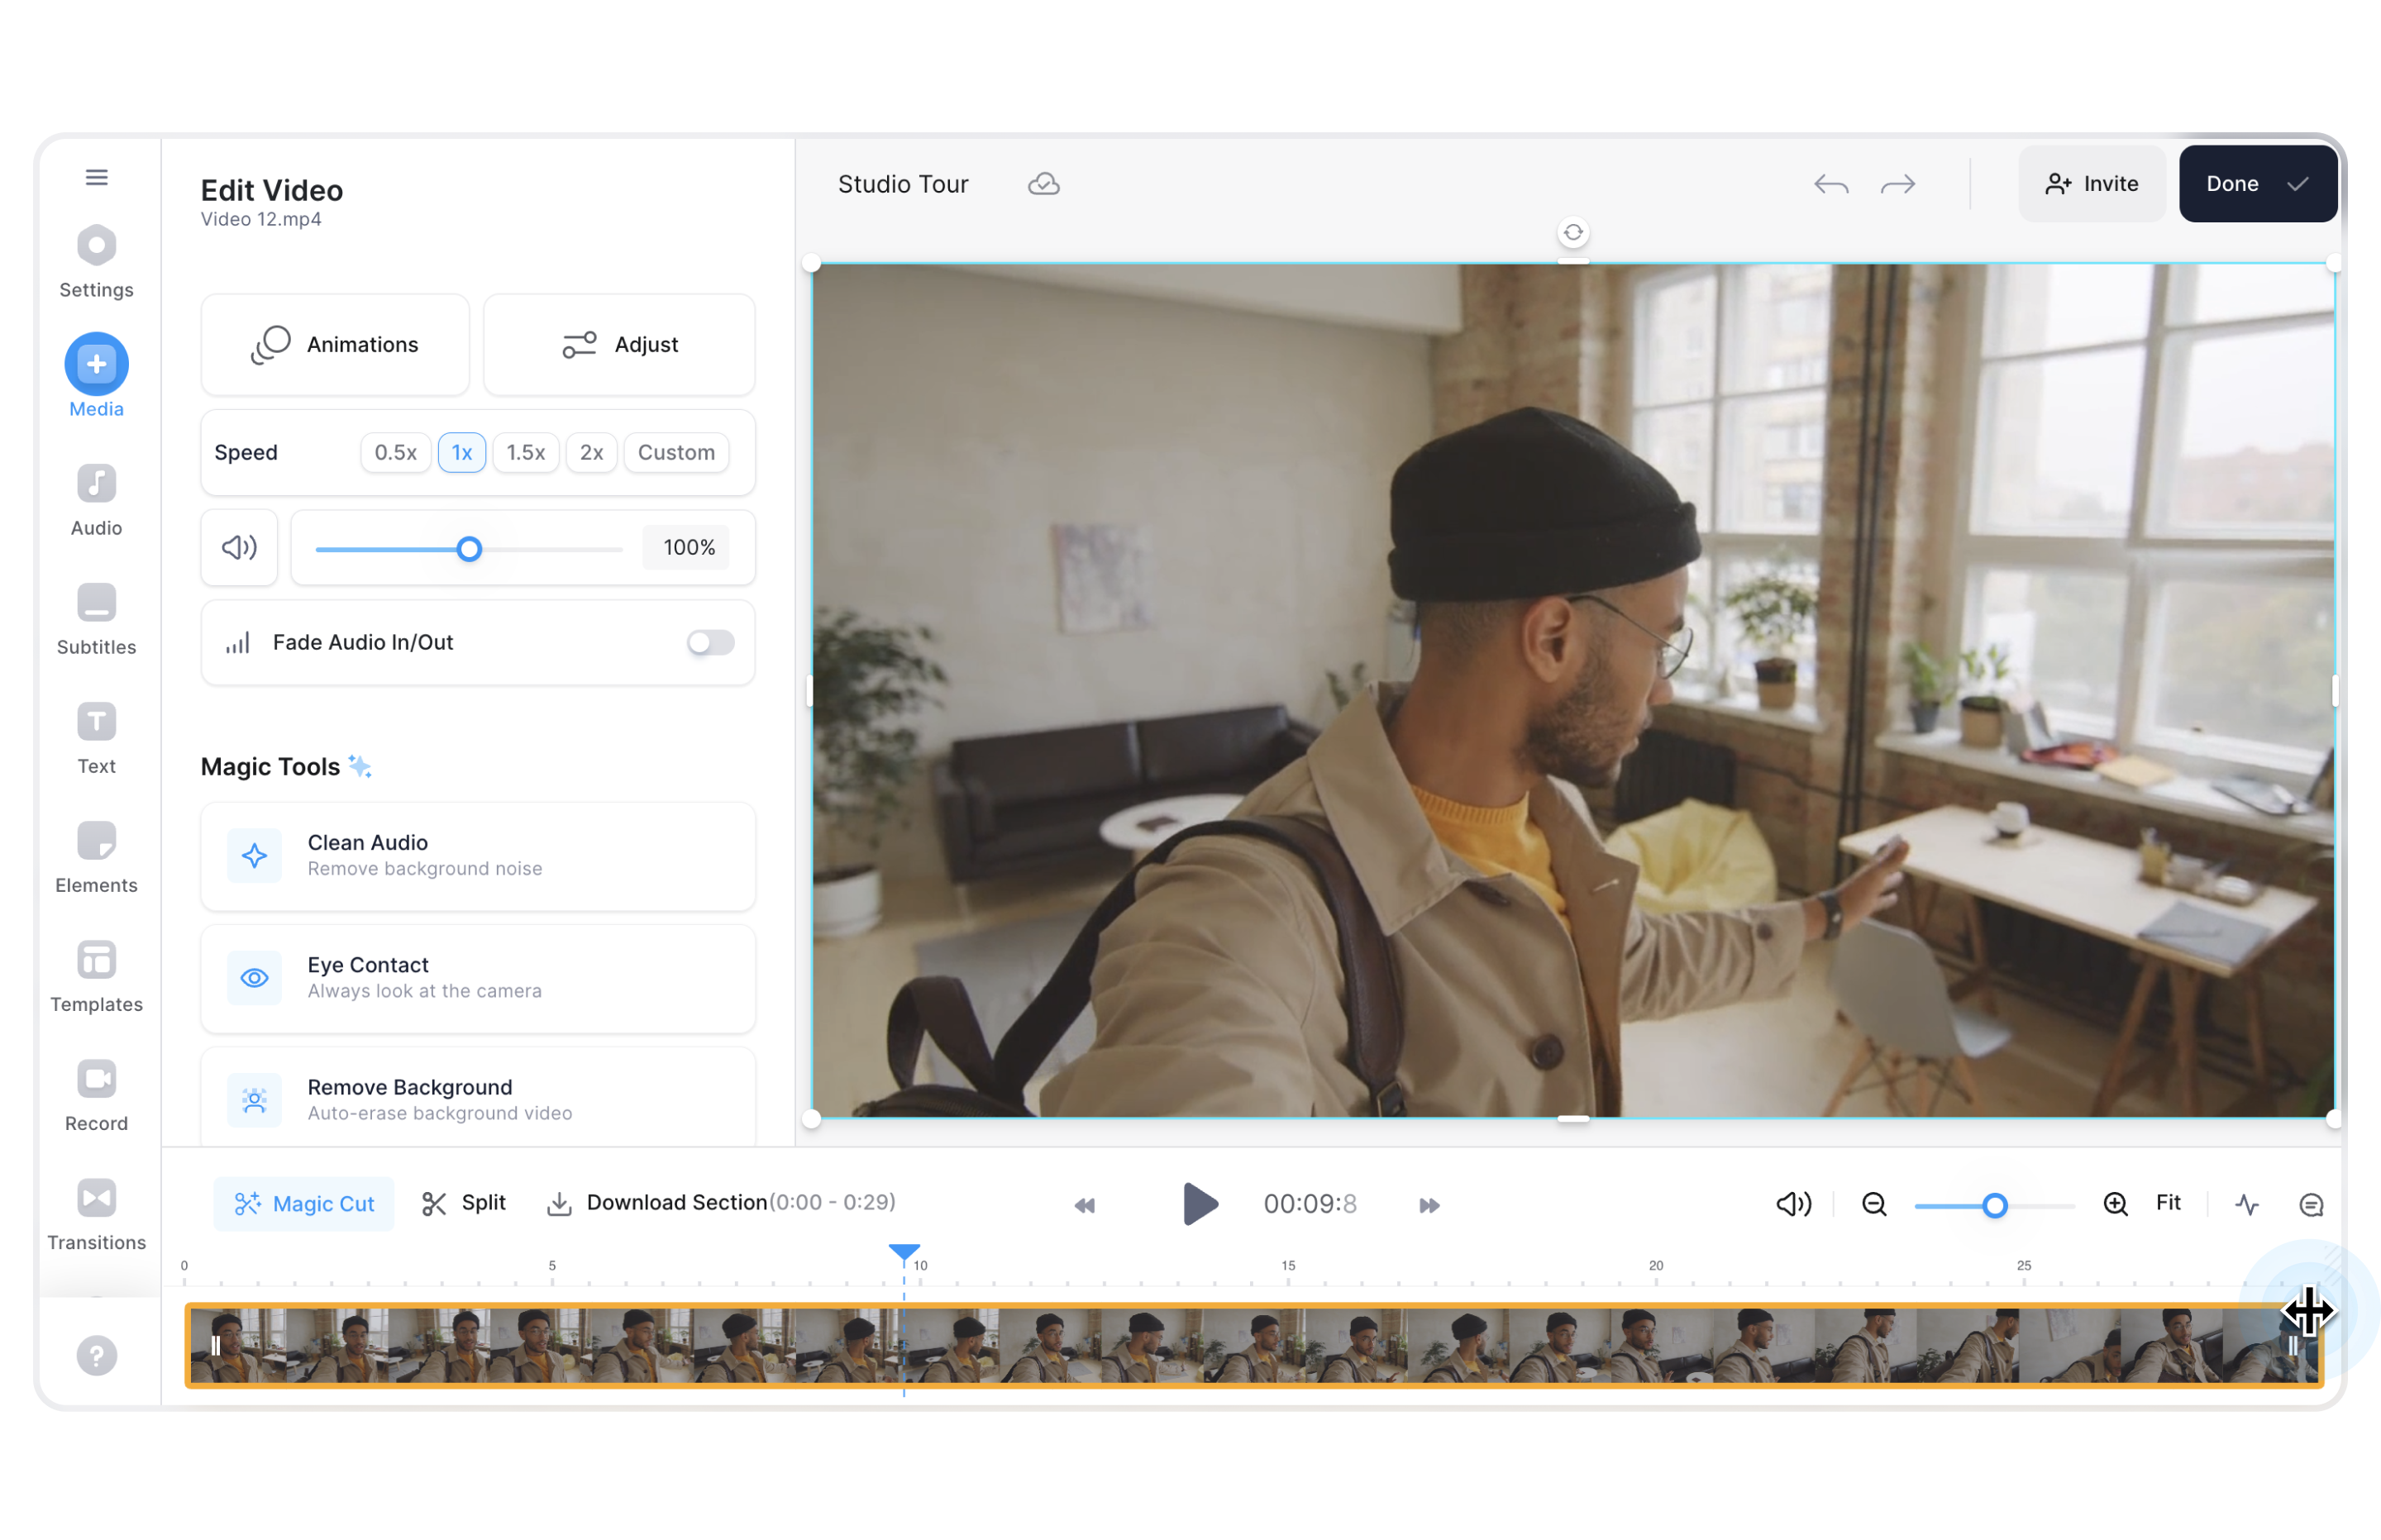
6. You can also easily trim and split your videos.
- To Split: Simply click on the video in the timeline, and drag the blue arrow to the point where you wish to split. Then, click on the Split button.
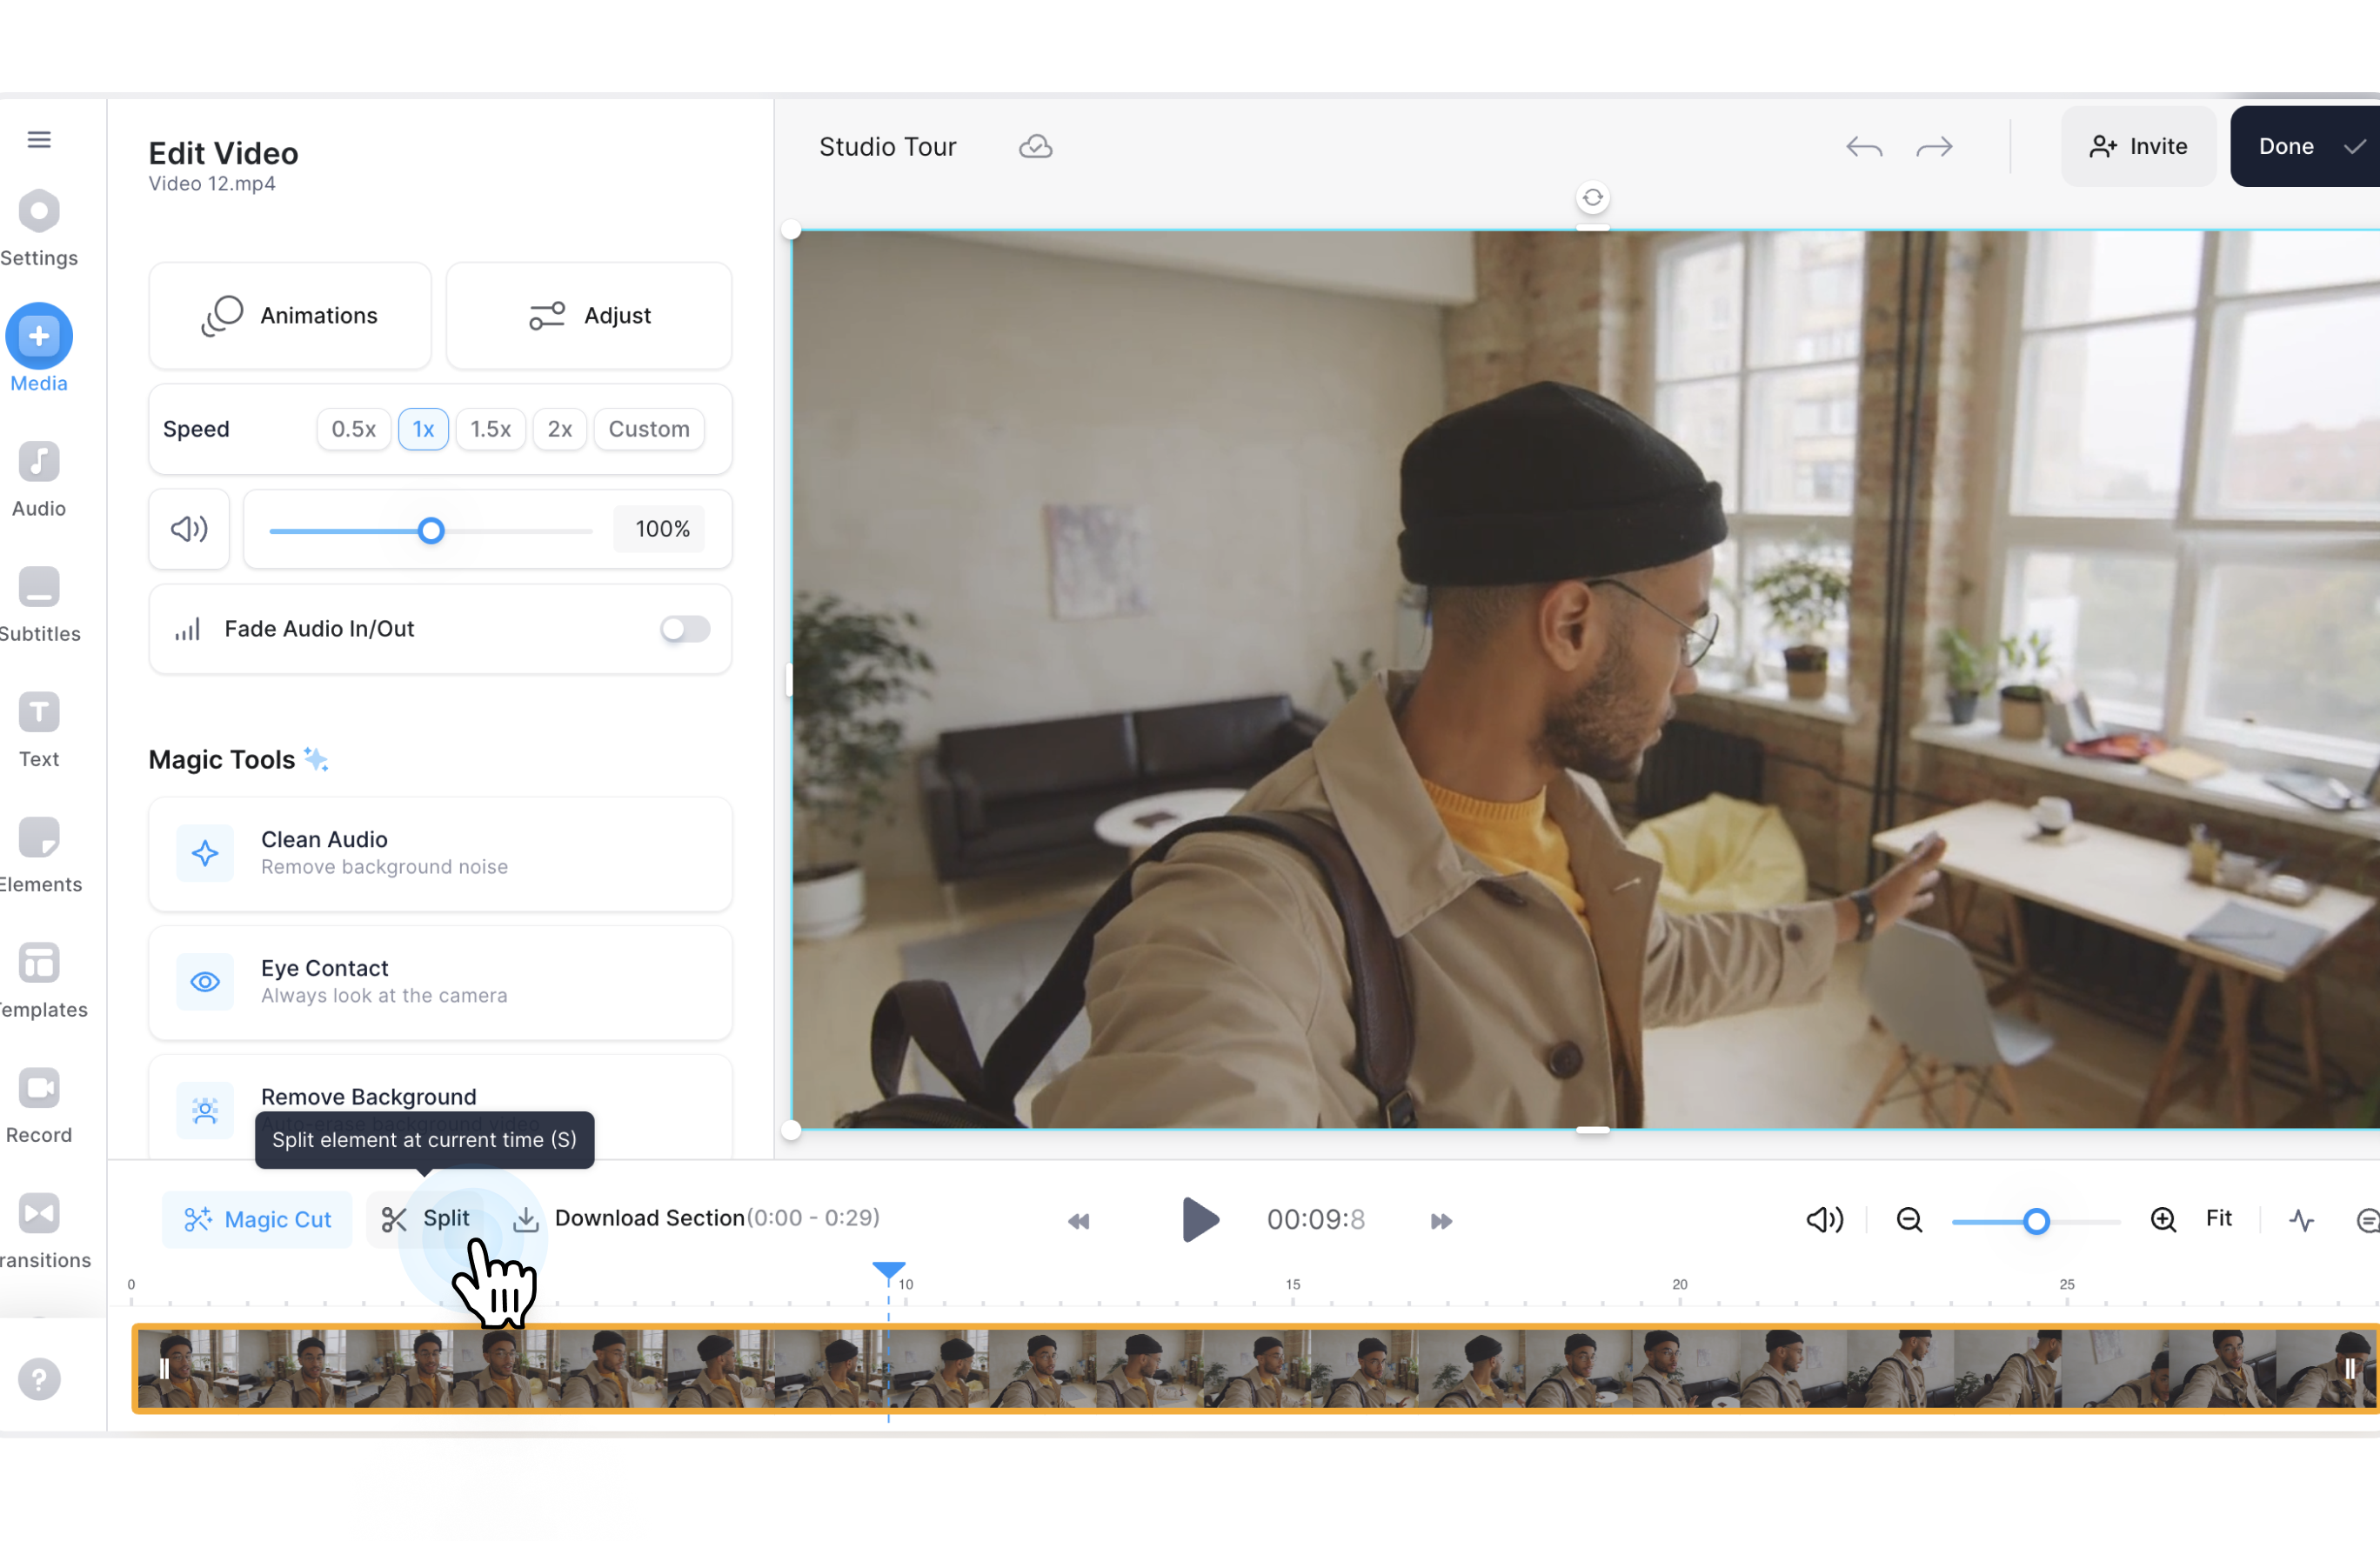
- To Trim: Click and drag either ends of your clip to the left or right in order to trim. Alternatively, you can also simply delete bits of your videos.
7. Use VEED AI to work smarter. Leverage these tools to edit your videos faster than ever before:
- Magic Cut: Instantly trim and clean your raw footage, and make it shorter and snappier...all with a single click! Read more about this game-changing feature here.
- Eye Contact Correction: Correct your gaze post-filming and engage your viewers with our cutting-edge Eye Contact Correction tool. Learn more here.
- AI Avatars: Camera shy? No worries — choose from over 50+ hyper-realistic AI avatars to produce professional-looking videos for your YouTube channel. Learn more about them here.
And that's just the tip of the iceberg. There are a lot more AI tools that VEED has to offer that can help simplify your video editing workflow. You can read about all of them on this resource.
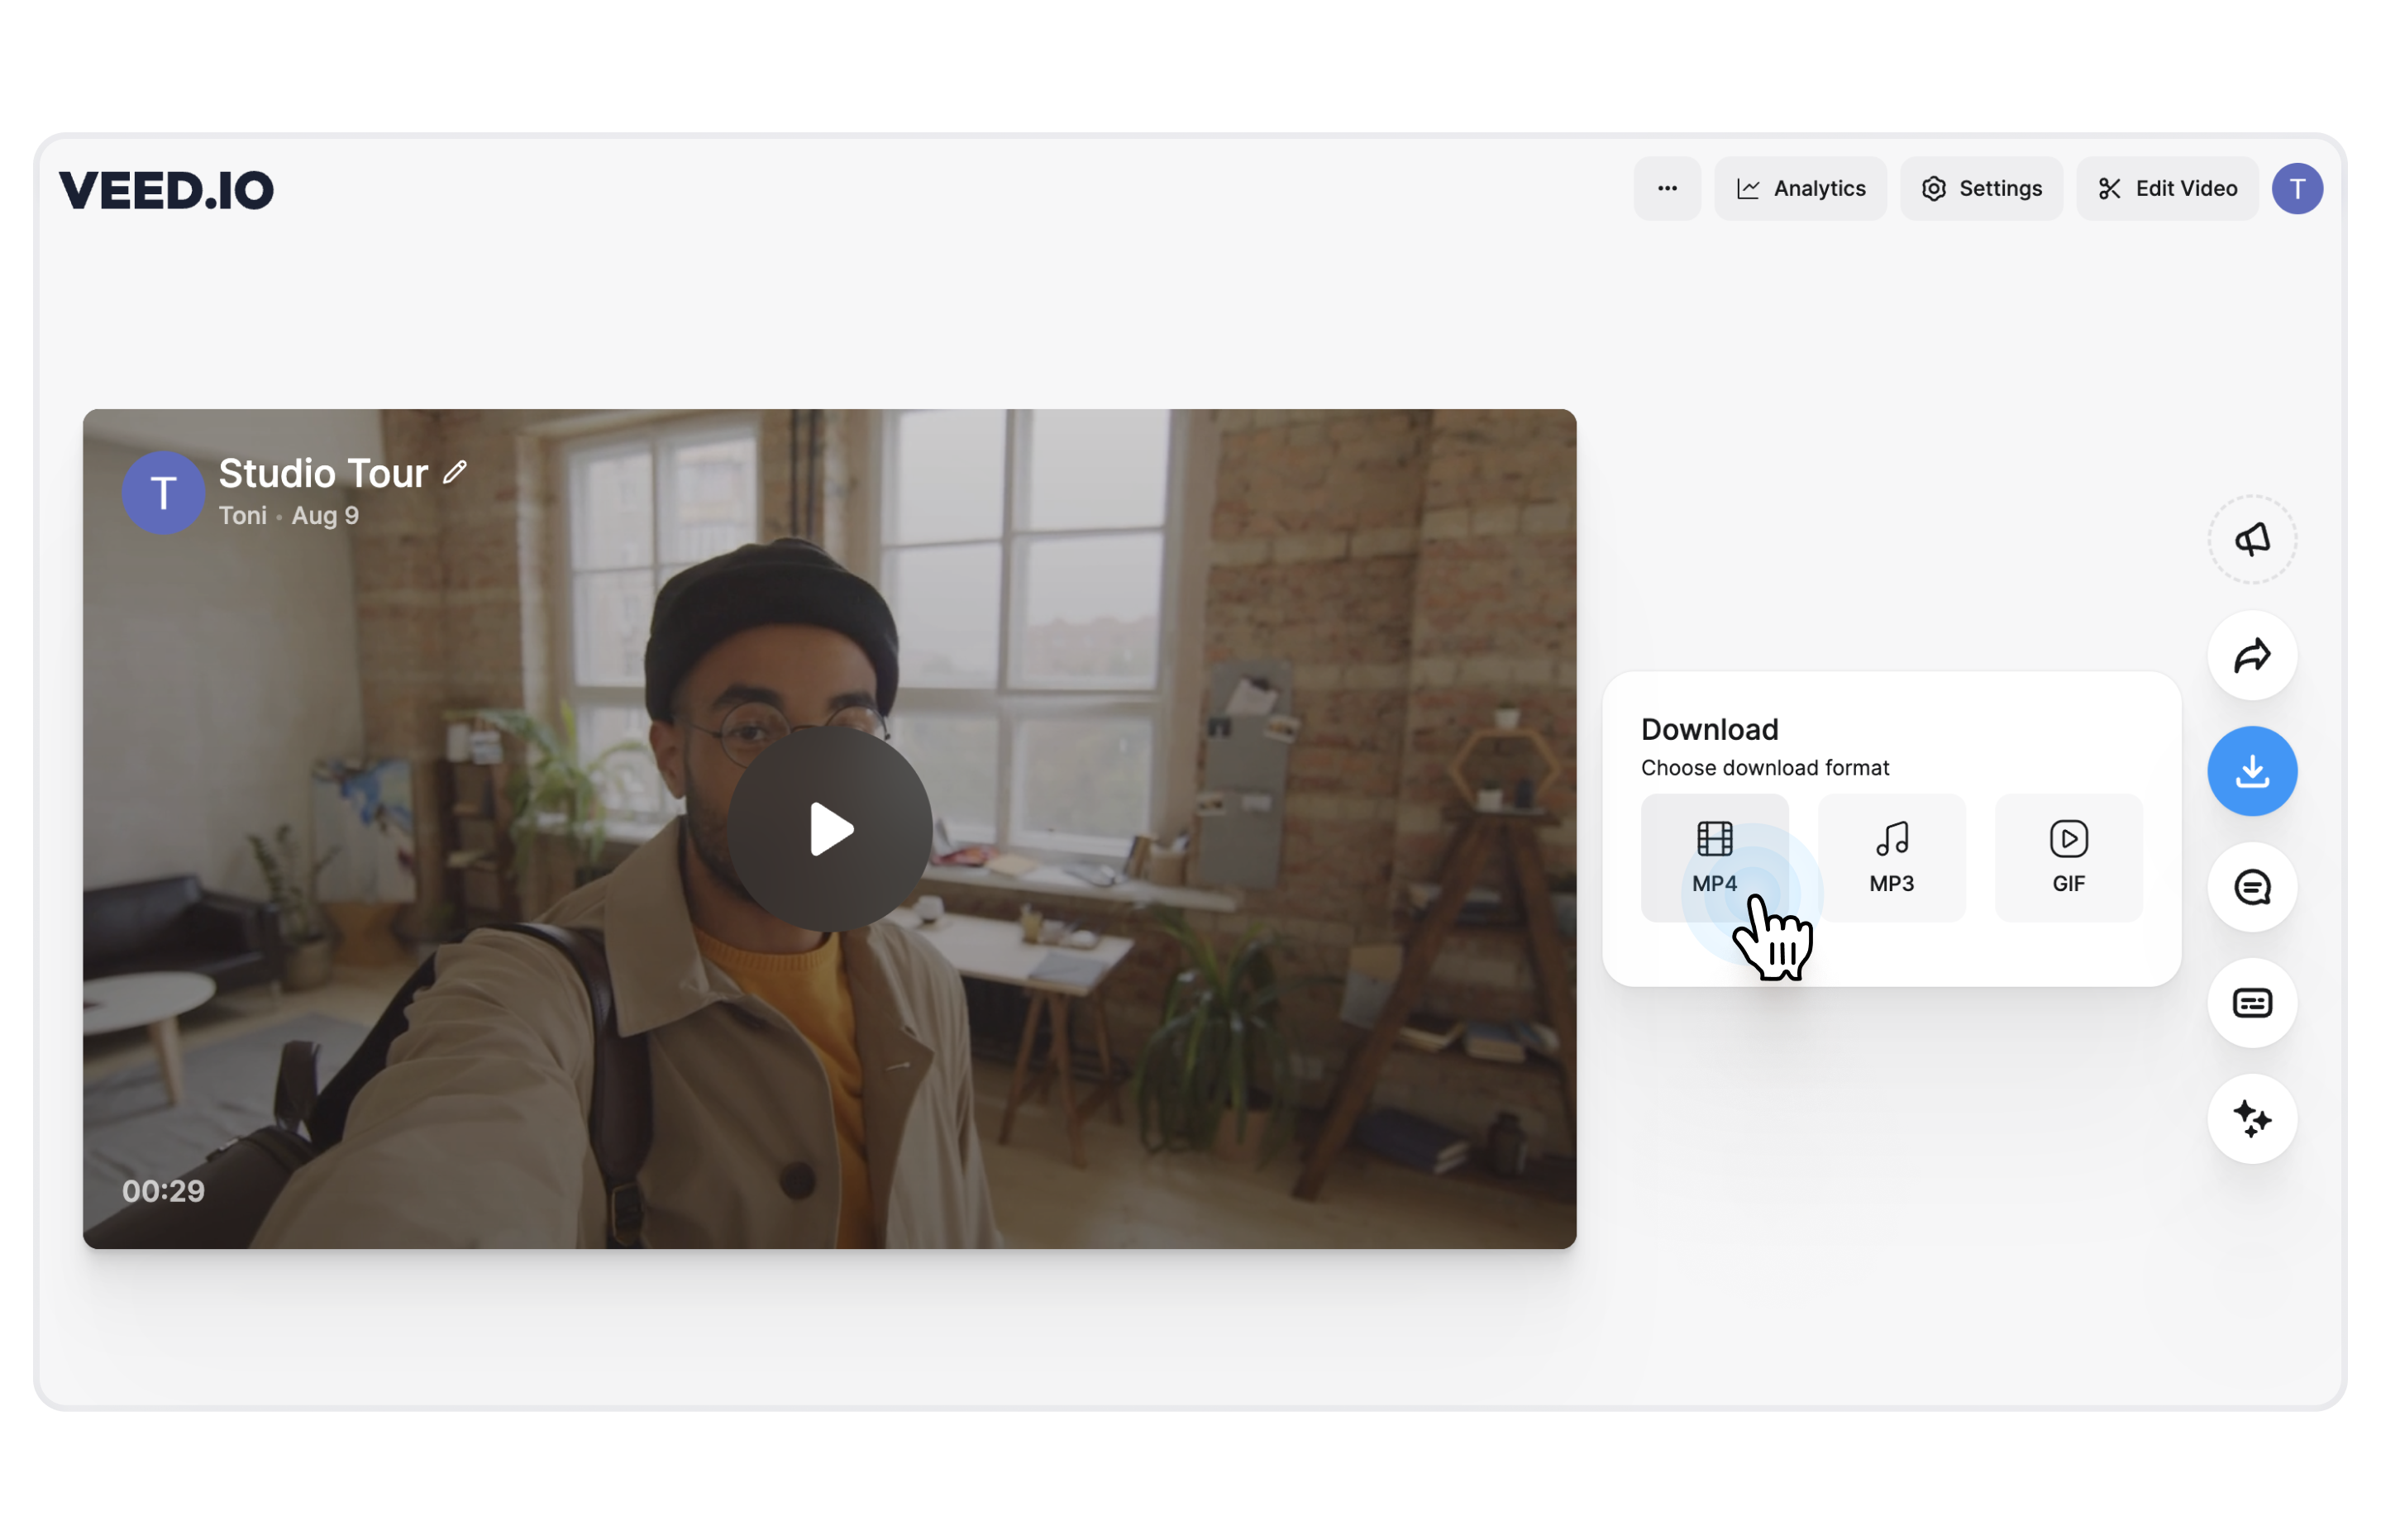
8. Once you’re done editing your video, you can click on the Export button on the top right of the screen. The Export menu pops up and from here, you can choose from a selection of different presets.
For total control, you can even manually adjust each setting. Once export options have been selected, click on the Export button.
9. VEED then renders your video and once the video has been rendered, you’re now on the video view page. From here, you have a variety of options. You can share the video instantly by copying the link and sharing it, or you share it on social media or you can choose to embed the video thanks to the embed link.

10. You can even download the video by clicking on the download button at the bottom of the screen.
If you’ve made any mistakes then worry not, you can click on the edit video button on the screen and re-edit the video.
That’s the basic overview of how to use VEED to edit and upload your YouTube videos. VEED is simply the best video editor for YouTube and is the perfect software for video editing for YouTube beginners.
If you need more help on how to use the various editing tools, then go on over to our VEED Studio YouTube channel for free YouTube tutorials on how to record and edit YouTube videos as well as read some in-depth guides on our VEED blog.
[#TOC3]Best practices on how to make and edit YouTube videos[#TOC3]
Your goal is to win over viewers and keep them watching, in addition to optimizing your video so it appears in YouTube and Google search results.
To do this, you must first determine the problem people desire to solve and then help those people achieve their goals more effectively than your competitors.
And once you've got this figured out, here are some editing tips to help you keep your audience engaged.
Use Engaging Elements (Pattern Interrupt)
When was the last time you stayed around to watch a video where someone rambled on for a good few minutes without making any edits or camera angle changes in the video?
Maybe what they're saying isn't dull. But the monotony of their delivery and editing is what makes the video boring.
Good video structure and editing (thanks to pattern interrupt) come to the rescue here...or at least help retain the viewer's attention.
When the boredom begins, you need a pattern interruption. Any shift in a video that helps redirect your audience's attention is known as a pattern interrupt.
Examples of Pattern Interrupt:
- An animated text overlay with a subtle zoom in/zoom
- The addition of a sound effect and filter
- Layering a GIF or supporting video footage on top of your video
It's anything that throws off the normal flow of whatever is happening right now. From a psychological point of view, it gives the impression to our brains that we are taking in some newly created material.
Ditch the fancy intro
Here’s the thing, Your viewers will literally thank you for not wasting their time with a fancy intro.. They just want to get the thing that they came for, i.e., the video where you actually deliver the content.
The attention span of the average person has dropped to an alarming eight seconds. You can’t keep rambling on without offering the viewers any new information.
Thumbnails
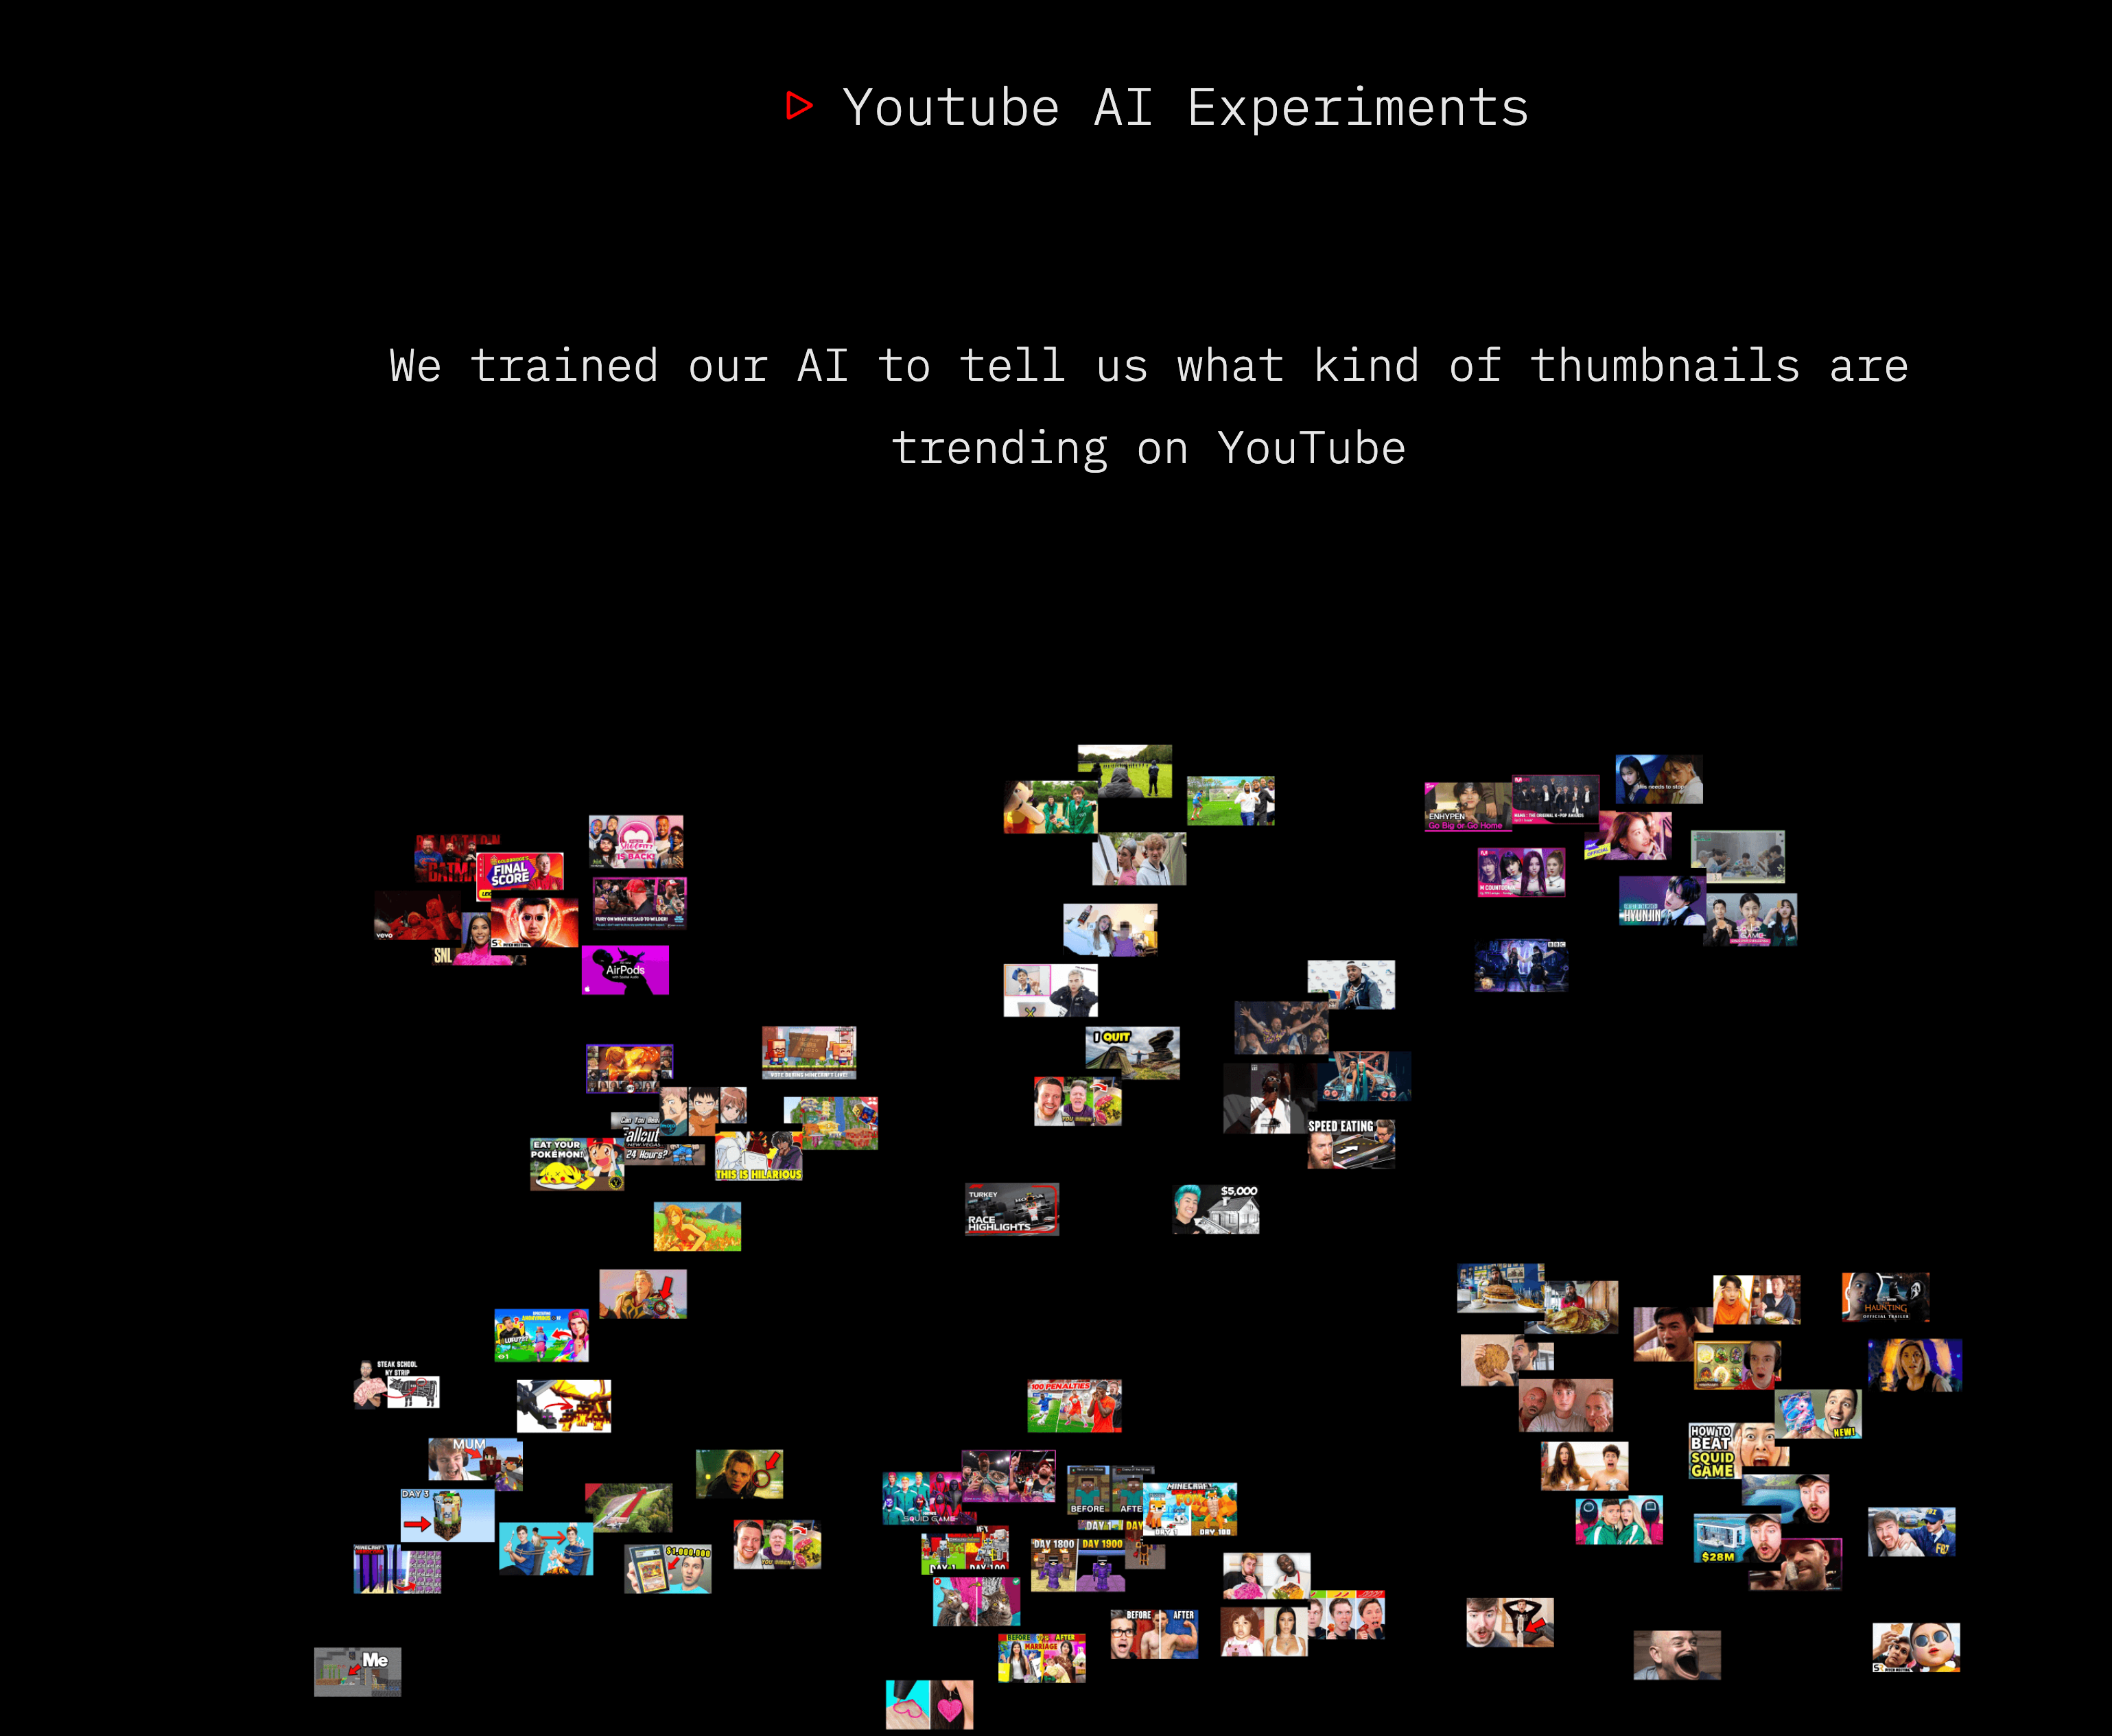
One easy way to get more viewers is to improve your video thumbnails and optimize the YouTube thumbnail size. We recently did an experiment where we trained our AI to see what makes a trending thumbnail.
Some tips include:
- Contrast: Choose colors that stand out against both the user interface and the content that is currently ranking for the search term you wish to appear for.
- Brand Recognition: Maintain the same aesthetic and color palette throughout all of your videos so your content can be easily recognized as you get more subscribers. The goal is to make your post stand out from the rest of the content. Keep parts of your identity, such as your font, but experiment with other aspects, such as color and imagery.
- Research Competitors: Do a search on YouTube according to the subject of the video you intend to upload in order to gather ideas from the most popular videos for what should be included in the thumbnail. You can take inspiration from the popular YouTube video ideas.
- Use Minimal Text: Reduce the amount of text that appears on the thumbnail to a minimum (ideally no more than 3-5 words). Create a captivating name for the video that captures the essence of the content and will attract viewers interested in what you offer.
- Put a face to the content: People want to connect with others, so the thumbnails must have a face. When you make eye contact with a viewer piques their interest in the video and encourages them to watch it more thoroughly.
Pro-tip: Spend the day photographing yourself and then use a background removal tool such as Canva to eliminate the backdrop in a single click so you can access the cut-out photographs of yourself while producing thumbnails.
Add .SRT File for Closed Captions
YouTube can produce captions on its own, but employing an additional tool like VEED would increase the accuracy while reducing the amount of time spent modifying the text.
One of the best methods to reach more people is to add closed captions to YouTube videos. 1.5 billion hearing-impaired people can be reached using closed captions on YouTube.
If you have a substantial number of people who follow you but who might not be proficient in your original language, you may want to consider adding translated captions and uploading the videos to YouTube. Adding closed caption can help boost your video's search engine optimization (SEO), which in turn helps it rank higher.
Keep each frame to a maximum of two lines. The audio and subtitles should be precisely in sync. When more than one person is in the frame or the speaker is not clearly seen, mention speakers.
Write a description
More clicks mean more views. Make the most of the first few letters of the description because they’re displayed in the video preview on YouTube search results. Include important keywords people will use to search for videos similar to yours.
A well-written description for your YouTube video has the potential to pique the attention of your viewers, which might lead to increased watch times, higher view counts, and even new subscribers. The YouTube SEO benefit is that it helps the YouTube algorithm comprehend your content and suggest it to new people, hence increasing your YouTube stats.
Include any pertinent connections to other videos or playlists, lead magnets, blogs, or even other videos to increase view duration and interaction with your brand as a whole. You can think of the description as a mini blog post and you can take advantage of AI writing tools to come up with a well-written description. Alternatively, you can write your own ideas and then refine them with an AI Rewriter. The tool can help you give the description a uniform tone and flow throughout the text. Running your description through an AI humanizer afterward can smooth out any robotic phrasing and make the final text feel more natural to your audience.
[#TOC4]What’s the best video editing software for YouTube beginners?[#TOC4]
The YouTube editor is perfect for you if all you need is a free platform to do basic modifications like cutting.
VEED is the ideal option for you if you are looking for a more comprehensive all-in-one solution for the creation of videos, editing of videos, and collaboration on videos that is still quick and simple to use.
If you’re interested in getting into the specifics of what each editor provides, the comparison tables that follow are for you.
Editing Features
Workflow Tools
Brand Tools
With the help of an online video editor such as VEED, you may create videos with the expertise of a pro without having to master any overly complicated program.
Edit your next YouTube video with VEED’s online editor.