Screen recordings make instructions and explanations crystal clear and easy to follow for even the most intricate workflows. You can clarify concepts, produce educational how-to videos and tutorials, and provide technical support to your prospects and customers.
And while screen recordings certainly make communicating your ideas a breeze, there's a catch.
Making these videos look professional and on-brand can, at times, be quite exhausting — especially if you don't have the right recording tool that meets your requirements.
That's where this guide comes in — to save you from the exhausting clutches of tool fatigue. Read on to learn how to record your computer screen and create ready-to-use videos that give your content extra flair, faster.
Want to jump to a specific screen recorder? We've got you.
- Snipping Tool: Best Windows Screen Recorder That Doesn’t Record Sound
- Xbox Game Bar: Best Gameplay Recorder for Windows
- QuickTime Player: Best Mac Screen Recorder with Very Limited Editing Capabilities
- VEED: Best Overall Online Screen Recorder with a Highly Intuitive Video Editor
- Snagit: Best Downloadable Screen Recorder That Works on Both PC and Mac
Let’s dive in.

[#TOC1]1. Snipping Tool[#TOC1]
Snipping Tool is a screenshot utility feature that also lets you record your entire screen, a specific window, or just a portion of your display. It was originally introduced in Windows 7, and now comes pre-installed with all the latest versions of the operating system.
Although convenient, this video recording tool isn’t suitable for creating advanced-level videos. For instance, you can’t edit the recording to add arrows, stamps, borders, and callouts. And without these annotation symbols, the viewer may find it more challenging to understand where to focus.
The fact you can't record your screen with audio is another disadvantage for some. You’ll need to add any voiceovers or other sound effects on a separate video editing software.
How to Record Your Screen with the Snipping Tool
Recording your screen with the Snipping Tool is super easy. Here’s how to get started.
Recording Your Screen
1. Press Win + S to open Windows Search and type 'Snipping Tool'. Then click on Open to launch the tool.
2. In the Snipping Tool window, click on the camcorder/video icon on the top bar.
3. Select New or press Ctrl + N to start a new screen recording session. Be sure the screen recording feature is enabled if not already.
4. Adjust the slider to highlight the specific portion of the screen you want to record. Snipping Tool also lets you capture a small section or record the entire screen.
5. Click on the Start button to begin the recording. A small timer will show you the recording duration. If needed, you can hit Pause to temporarily halt the recording or Delete to discard the clip.
6. Once you've finished recording, click on the Stop button to end the recording session and return to the Snipping Tool window.
Saving Your Screen Recording
7. Press Ctrl + S to open the Save window, and save the recorded clip on your computer.
8. Type a name for the video in the designated field and choose your preferred location to save the file. Alternatively, you can click on the Save icon in the top bar to save the video.
Note: The recordings are saved in MP4 format, and there's no option to change the format within the Snipping Tool app settings.
[#TOC2]2. Xbox Game Bar[#TOC2]
Calling all gamers using Windows PC! The Xbox Game Bar isn't just limited to capturing those epic gameplays on your PC or streamed from an Xbox controller; it can also record screen activity from non-gaming applications.
With just a few clicks, you can immortalize your gaming footage or capture important actions within other programs. Just keep in mind the video recorder only operates within a specific application and cannot capture your entire desktop, File Explorer, or specific window applications like Weather.
The Xbox Game Bar comes pre-built into Windows 10 and Windows 11, but you can also get it as an add-on. Note that your PC needs to have one of the following encoders to use the feature: AMD VCE, Intel Quick Sync H.264 (second-generation CPU or newer), or Nvidia NVENC (most Nvidia GeForce 600 or newer, and most Quadro K series or newer).
How to Record Your Screen with Xbox Game Bar
Whether you want to record your gameplay or some other task, getting started with the Xbox Game Bar is fairly simple.
Setting Up Game Bar
1. Open Settings and click on Gaming followed by Xbox Game Bar.
- In Windows 10, turn on the switch for Enable Xbox Game Bar. You can also enable the option to open Game Bar using the Xbox button on an Xbox controller.
- In Windows 11, turn on the switch for Open Xbox Game Bar using this button as a controller to use an Xbox gamepad to activate Game Bar.
2. Customize your Game Bar experience by accessing the Xbox Game Bar settings menu. There, you can easily view and modify the default shortcuts linked to various Game Bar actions.
Activating Game Bar and Recording
3. Navigate to the screen you want to record.
4. Press Win + G to open the Game Bar. Widgets will appear on the screen with controls for capturing screenshots, recording video and audio, and broadcasting your screen activity.
5. Click on the Start Recording button or press Win + Alt + R to screen record computer activity.
6. Execute the actions you want to capture. Meanwhile, the Game Bar widgets will disappear, and a floating bar will appear in the upper-right corner of your screen, allowing you to control the recording.
7. To stop the recording, click on the Recording button on the floating bar.
Accessing and Customizing Recorded Videos
8. Once the recording ends, you'll see a notification indicating the clip was recorded and saved as an MP4 file. Click the notification to view your video in the Game Bar.
9. Click on Play to play the video. You can also access your recorded videos from their default location in File Explorer: C:\Users[username]\Videos\Captures.
[#TOC3]3. QuickTime Player[#TOC3]
Among the many features of QuickTime Player is a built-in screen recording tool, aptly named "Screenshot," that lets you record your macOS screen along with audio. But while QuickTime Player gets the job done, it doesn't offer the same extensive features as advanced third-party screen recording tools like VEED.
For starters, you're limited to exporting recordings in .mov format, which may not be as widely compatible as other formats. Many content creators also dislike the lack of screen annotation features and the 1080p-maximum recording quality cap. Without these features, your recordings might end up feeling flat and uninspiring.
How to Record Your Screen with QuickTime Player
Want to create simple recordings on your Mac, and don’t care much about editing them? Here’s how to do just that with QuickTime Player.
Recording Your Screen
1. Launch QuickTime Player.
2. Click on File in the menu bar at the top of the screen, and then select New Screen Recording from the dropdown menu.
3. You may see a prompt requesting permission to record your screen. Click Open System Preferences and enable the checkbox next to QuickTime Player. If required, restart QuickTime Player. If not, proceed to Step 6.
4. Once QuickTime Player restarts, click on File again, followed by New screen recording.
5. Before recording your screen, you can adjust the recording settings. To access these settings, click on the arrow next to the Record button and make the necessary changes.
6. To begin recording, select Record entire screen or Record selected portion, followed by the Record button located on the right side of the toolbar.
7. Once you're done, go to the menu bar and select Stop recording or press Command + Control + Escape.
Saving Your Screen Recording
8. Select File in the menu bar, then click on Save from the drop-down menu to save your recording.
9. Choose a suitable location to save the file (if you haven't done so already), and name the recording. Finally, hit Save to confirm your choice.
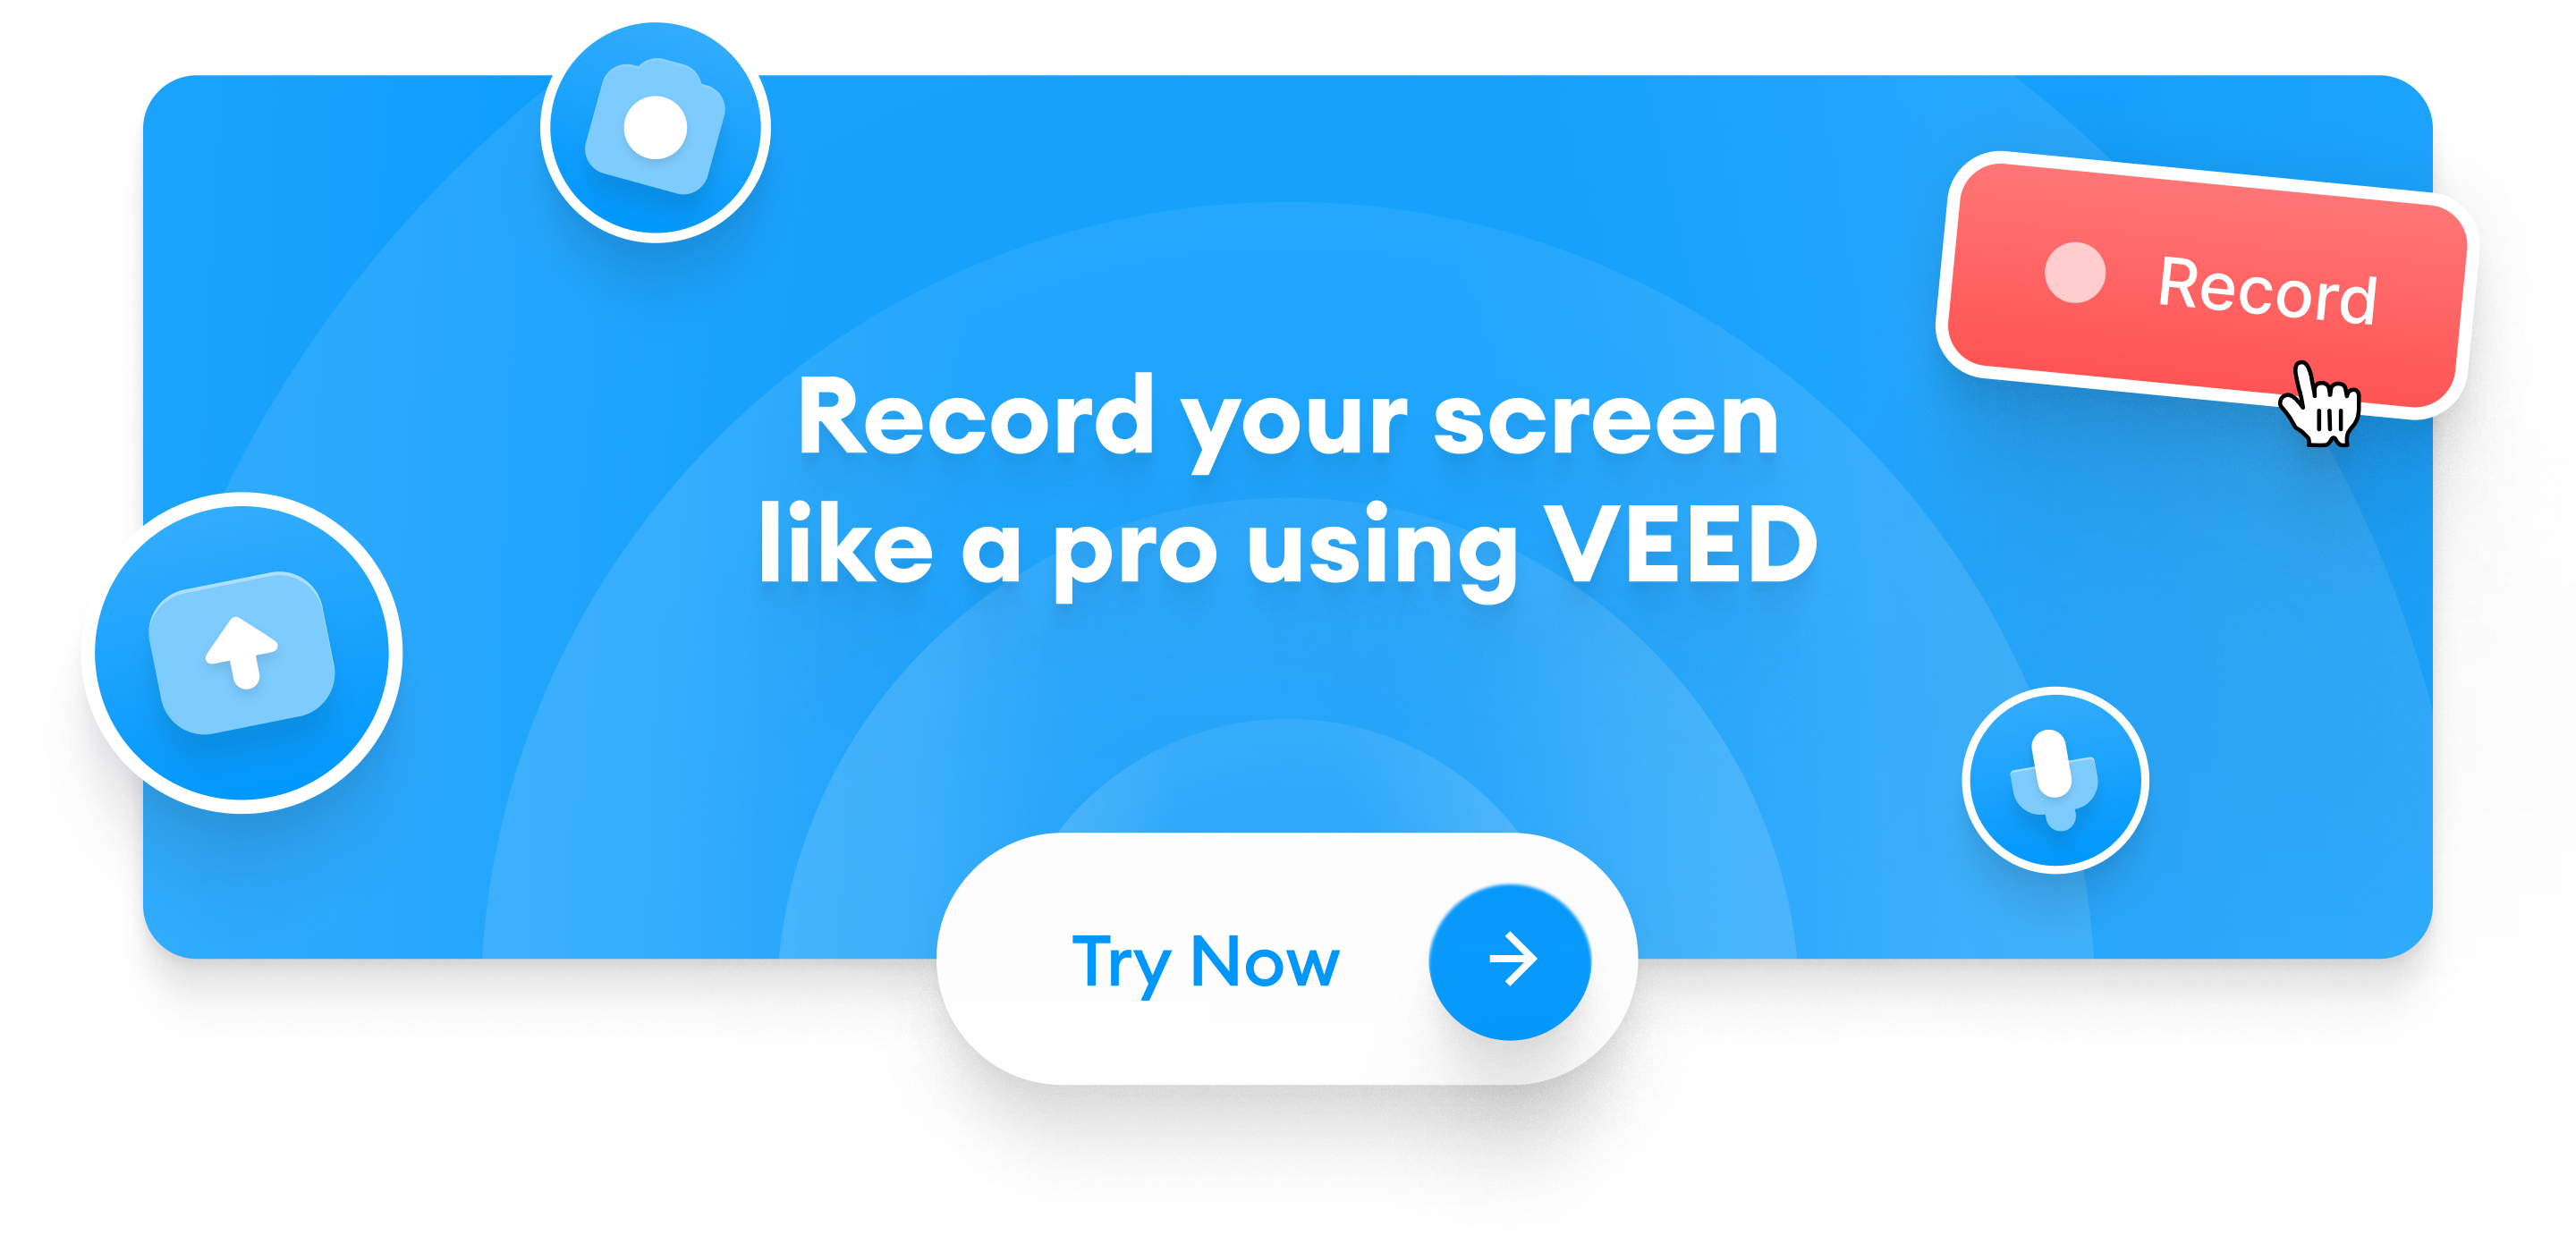
[#TOC4]4. VEED[#TOC4]
VEED is an online screen recorder that makes screen recordings as easy as a few clicks. It lets you edit the recording you create within the same app, so you don’t need to jump between tools (goodbye, tool fatigue!)
What's more, you can use VEED to record different screen-recorded formats including video presentations and audio-only recordings. VEED also comes with a built-in teleprompter, which enables you to upload your video script and deliver your presentation like a public speaking pro.
How to Record Your Screen with VEED
Here’s how to record your screen using VEED:
Setting Up and Recording
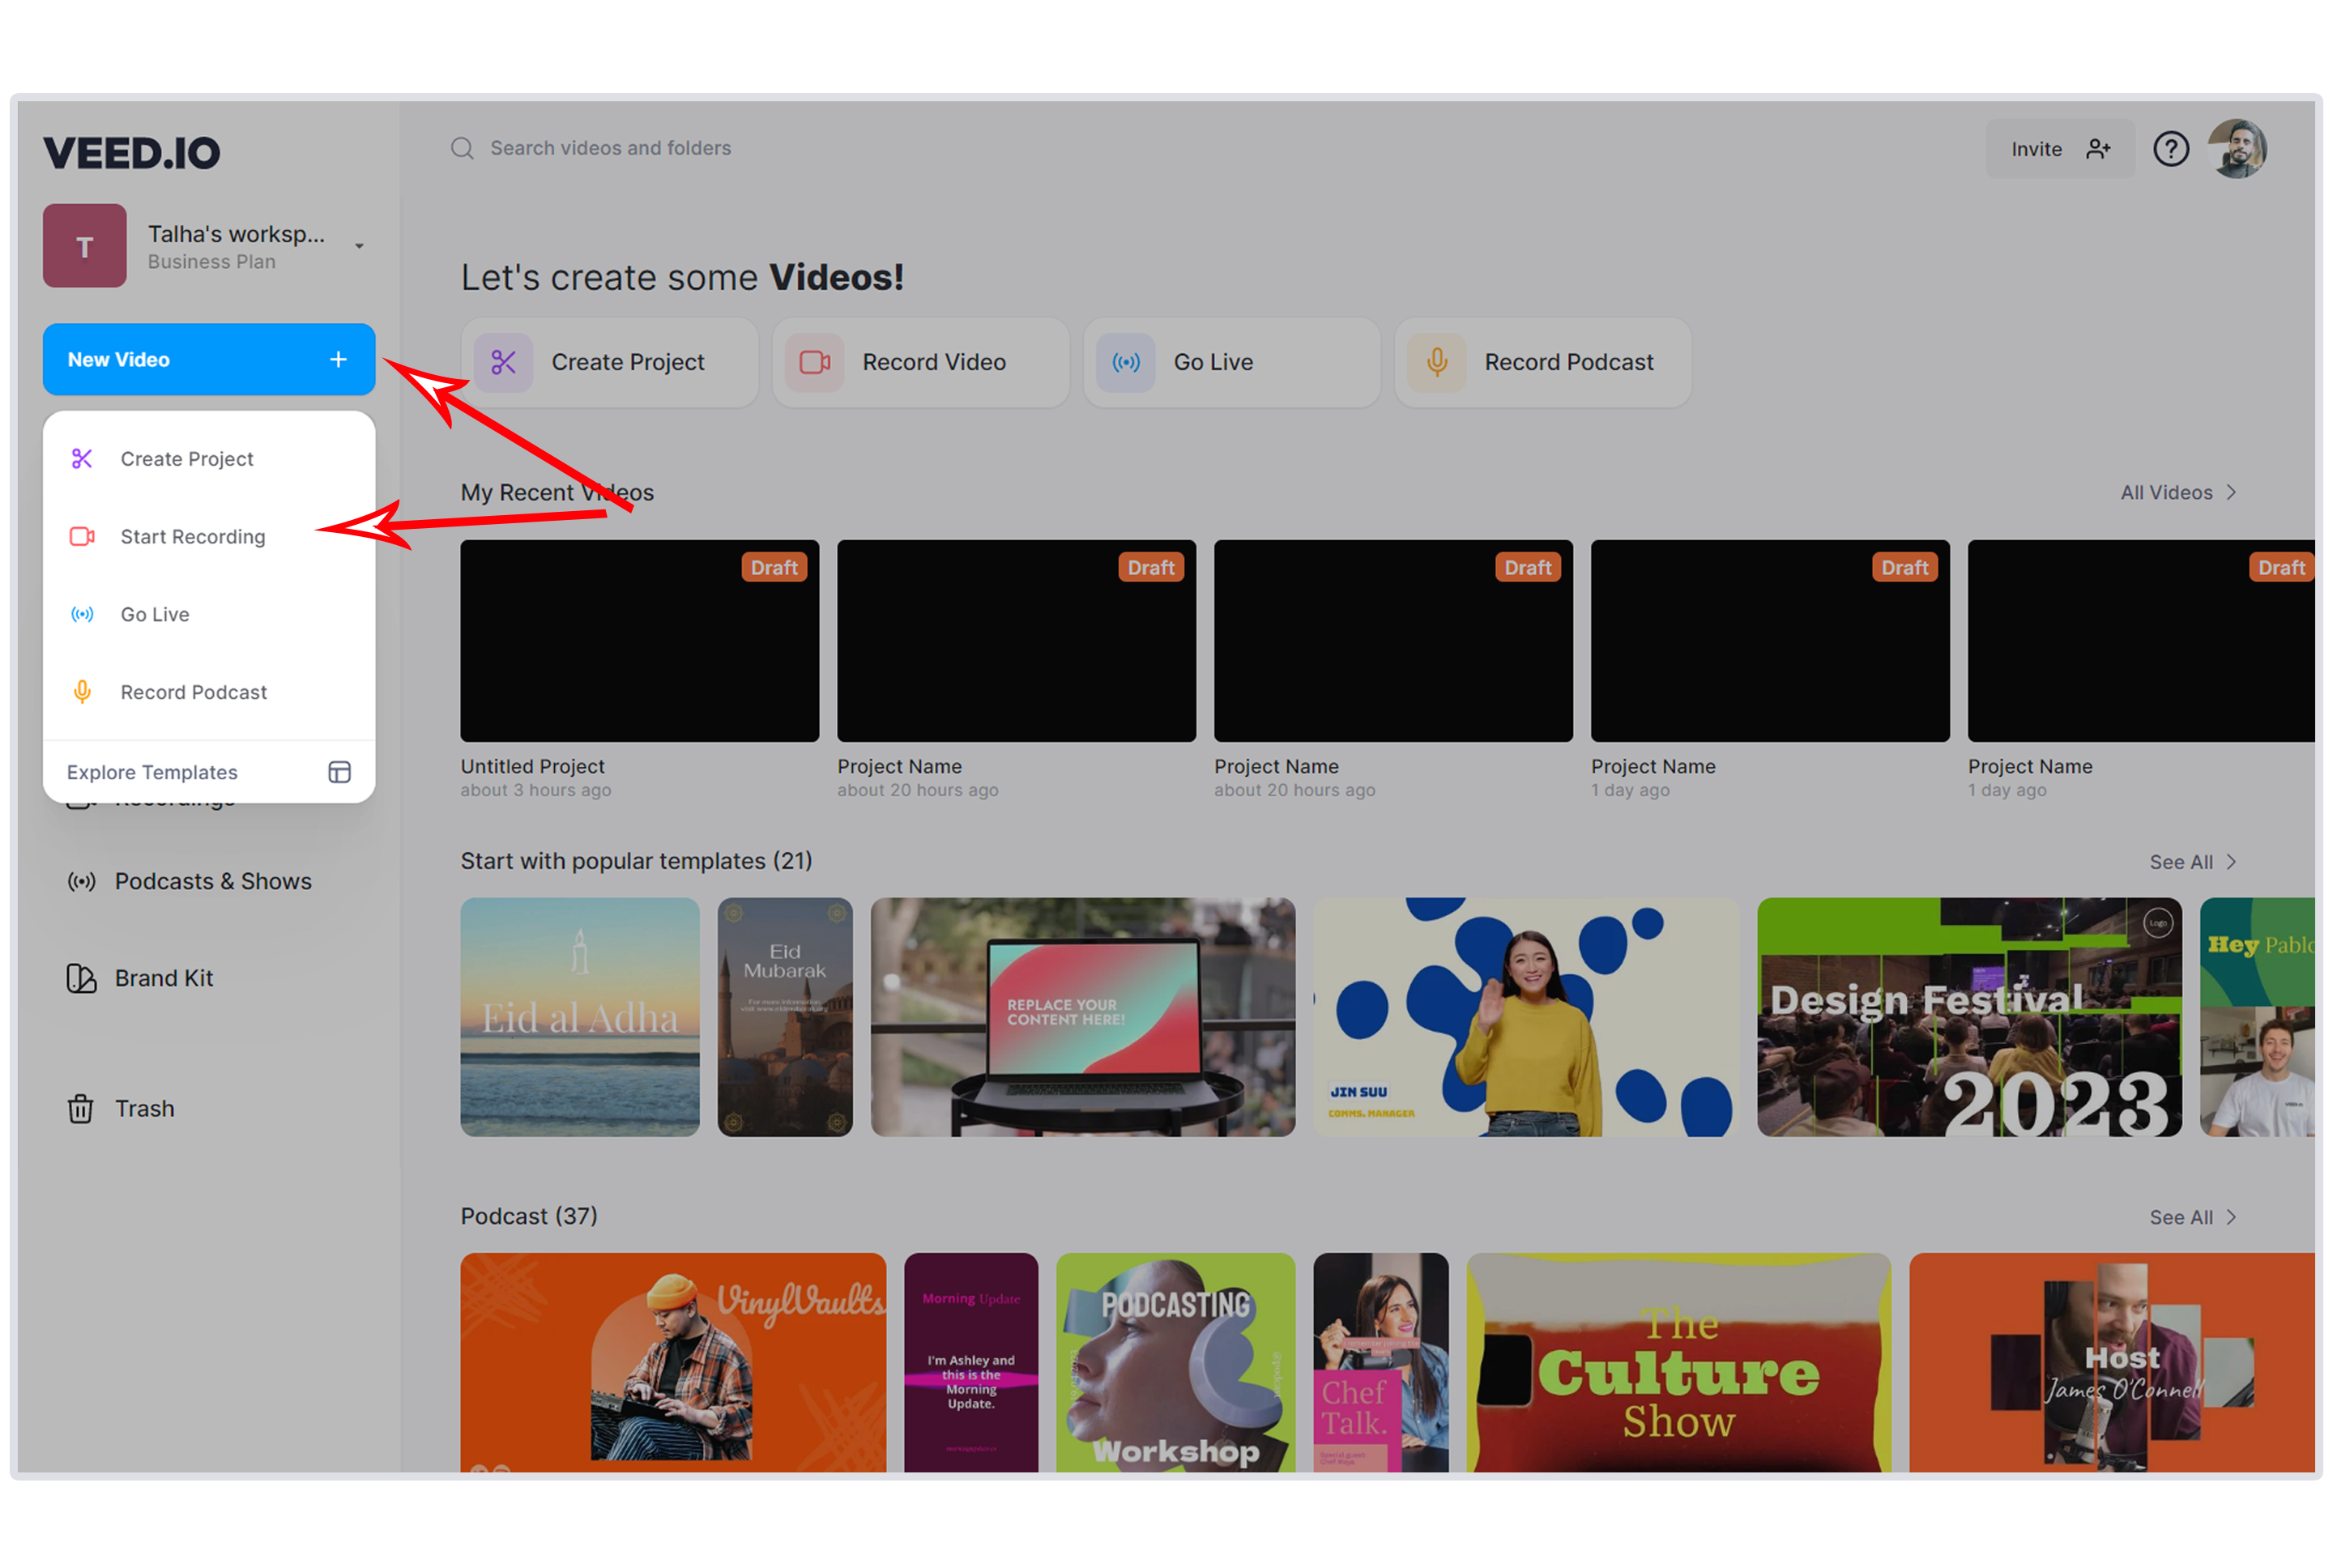
1. On your VEED dashboard, go to Record Video.

Alternatively, select New Video + in the side menu and choose Start Recording.
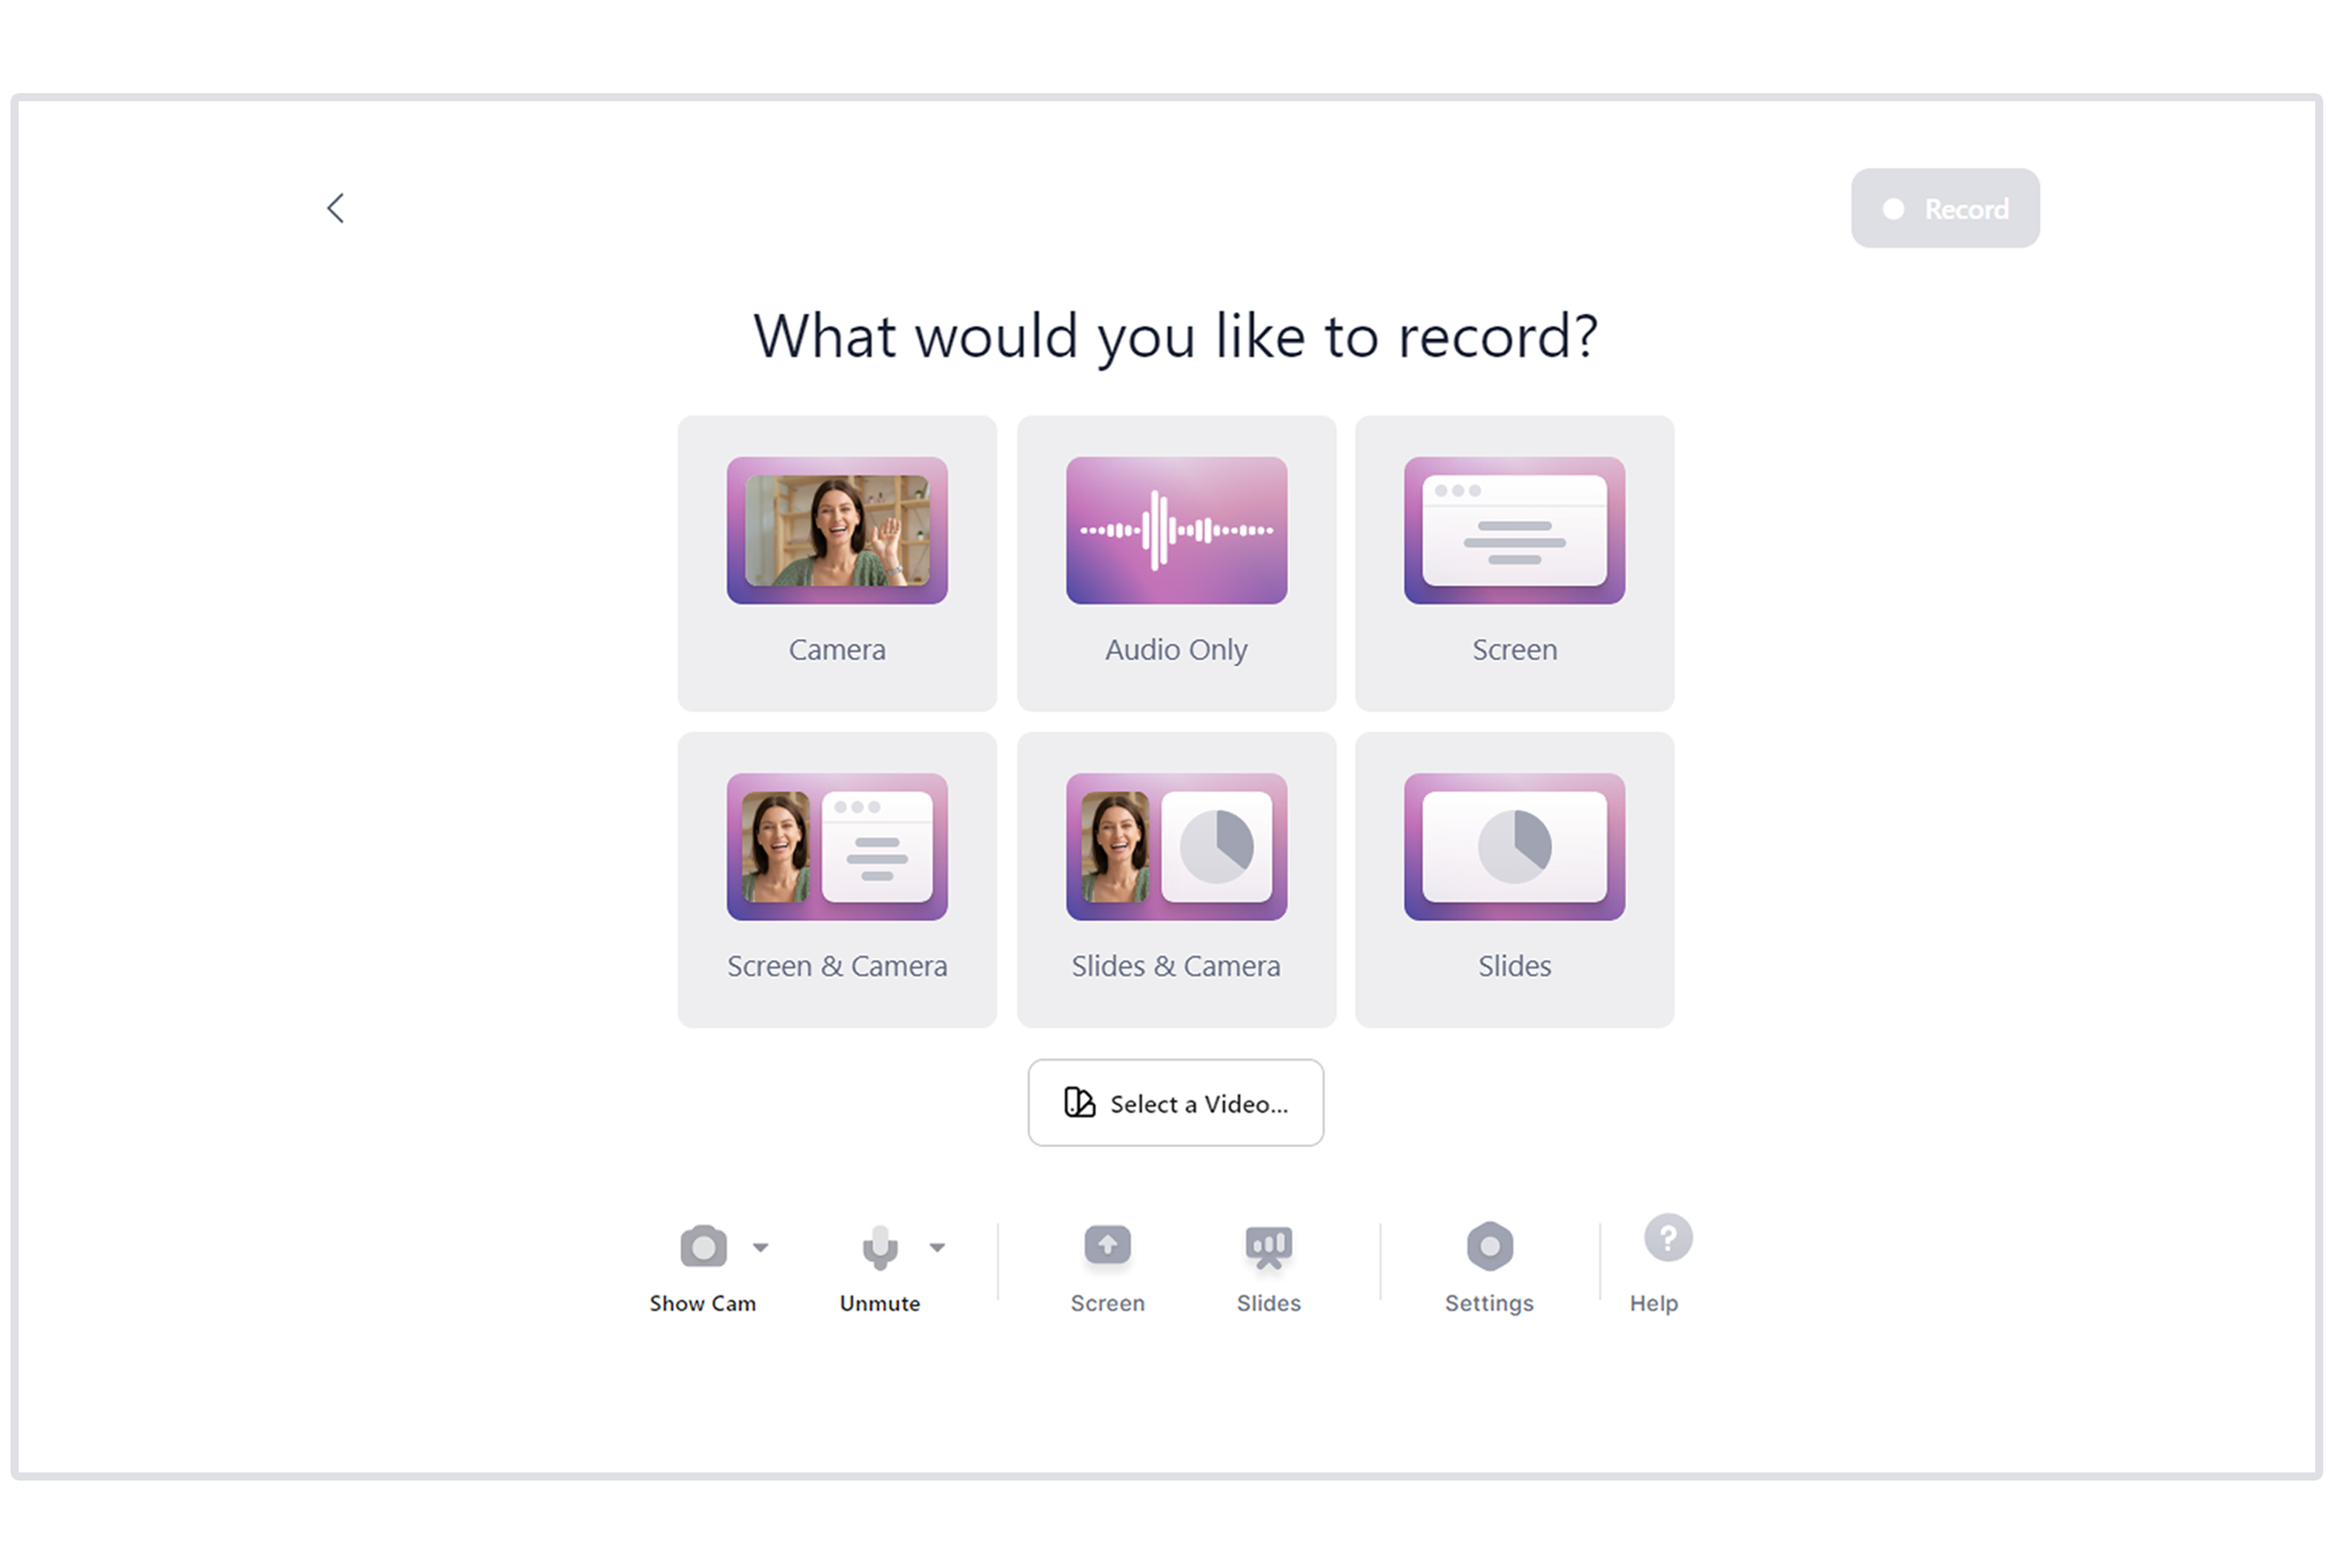
2. Choose from six video screen layouts or opt for Audio Only if you only need audio.
- If you have a prerecorded video clip, you can upload it and combine it with your screen recording.
- For video presentations, you can upload a file or import slides from Google Slides.
- When sharing your screen, specify whether you want to record the entire screen, a specific window, or a tab.
Pro Tip: Get VEED’s screen recording Chrome extension to record videos on the go with a click of a button.
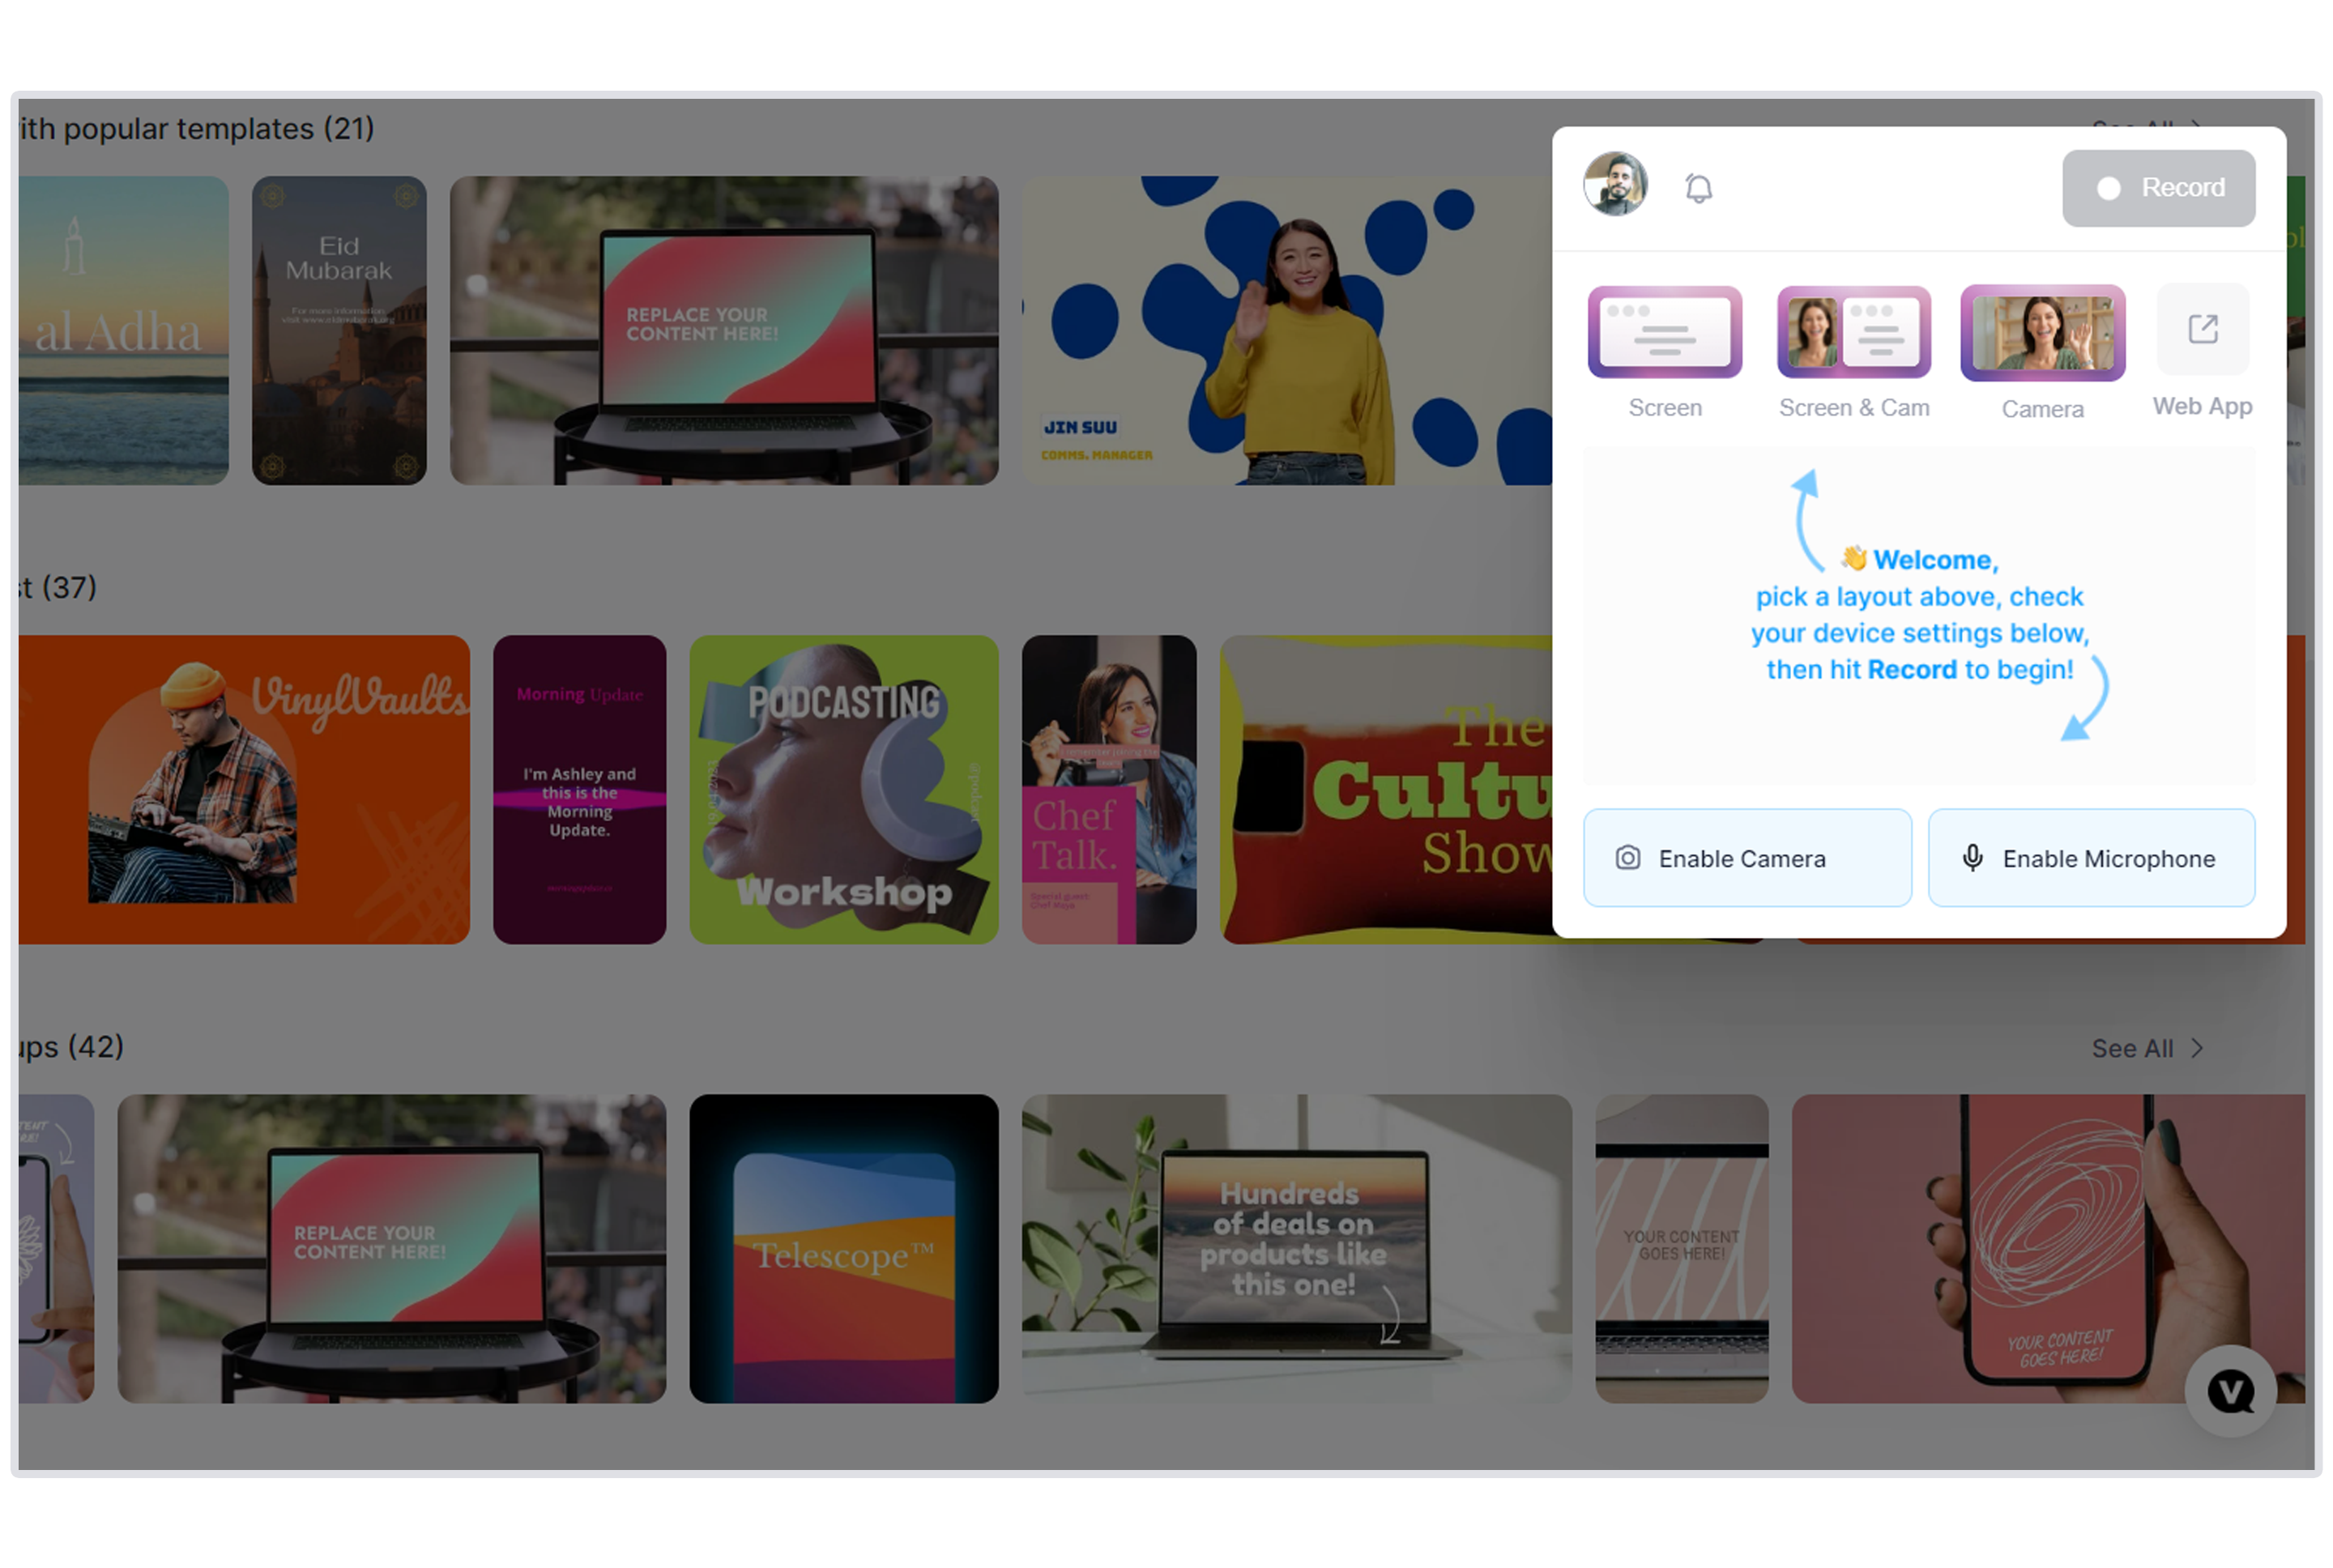
3. Customize your screen recording with themes, background colors, and images that align with your brand. You can also adjust the recording dimensions to optimize it for the platform where viewers will watch it.

4. Once you've customized your video background, click on Record in the top right corner of the video frame.
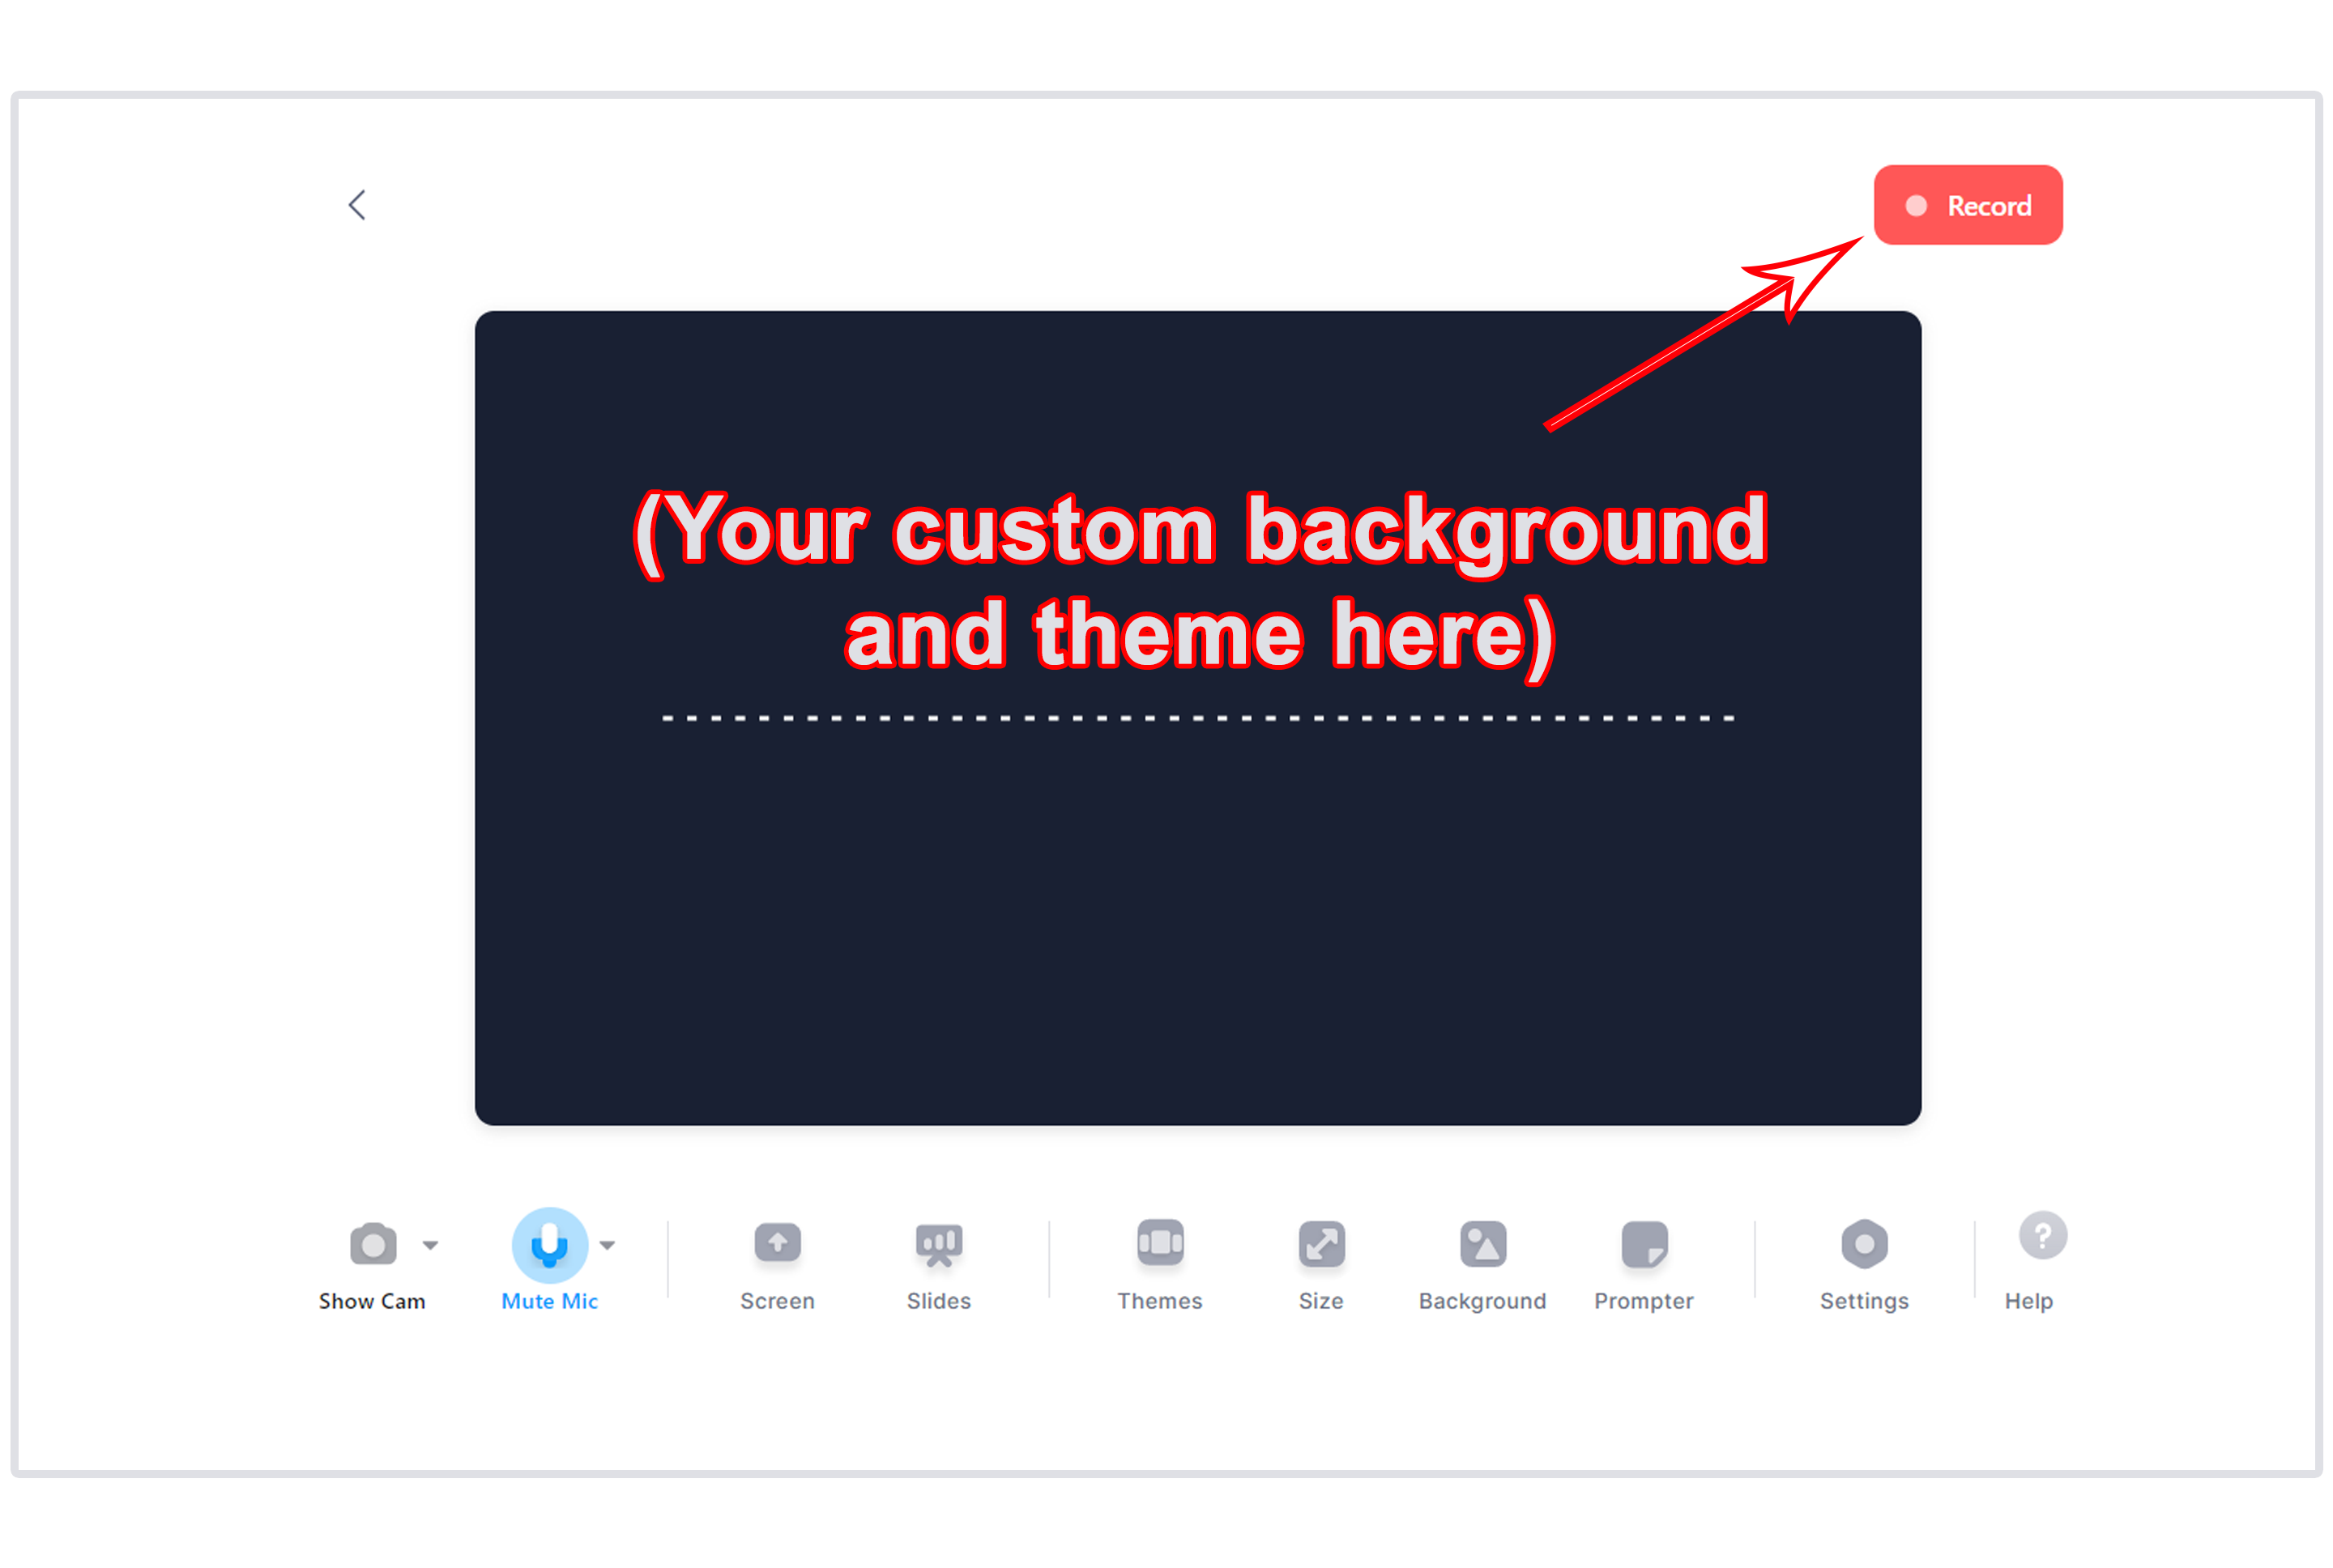
5. Select Stop in the upper right corner when you're done recording.
(Optional) Editing the Recording
6. Click on Edit to go to VEED’s online editor. Here you'll find tons of basic and advanced editing options like:
- Auto Subtitles: VEED automatically adds captions to screen recordings, enhancing accessibility and message retention.
- Magic Cut: remove mistakes, filler words, and pauses in seconds using VEED AI.
- Add Text and Elements: add text, shapes, emojis, GIFs, stickers, and more to personalize your screen-recorded video.
- Trimming and Cutting: make your video crisp and more effective by taking out unnecessary portions.
- Stock library: add royalty-free music and videos to screen recordings.
Read more: How to automatically add and customize subtitles with VEED
Sharing the Recording
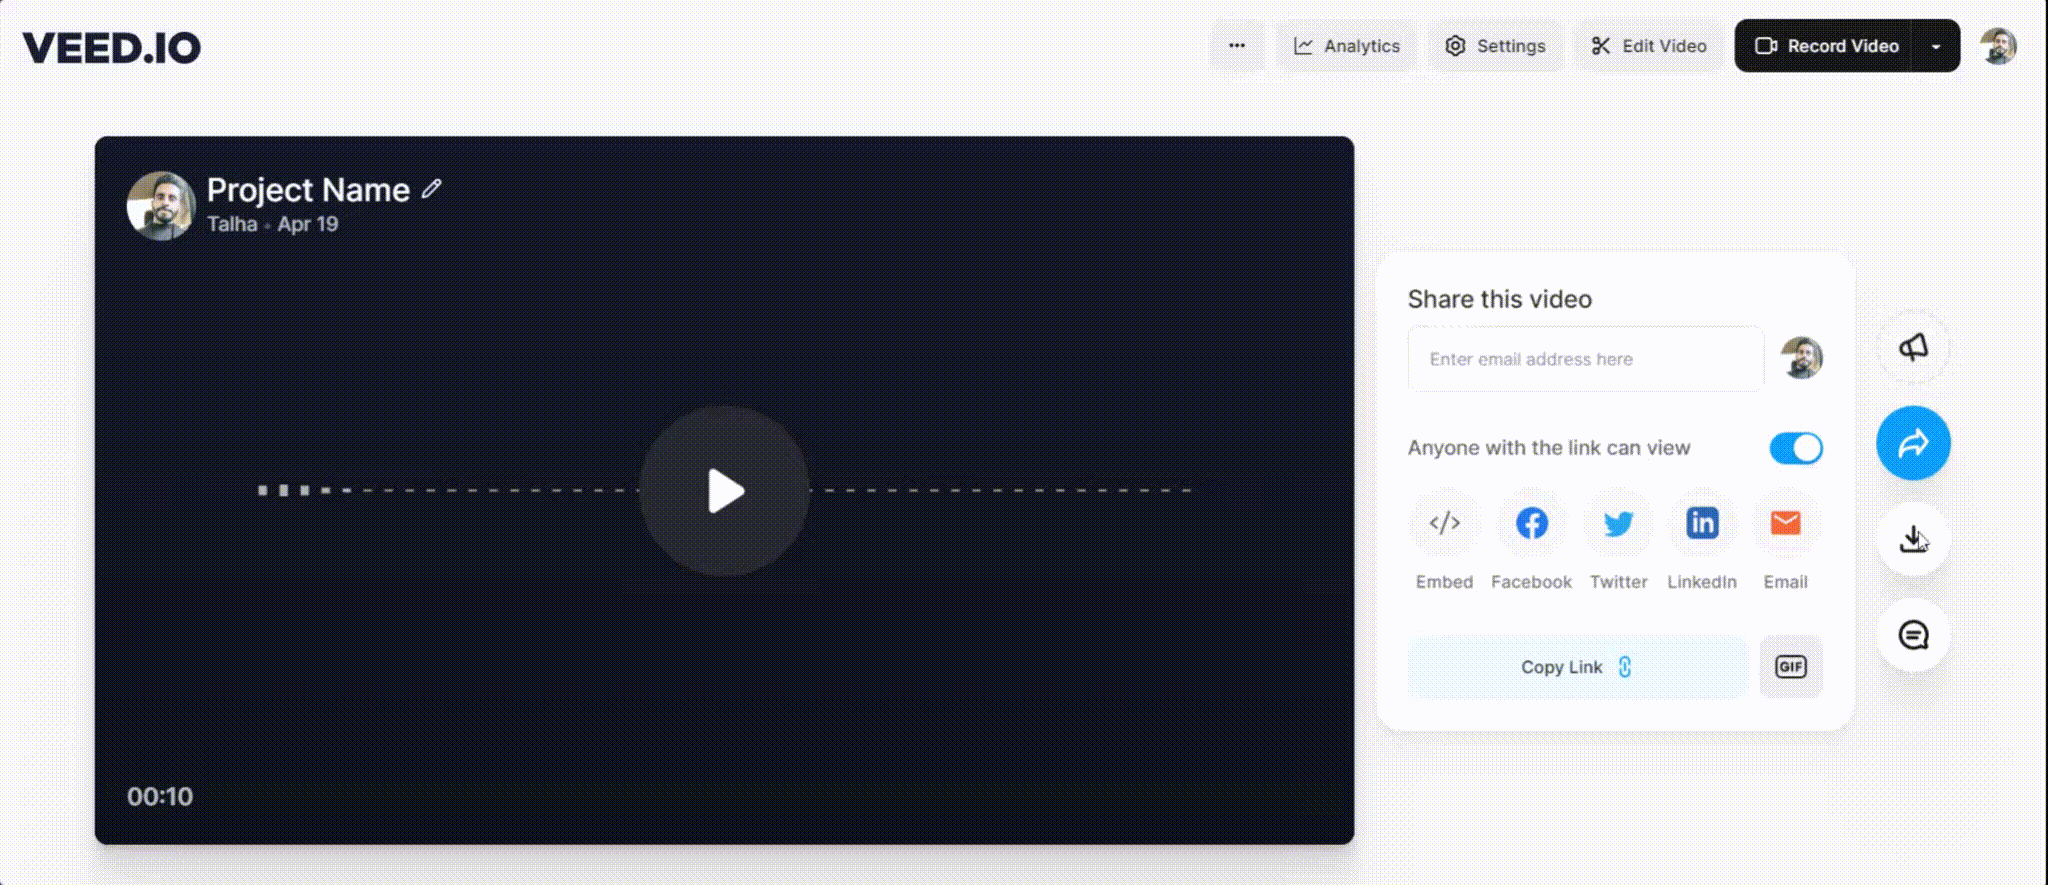
7. Once you're satisfied with the clip, click on Done. You'll then be directed to the screen where you can share the recorded video.
8. Share the recorded video with teammates for feedback via email or through a sharing link. You can also publish the video directly on social media platforms or download it in your preferred format. Note that VEED business plan users can customize the video's title, description, and links.
[#TOC5]5. Snagit[#TOC5]
Snagit captures your screen with precision. You can effortlessly record videos, complete with system audio and webcam integration, making the whole process seamless and hassle-free.
Fair warning, Snagit comes with a higher price tag and may not fulfill all use cases, so it's crucial to consider your specific needs. Also, the lack of robust video editing features means you might want to explore other options if you're looking for intricate edits and advanced effects.
How to Record Your Screen with Snagit
Here’s how to record your screen using Snagit:
Setting Up and Recording Your Screen
1. Go to the Capture window, and select the Video tab.
2. (Optional) Customize the quality, format, and other aspects of your recorded video.
3. Click on Capture in the Capture window, or press Print Screen (Windows) or Control + Shift + C (Mac) on your keyboard. A set of orange crosshairs will appear.
4. Click and drag the crosshairs to create a rectangular selection around the area you want to record. Alternatively, click the Fullscreen button to capture the entire screen.
5. (Optional) While selecting the recording area, you can press the G key to show video selection guidelines, helping you make precise selections.
6. The Video Recording toolbar will immediately appear after you make your selection. Use the buttons on the toolbar to enable or disable webcam and audio sources.
7. Click Record on the Video Recording toolbar, or press Shift + F9 (Windows) or Command + Shift + Space (Mac) on your keyboard.
Annotating Your Screen Recording
8. To highlight important information during recording, click on the Screen Draw button on the toolbar and choose a drawing tool to annotate or emphasize specific elements on the screen.
9. When you're done recording, click on Stop on the toolbar, or press Shift + F10 (Windows) or Option + Shift + V (Mac). The captured video will automatically open in the Snagit Editor, where you can preview, edit, and save the recording.
10. In Snagit Editor, review and edit the captured video. Save it to your preferred location and format when satisfied.
Start Recording Your Screen Today!
You'll no longer have to wonder how to record a video on your screen — this guide has you covered. If you're looking to create professional, on-brand screen recordings, choose an advanced screen and voice recorder like VEED. Compared to other built-in tools, VEED is more intuitive and serves as an end-to-end editor that works on both PC and Mac.