In a world where a few seconds can make you stop scrolling and dive into a story, Instagram Reels are the canvas that creators everywhere are using to captivate, entertain, and connect. Whether you’re looking to show off your skills, boost your brand, or simply have fun, Reels give you the chance to shine in short, snappy, and visually striking ways. But how do you actually make a reel on Instagram that grabs attention, keeps viewers hooked, and maybe even goes viral?
This guide walks you through every step of the process — from planning your concept to the final edit — with pro tips sprinkled in to help you unlock your inner video artist.
Let’s go! 👇
Jump to a specific section:
- What are Instagram Reels?
- How to make reels on Instagram (detailed tutorial)
- 5 best practices for recording, editing, and promoting your reels
How to make a reel on Instagram: At a glance
Short on time? No worries. Here’s a quick step-by-step guide with none of the fluff:
- Click the + icon in bottom of the app
- Swipe over to Reel
- Choose existing video, pick a template, or record from scratch
- Spice up your reel with music, captions, stickers, and more.
- Set your post preferences, including visibility
- Write a caption and choose a thumbnail
- Publish
[#TOC1]What are Instagram Reels?[#TOC1]
Instagram Reels are vertical aspect ratio, short-form videos that inspire, educate, or entertain your audience. Unlike a video posted to your Instagram Story, a Reel is around for the long haul.
Instagram Reels go beyond typical video posts on Instagram. When you post a Reel, it appears both on someone’s Instagram Feed, as well as their Reel-specific feed. This can help your video get more exposure, as many users like to browse Reels specifically.
Instagram Reels also benefit from more advanced video editing options than a regular video post. Similar to TikTok videos, Instagram Reels can have various effects applied to them, utilize custom audio tracks, and be cropped or chopped up and moved around.
Where Reels really benefit is from the Explore page. This feed gives users suggested accounts to follow, along with popular and trending Instagram content, all based on content they’ve interacted with in the past.
So, if your audience research is on point, you can create a Reel that will show up on the right Explore Feed and land in front of your target audience.
[#TOC2]How to make reels on Instagram (detailed tutorial)[#TOC2]
Meta has stepped up its game by adding Reels to Instagram. And brands are responding well—78% of marketers use the app, with 64% even planning to increase their usage in the future. Reels are a great way to splash creativity into your marketing strategy and connect with your audience on a deeper level—especially when paired with an easy-to-use reel maker for faster content creation.
Here's how to make them.
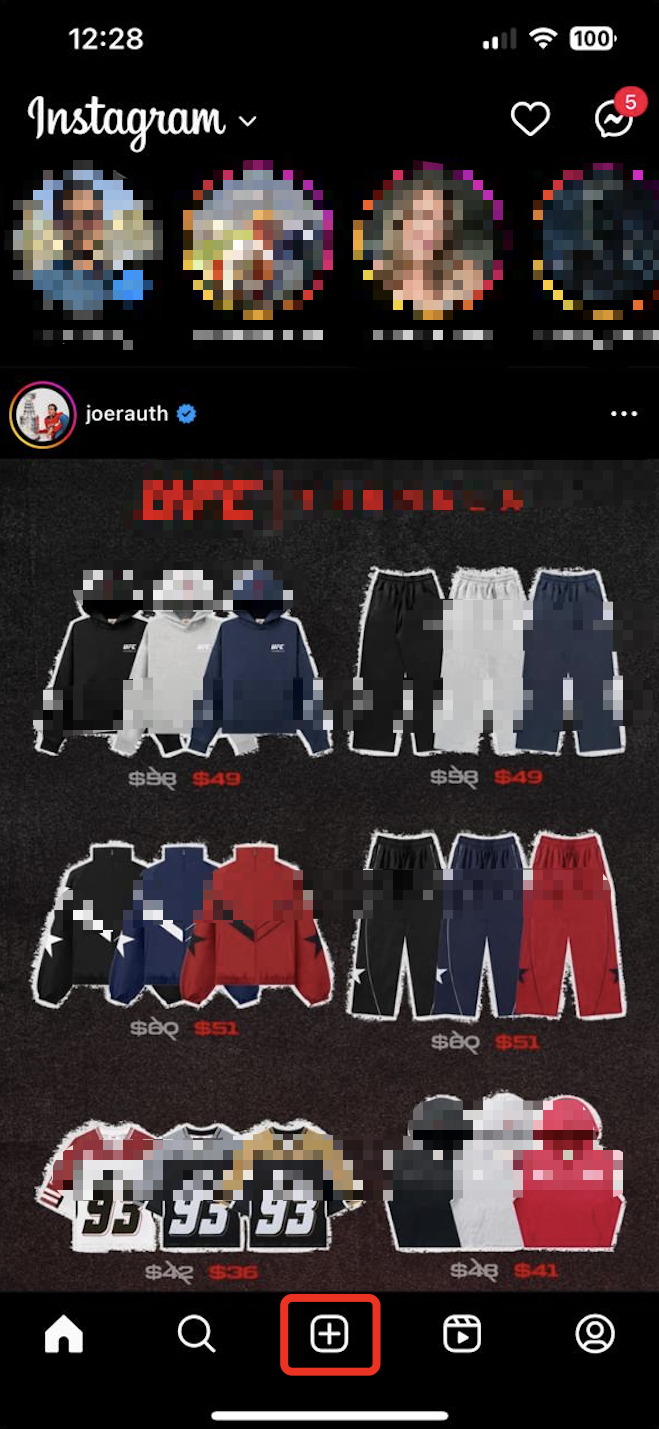
Step 1. Open the Instagram app on iOS or Android and click on the + icon at the bottom of the screen.
Step 2. At the bottom, make sure "REEL" is selected.
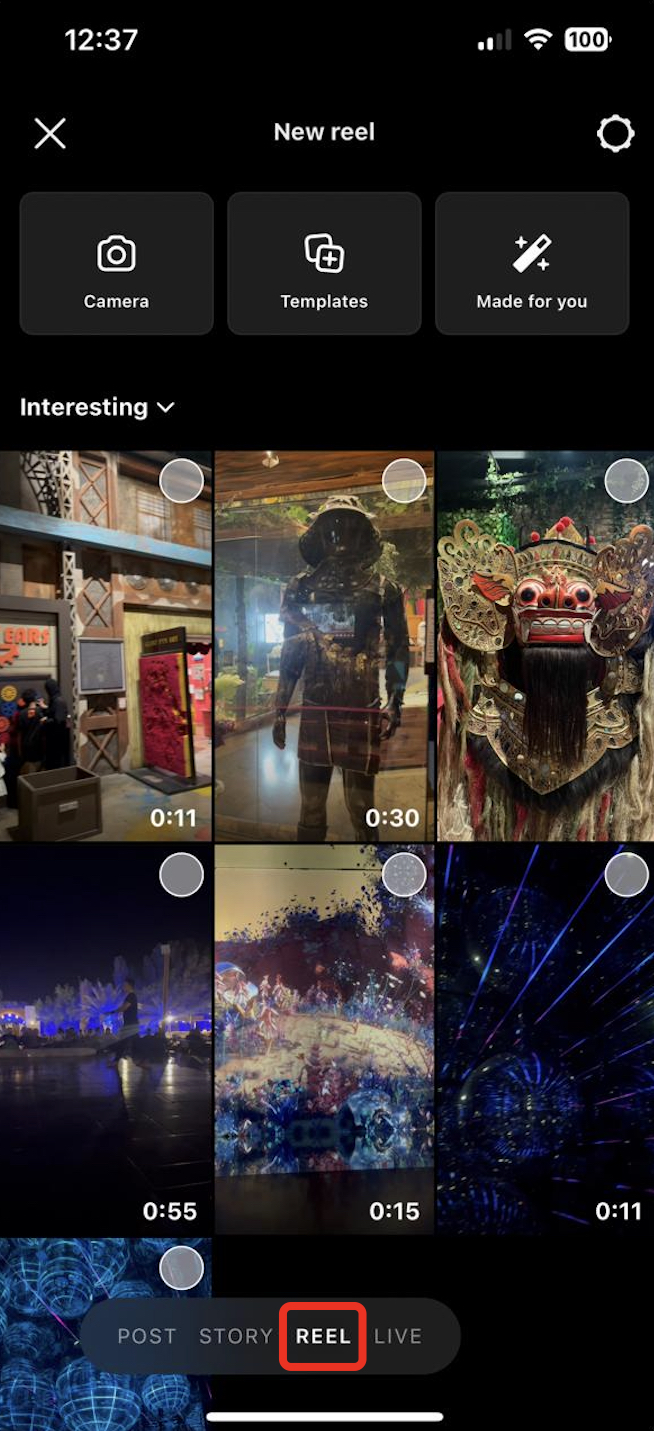
Step 3. At this point, you can upload an existing video from your camera roll, pick a Reels template, or create a new Reel from scratch by hitting the camera icon.

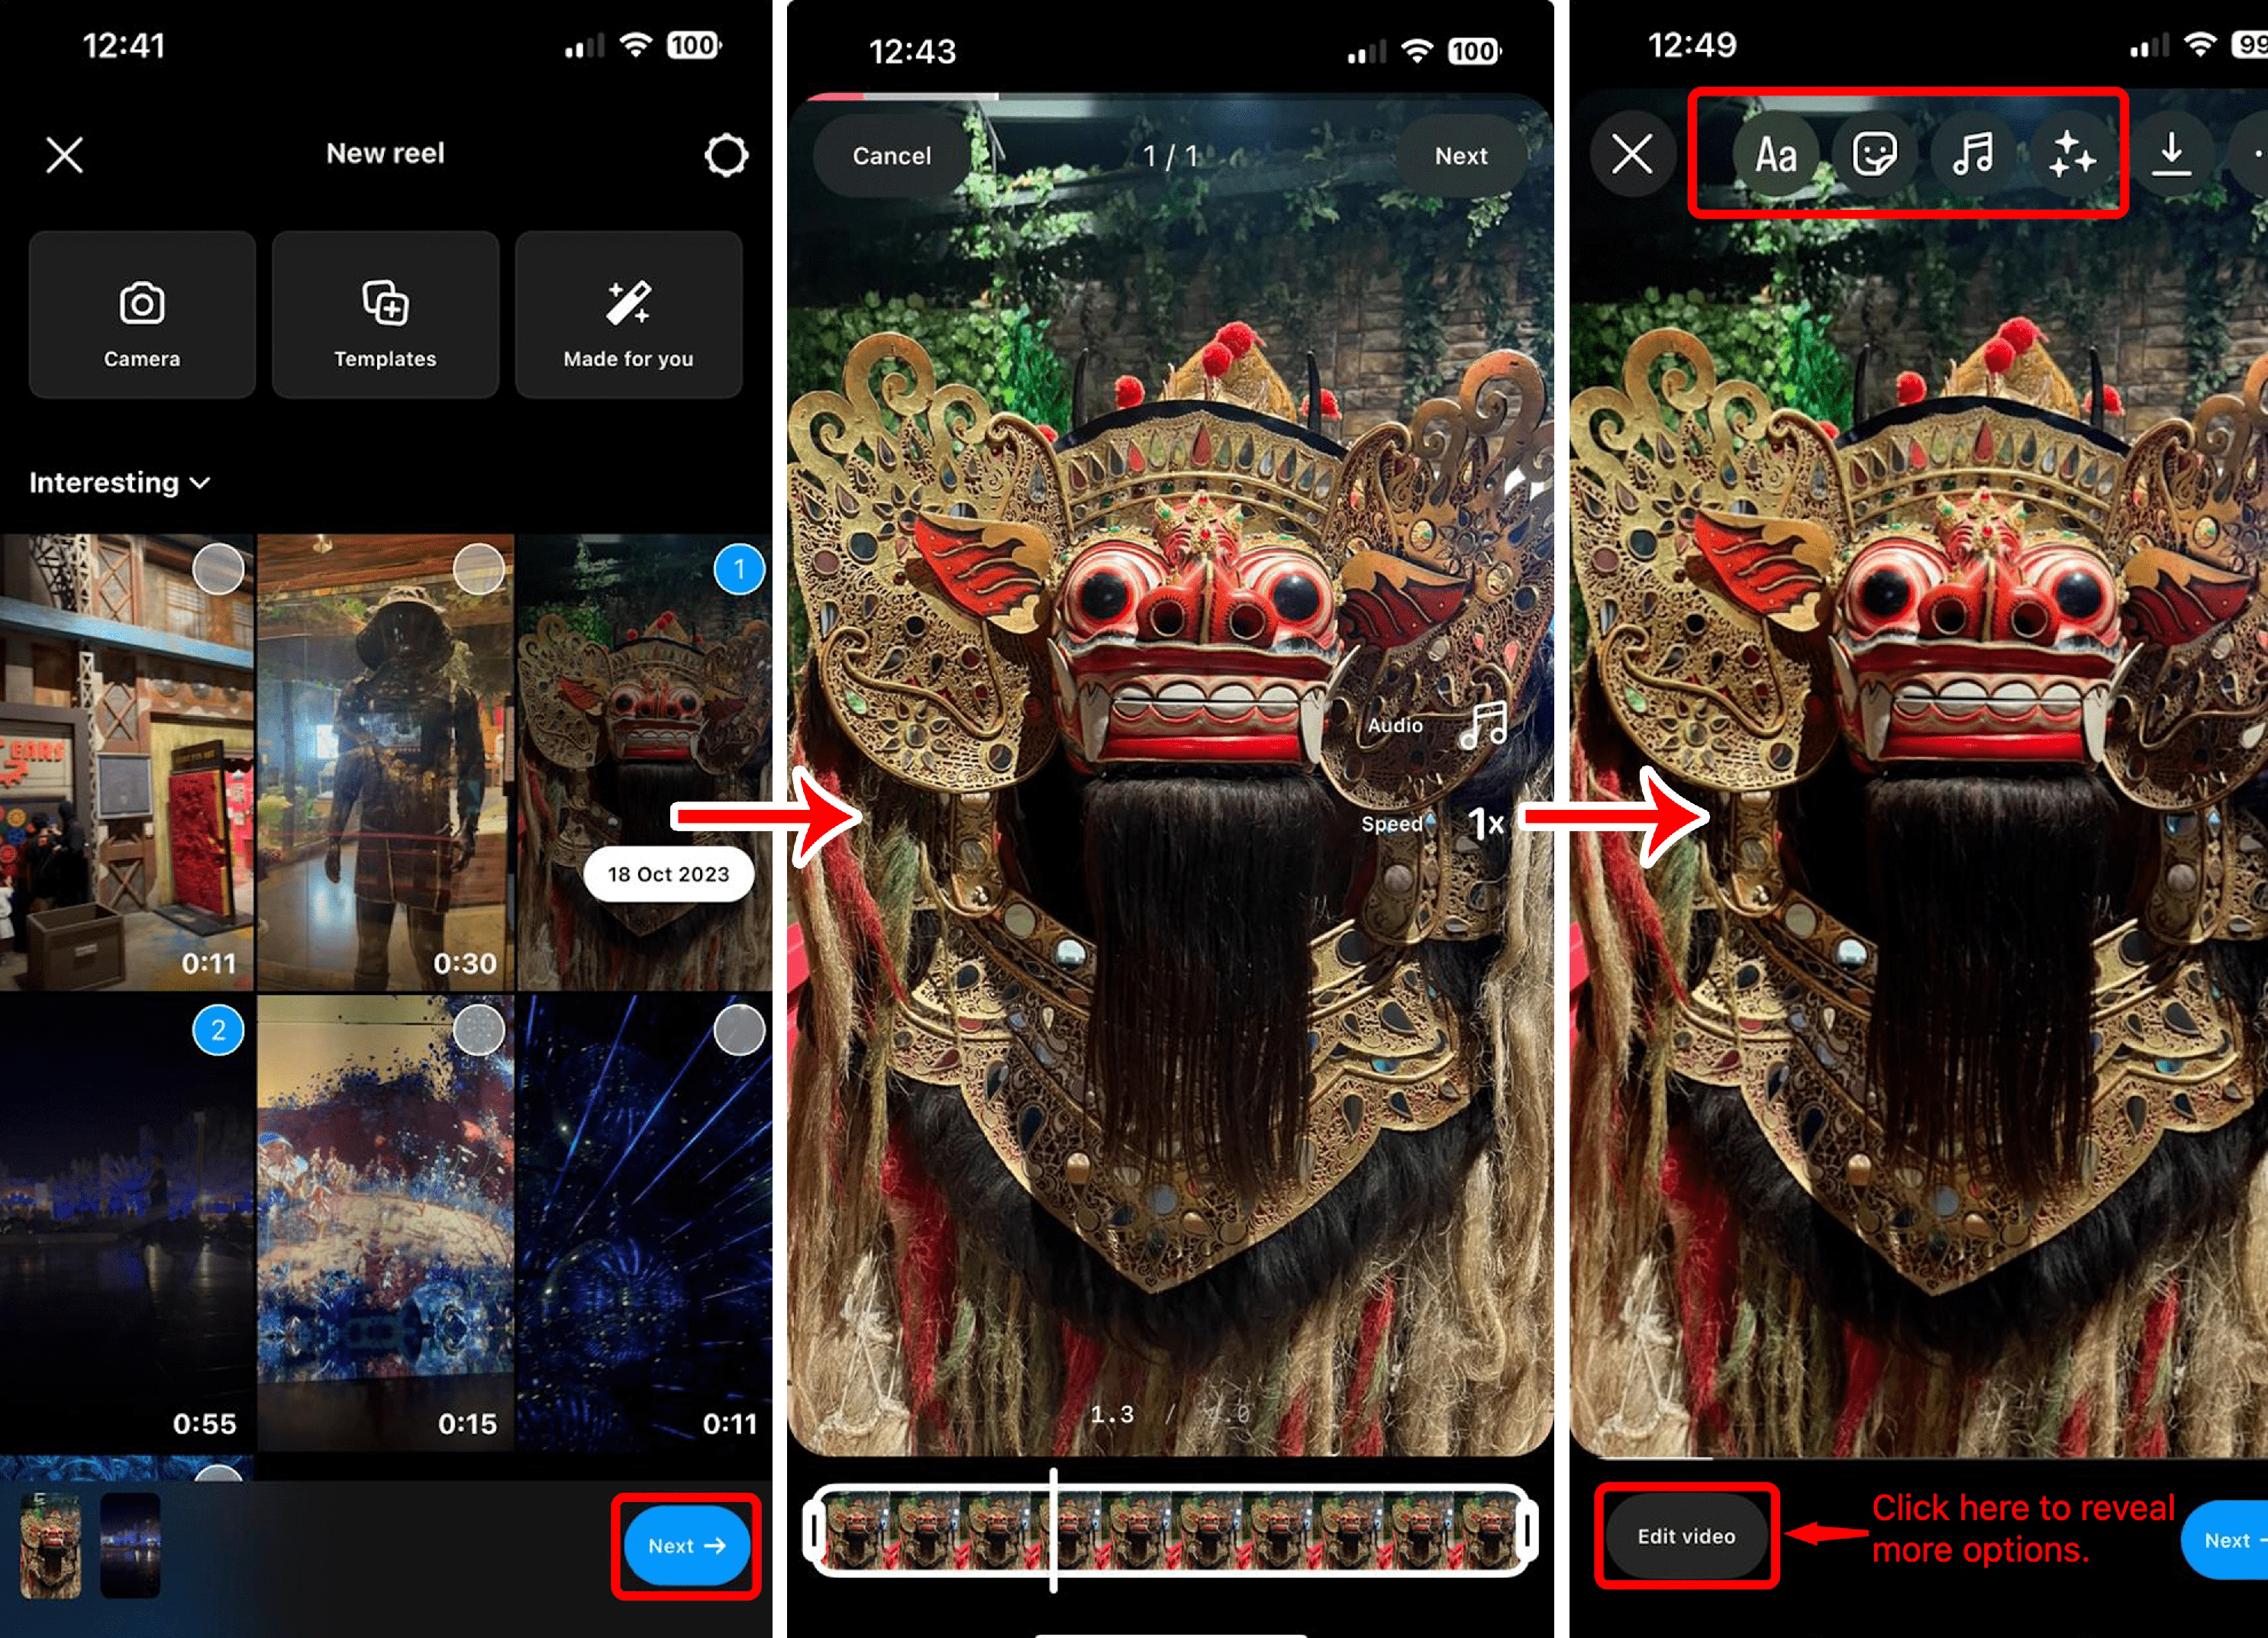
If you’re using existing footage, you can select multiple videos. Once selected, tap on Next and edit them together as you see fit. On the first step, you will be able to adjust the length, add music, and control speed. Next, you will be able to add any text, stickers, and special effects.
If you’re creating new video, use the camera interface to record. You can also choose to use the original audio, or add in custom audio and music tracks, or those from Instagram’s music library, as well as various effects.
Step 5. Once you’re done editing or recording, you can set your post preferences. This includes setting your audience, adding a caption, tagging products, adding location info, and sharing. Make sure you tag people in the video if they’re okay with it, as this will help with exposure.
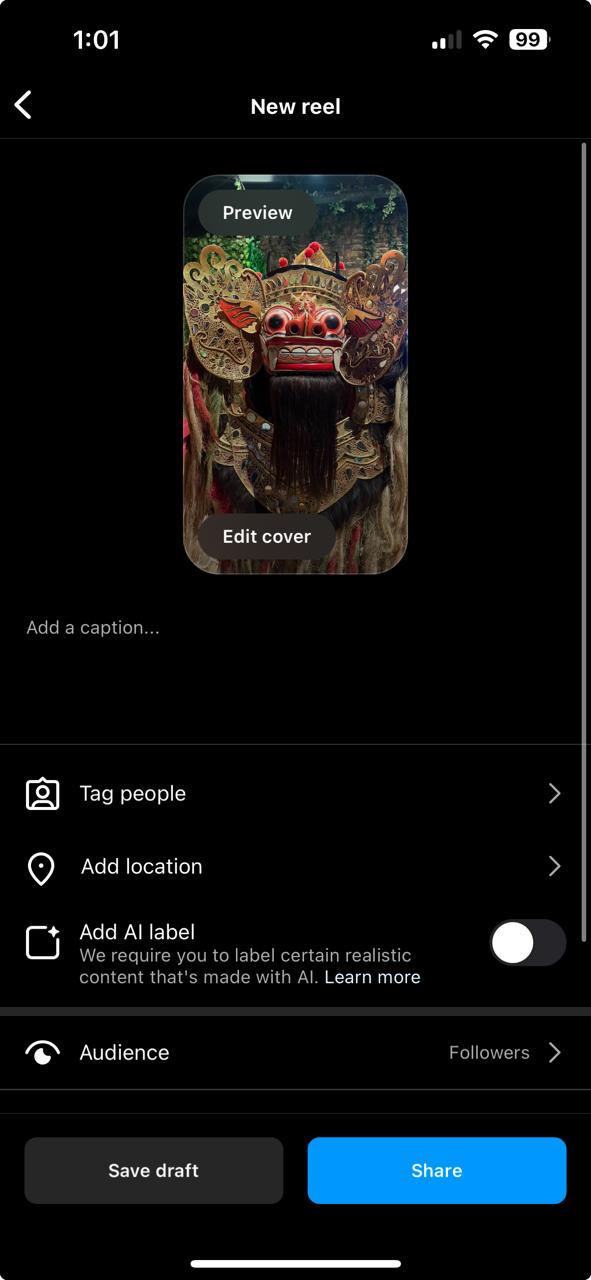
Step 6. Set a cover photo that catches the eye, but is also faithful to the content of the video. Keep in mind the cover image is what people will see first, so you want it to really grab attention—an image enhancer can help keep it crisp and clear.
Step 7. Share the video to your profile!
[#TOC3]5 best practices for recording, editing, and promoting your reels[#TOC3]
Simply uploading Instagram Reels consistently isn’t enough anymore. Want to improve the performance of your Reels and increase engagement?
Follow these five best (practical!) practices.
1. Check your analytics frequently and adapt according to the data
If you have a business or creator profile on Instagram, you can dive into analytics data. To access analytics, go to your IG profile, tap the hamburger menu at the top-right corner, and scroll to Insights. There, scroll all the way down to Reels, and tap on it, where you can find data on individual reels.
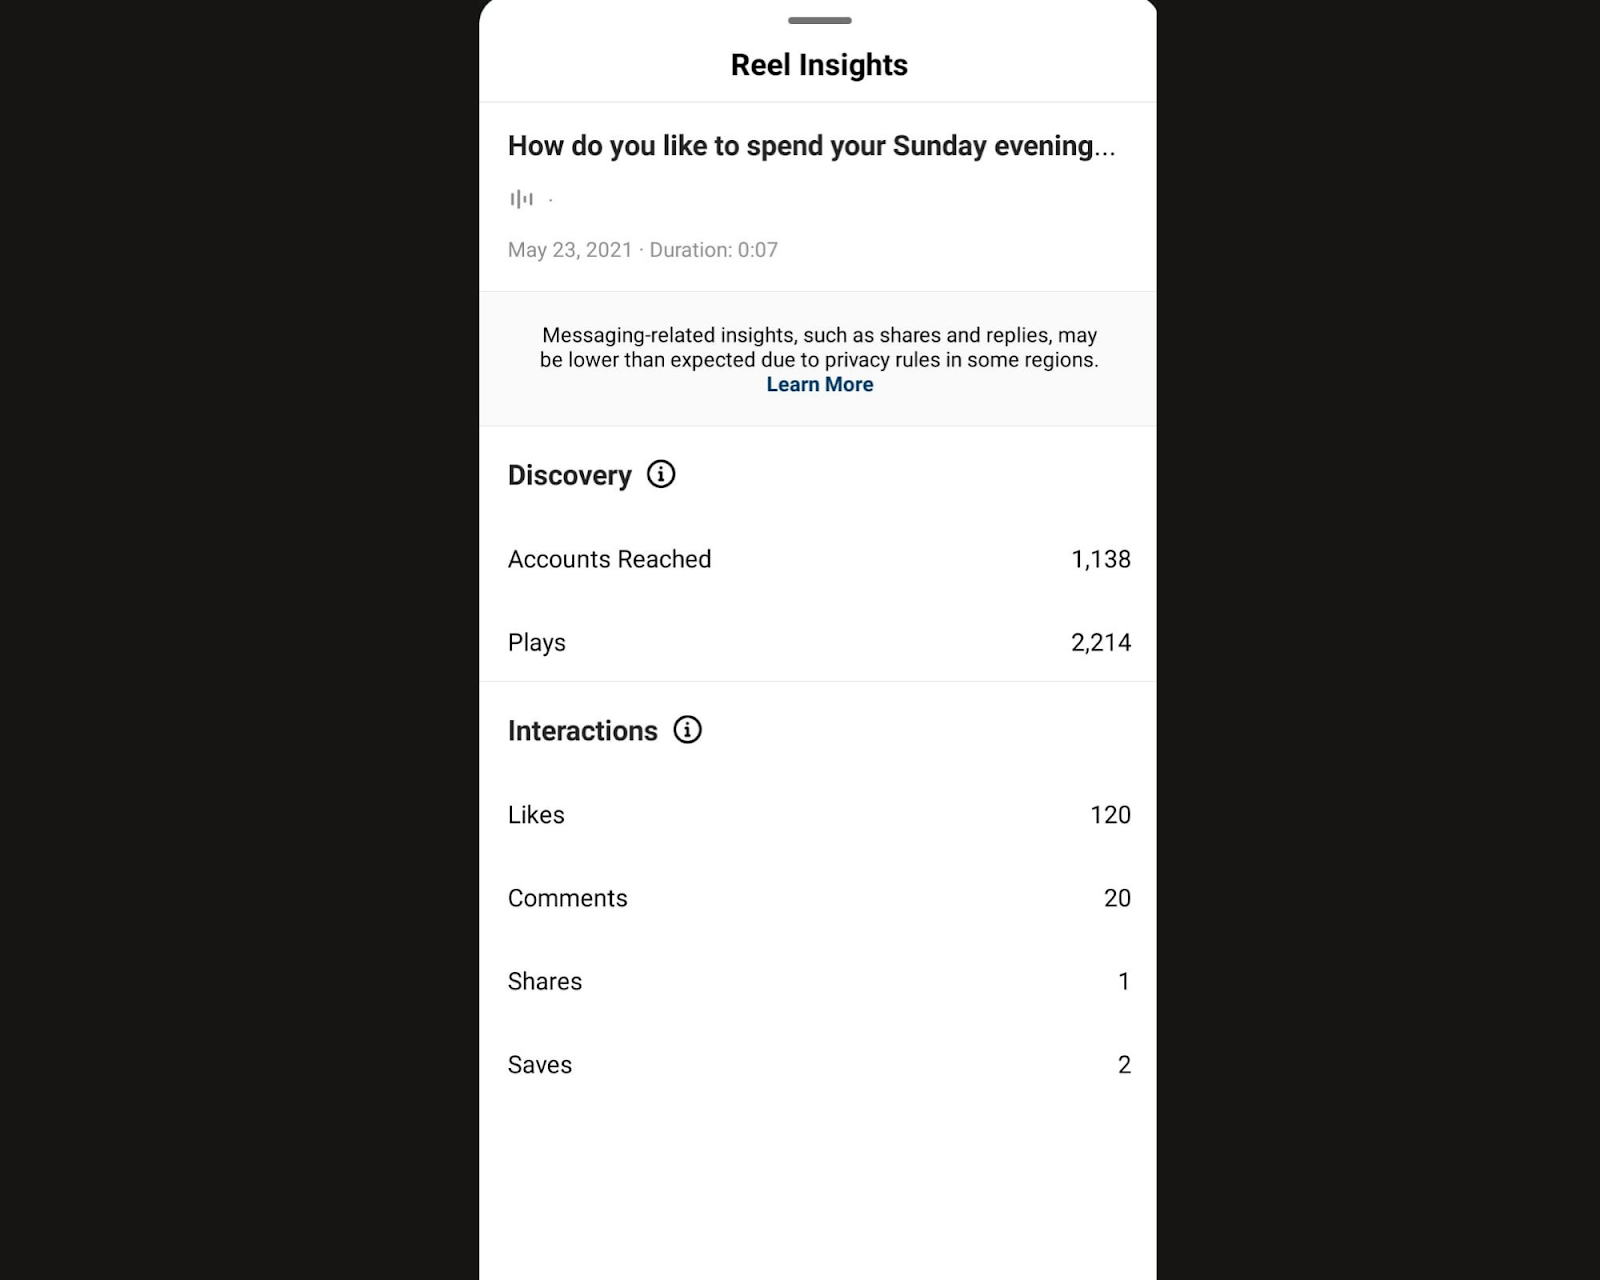
The Instagram app shows you six metrics for analyzing how your Reel performed:
- Likes: The number of people who have liked your Reels
- Comments: The number of comments your Reel has received
- Saved: The number of users who have saved your Reel for later
- Accounts reached: The number of unique accounts who saw your Reel at least once
- Shares: The number of times your Reel was shared privately on DMs with other users or as someone else’s Instagram story
- Plays: The number of times viewers played your Reel. Is this number more than the “accounts reached” for your Reel? This means some users have watched your Reel more than once
Why check your Reel insights? Checking how your Reels are performing can give you an insight into what’s working, identify opportunities for improvement, and double down on what seems to click with your audience.
For instance, a certain call to action—like asking a specific question—might be garnering the most engagement for you. Similarly, you might notice a pattern where educational Reels have the most saves since people might want to reference them in the future.
Apart from analyzing individual Reels, you can get overall engagement data (including top-performing Reels), from the “Insights” tab.
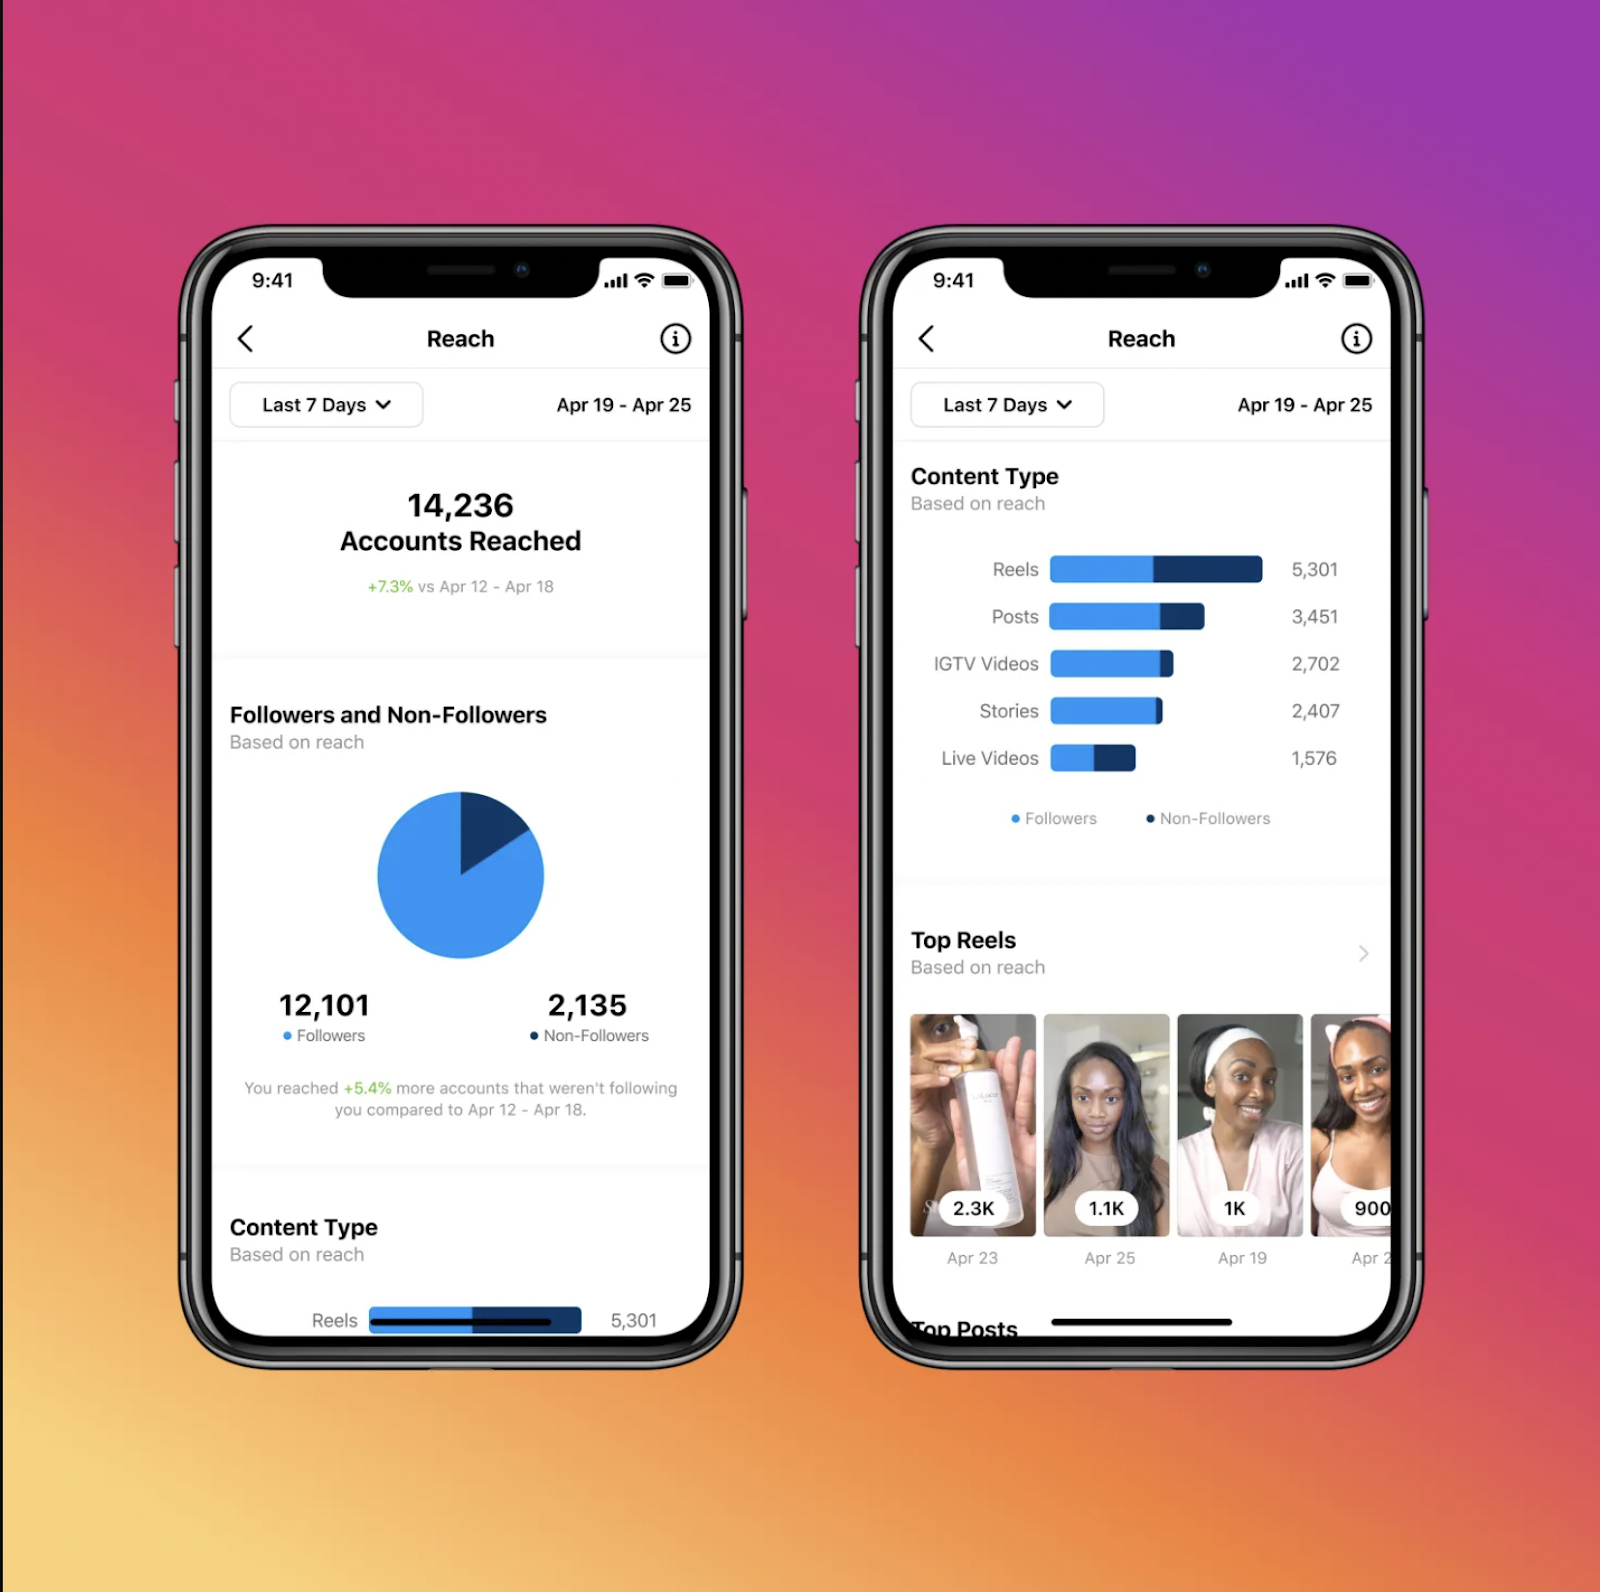
Here, you can check how much of your account growth is due to Reels, which Reels are working the best for you, and track data over time.
Data here will also highlight when most of your followers are online—a crucial metric considering the Instagram Reels algorithm prioritizes the most recent posts.
Get your nerd on every so often and give the people what they want (and when they want it).
2. Don’t skimp on writing your Instagram Reels captions
You’ve already spent hours brainstorming creative ideas, shooting the perfect video, and syncing up your audio and text. By the time you come to writing your reels’ captions, you want to pop in a few emojis and call it a day.
The harsh truth? Your reels’ captions can make or break your Instagram Reel strategy. An experiment by Hootsuite confirmed posts with longer and more thoughtful captions get more engagement than posts with shorter captions.
And Fohr’s research report found Instagram captions are getting longer and longer.
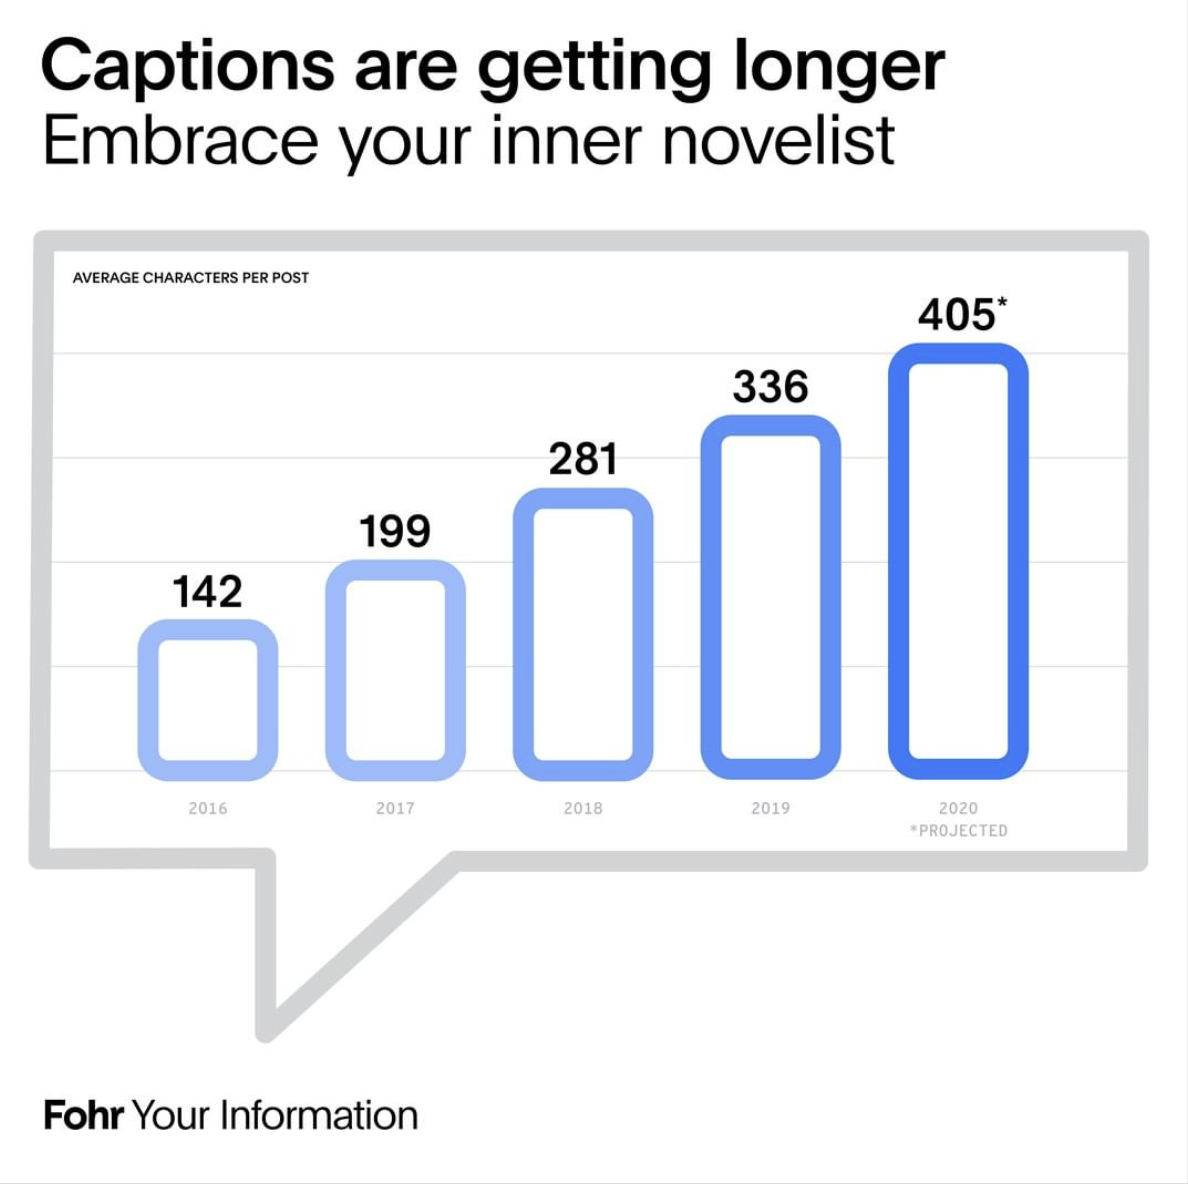
Your Instagram characters are precious. So is your audience’s time. You don’t want to waste Instagram Reel captions’ white space by just writing a few emojis or a full-fluff draft.
Make it count.
For example, in Elise Darma’s recent Reel about her free workshop, she doesn’t jump right in with, “Sign up for my free workshop!”
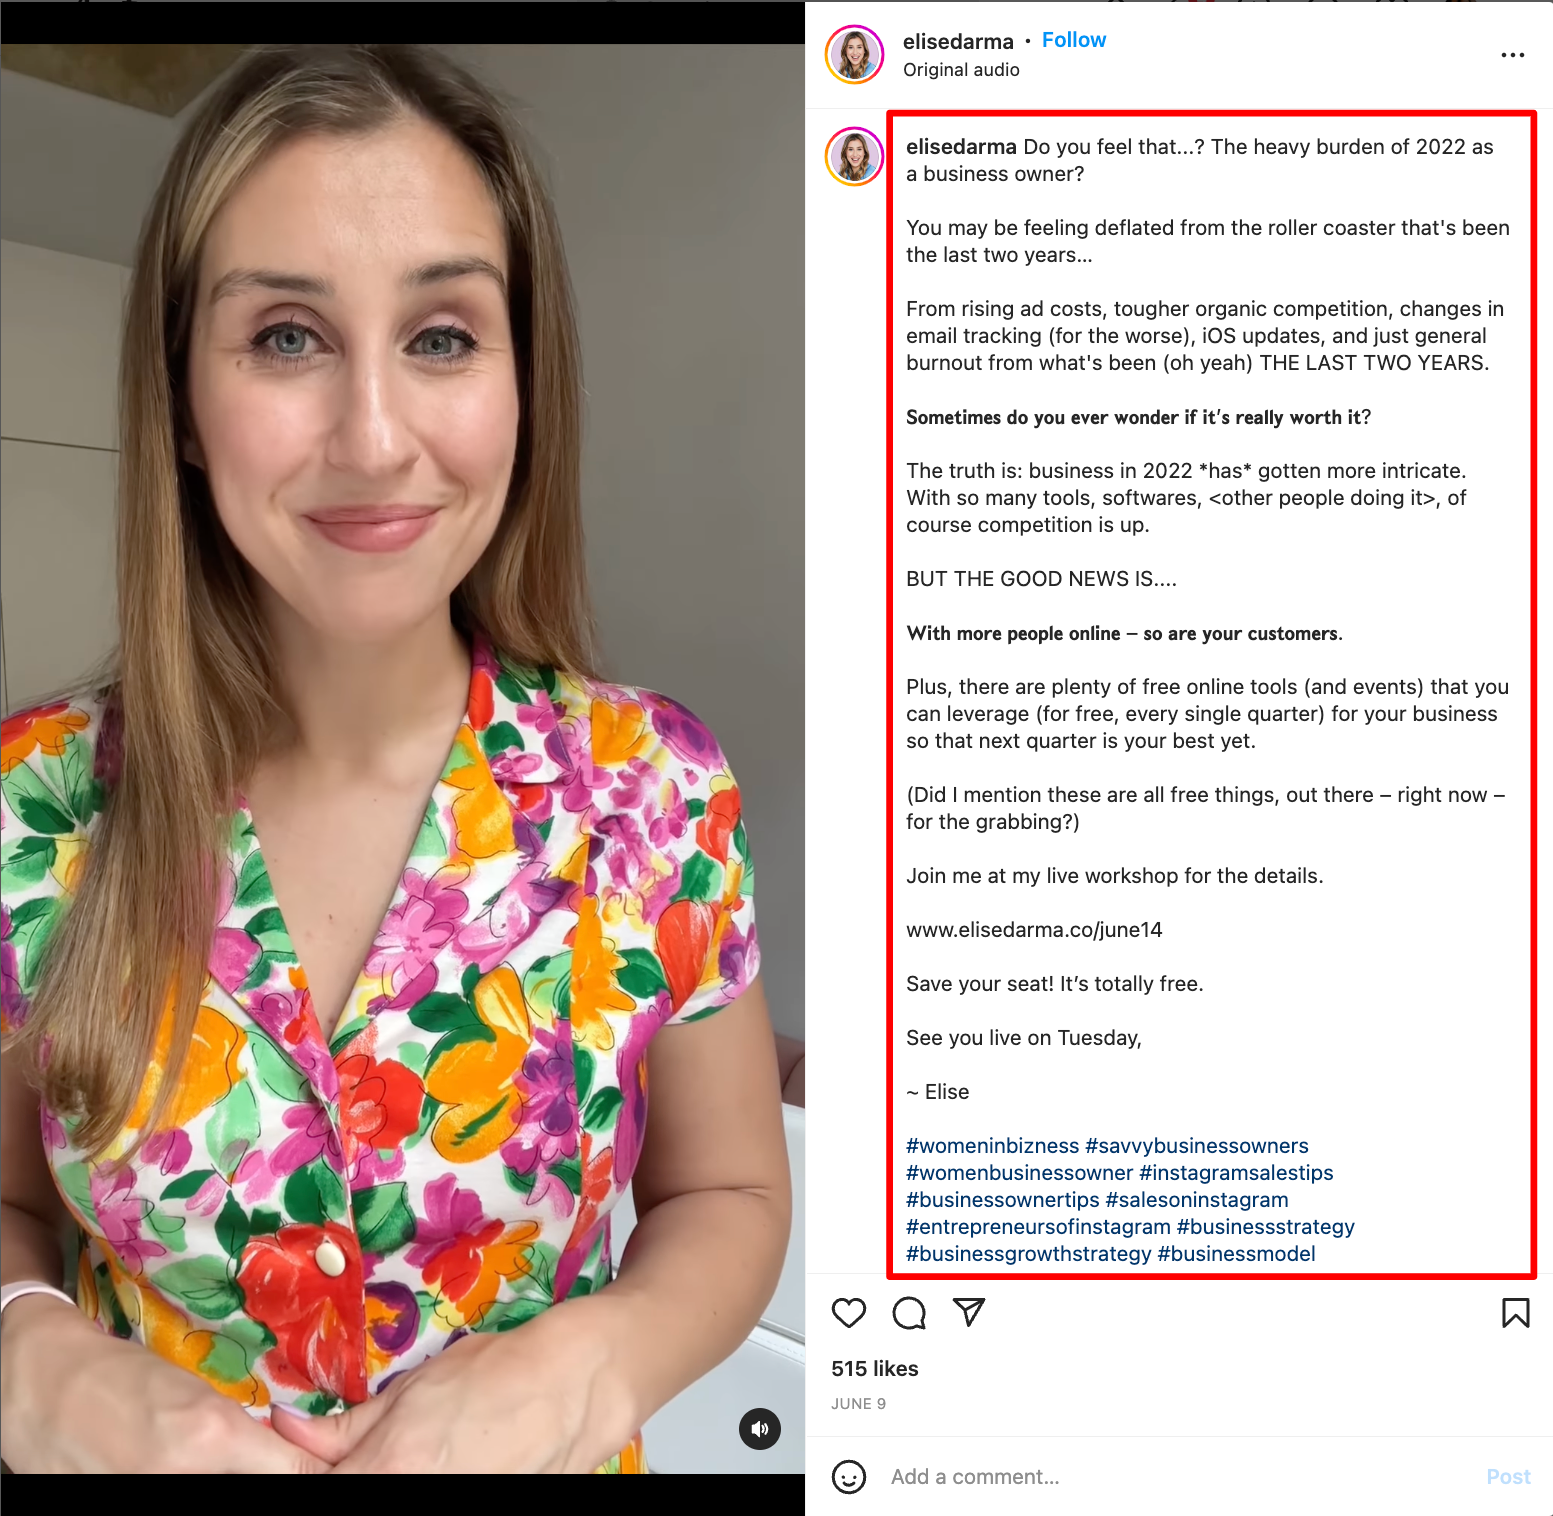
Instead, she lures the watchers in by enticing curiosity with her opening line, “Do you feel that…?”
Next, she continues the caption by writing something her audience will find relatable—rising ad costs, organic competition, iOS updates, and more.
Finally, Elise shows why her free workshop is the solution to making lemonade out of these sour lemons and slides in her call-to-action.
Undoubtedly, good captions are worth it. How do you write one without burning hours? By breaking each caption into four elements:
- Headline: Users see only one to two lines of the caption while scrolling their feed, so a headline that reels (see what I did there?) people in is crucial.
- Tease: Why should people care to continue reading your caption? Think of a juicy result to share or a statement that makes people think, “I got to know more!”
- Value: Quench the tease by sharing what you promised—whether it’s tips, inspiration, or continuing a story
- Call-to-action: What do you want people to do after they’ve watched your Reel? Recommend one action only in each Reel, so it’s easier for people to follow
Elise Darma, an Instagram educator, says not including a call-to-action in your Reels is the biggest mistake she sees creators make:
“There are lots of ways you can write a caption, but there is always a reason to include a call-to-action. Help your audience understand what the next best step for them to take is, whether that is tapping the link in your bio to download your freebie; saving your post for reference; or sending you a DM to learn more about working with you, for example. A call to action helps an interaction feel complete by giving your audience clarity about your intentions and reminds them of all that you have to offer.”
3. Repurpose your videos
Double your content production in a jiffy by repurposing long-form videos you create for webinars, YouTube videos, and interviews.
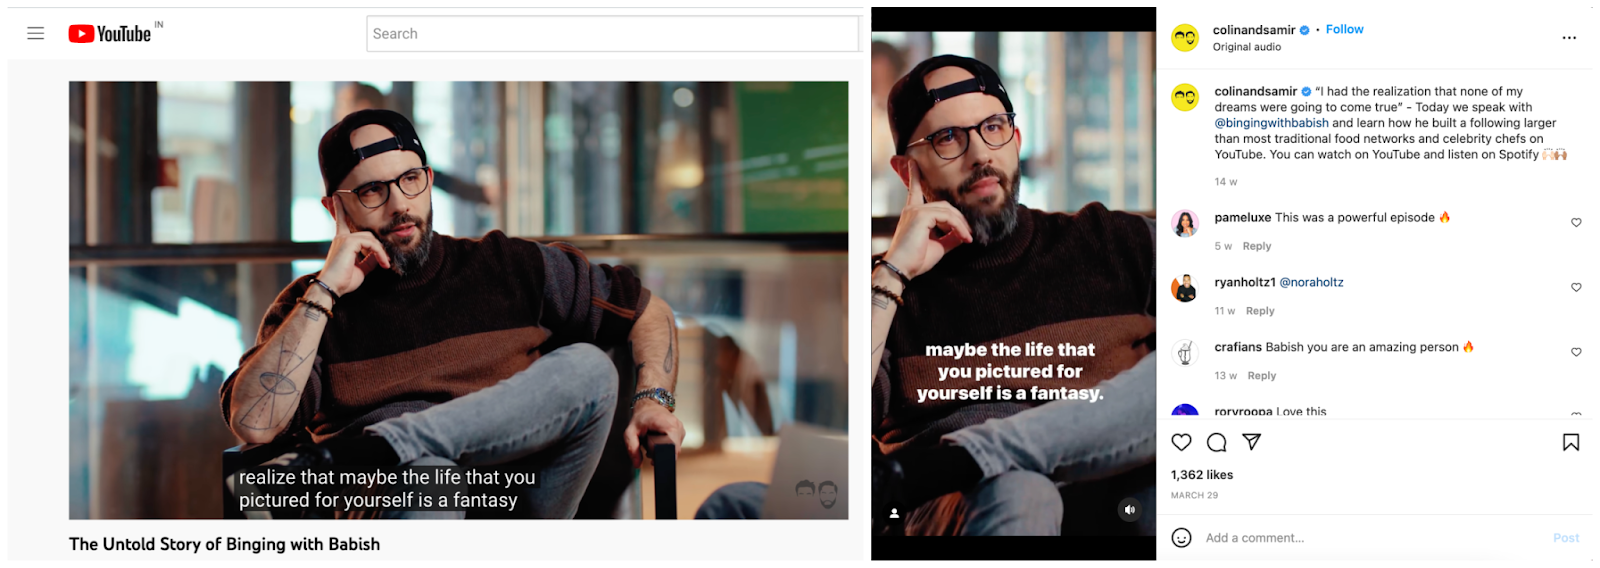
Take snippets of your long-form videos and dust them up for Instagram Reels. See how YouTubers Colin and Samir regularly share snippets of their YouTube interviews on Instagram Reels video.
You can auto-repurpose your videos easily with AI using Clips by VEED. Simply upload your videos, select "Portrait" as the orientation, and answer a few more questions. Then, let VEED automatically turn your content into engaging reels. Want to learn more? Check out this guide.
Kyle Reed, the founder of Reed Digital Marketing agency, loves VEED’s progress bar and captions:
“VEED’s caption tool was super easy to use and quick at translating to correct captions. The video progress bar allowed me to take a video to a professional level and add in that little touch that helped it stand out over other videos.”
4. Use hashtags in your caption (and make a brand-specific hashtag)
If you don’t use the right hashtags, your video won’t reach the audience it deserves. Data confirms this too: Reach increases by 11% when you use more hashtags in your Reel videos.
So, it doesn’t matter if you have the very best video in the world—one where your dance is smooth as Shakira, the edits are flawless, and the message is spot-on—if you don’t use the right hashtags.
There are all kinds of confusing information around Instagram hashtags. The top three?
- You should use only three to four hashtags or you’ll confuse the Instagram algorithm
- Find hashtag lists to copy-paste that promise increased reach without accounting for the size of your account or the following of the hashtag
- It doesn’t matter whether or not you use hashtags because it doesn’t affect your growth at all
As you can expect, the reality is far more nuanced than these generalized claims.
You shouldn’t use only three to four hashtags. If possible, use all the 30 hashtags given by Instagram. But…
Overusing hashtags won’t suddenly significantly bump up your reach or impressions. Use relevant hashtags that you can rank for and that your audience might follow.
Users often follow hashtags to see all posts related to it and the Instagram algorithm also uses hashtags to categorize Reels and push them to relevant audiences.
While you’re at it, also experiment with creating brand-specific hashtags.
Besides making you memorable and accessible, branded hashtags can also help generate user-generated content for your store, run contests, and foster a sense of community.
5. Avoid these basic mistakes
The Instagram app has plenty of features for recording, editing, and promoting your Reels. But many content creators make basic mistakes that hold them back.
Here are a few Reel blunders you want to avoid at all costs:
- Not cutting your uhm, uh, and pauses: With short-form video content like Reels, you want to talk fast and edit fast. There should be no ‘um, uh’ and pauses. Trim all of that fat using Magic Cut by VEED.
- Not creating a mix of long and short Reels: New viewers might be receptive to investing 30-90 seconds of their time in your video. So, create a mix of short and long Reels. If you provide enough value in a 15-second Reel, you’ll get people’s attention and trust—making them watch your longer videos as well. Then, use the new 90-second limit to share in-depth information in your niche and forge a deeper connection with your audience. Keep your focus on providing value without fluff, regardless of the length.
- Not adding subtitles or text on your videos: Who here has scrolled Instagram Reels during a boring office meeting? Don’t worry, we won’t tell your manager (we’re raising our hands too!). Adding subtitles and text on your videos improves comprehension for those who cannot turn their sounds on—whether it’s because they’re in a quiet space without headphones or because they want to tune out a rambling coworker.
Not to mention: Over five percent of the population—or 430 million people—are deaf or hard of hearing. Subtitles and text make your Instagram Reels more accessible and inclusive.
The best part? You improve your shot at engagement and growth when more people understand your video.
Find Instagram’s native captions faulty? Don’t like the limiting font options for captions? You’re not alone. Use VEED to add accurate subtitles and choose from various fonts, letter cases, line height, and formatting.
- Not sharing your Reels to your Instagram story: If you share your published Reel on your Instagram stories, Instagram will play the Reel on your story for up to 15-seconds. The best part? Instagram counts this story’s views as part of your Reel's views. Boost your reach by sharing your Reels on your stories frequently—especially your old Reels that have dried up, but you want to bring back from the grave. To maximize performance further, learn advanced tactics to increase your views through strategic optimization and audience engagement techniques.
How to share your Instagram Reels on your story? Click the “share” button below the comment option and select “add Reel to story.”
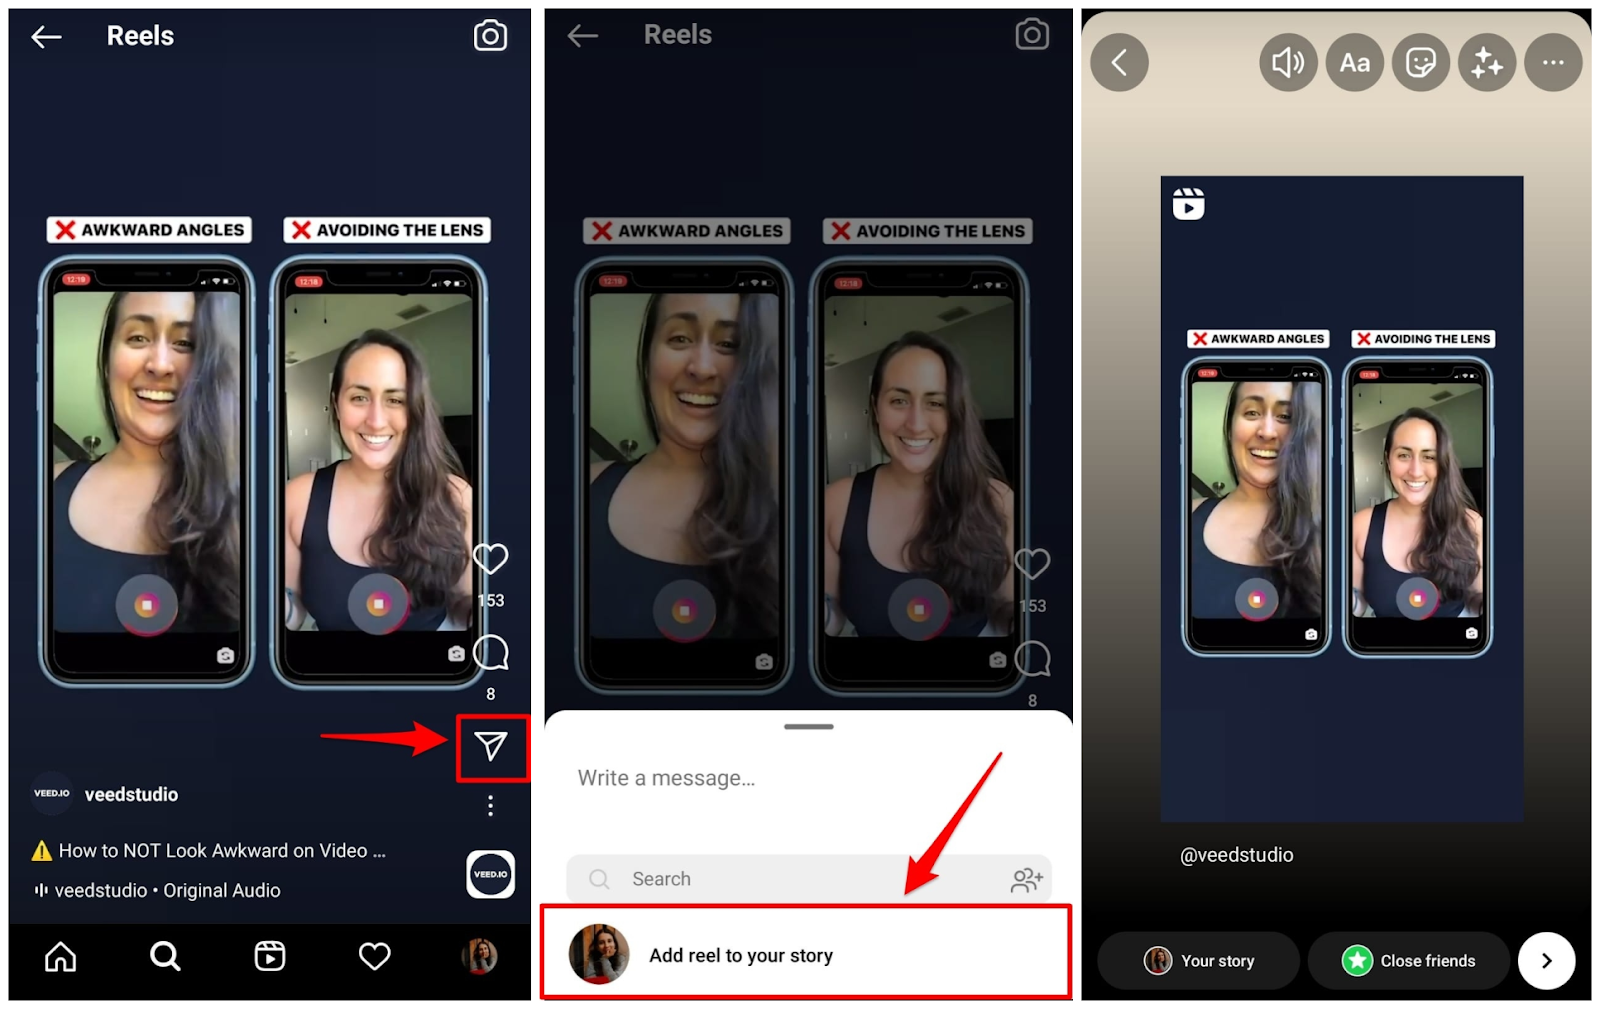
You’ll get an option to adjust how your Reel appears—add some text or stickers if you wish. For example, see how finance influencer Shreya Kapoor, shared her recent Reel with text, a sticker, music, and a poll.

The best part? She used curiosity-gap to highlight what her Reel was about (“Learn how to save taxes”) without revealing her Reel content by putting an image on top of it and adding music to drown the voiceover.
- Not pitching your topic in the first three seconds: On Instagram Reels, people decide fast if they want to stick around. Your first three seconds should answer, “What’s in it for me?” for the watcher or pique enough curiosity to make them stick around. There’s no room for jibber-jabber on short-form videos.
Remember to have fun!
Instagram Reels video has become the app’s fastest growing feature worldwide. As the popularity of Reels continues to boom, you’ll get bombarded with a lot of advice centering on what to do, what not to do, and what to absolutely avoid—all of which keep shifting as Instagram evolves.
Instead of getting overwhelmed trying to keep up with all the trends, features, and algorithm updates, treat Instagram Reels as your creative outlet. Experiment, have fun, and form a genuine connection with your audience using Reels.