
Want to create professional-looking videos on your Mac, but don’t know how or where to get started? You could use Apple’s Quicktime if you only want to do basic edits like trimming your video clips. Or if you’re comfortable using a more complex video editing software, and have enough storage space on your Mac, you could use iMovie.
However, if you want to add a more professional flair to your videos, yet you only have beginner-level editing skills and not a lot of free storage space, VEED might be more up your alley.
VEED is an online, beginner-friendly video editing program that lets you record, edit, review, and share videos in the simplest way possible. With classic and advanced tools (powered with AI) such as auto subtitles, templates, transitions, and more, it makes editing videos a walk in the park. Plus, since it’s cloud-based, the video projects you build on VEED won’t take up any space on your device or significant system resources while you edit. It’s simply one of the best video editing software for Mac! Just fire it up on Safari and get started.
How to edit videos on Mac (overview of steps):
- Sign Up and Log In
- Set Up Your Video Project
- Set Your Aspect Ratio
- Start Editing Your Project
- Export and Share Your Video
Let’s dive into the tutorial.
[#TOC1]1. Sign Up and Log In[#TOC1]
Launch Safari or any browser you are comfortable using, and go to VEED.io.
You can see the Login and Sign up buttons in the upper right corner. You can either sign up with your email/Google Account, or get a magic link to log in. Once you’re done signing up/logging in, you’ll be led to your workspace, which is where you can manage all of your video projects.
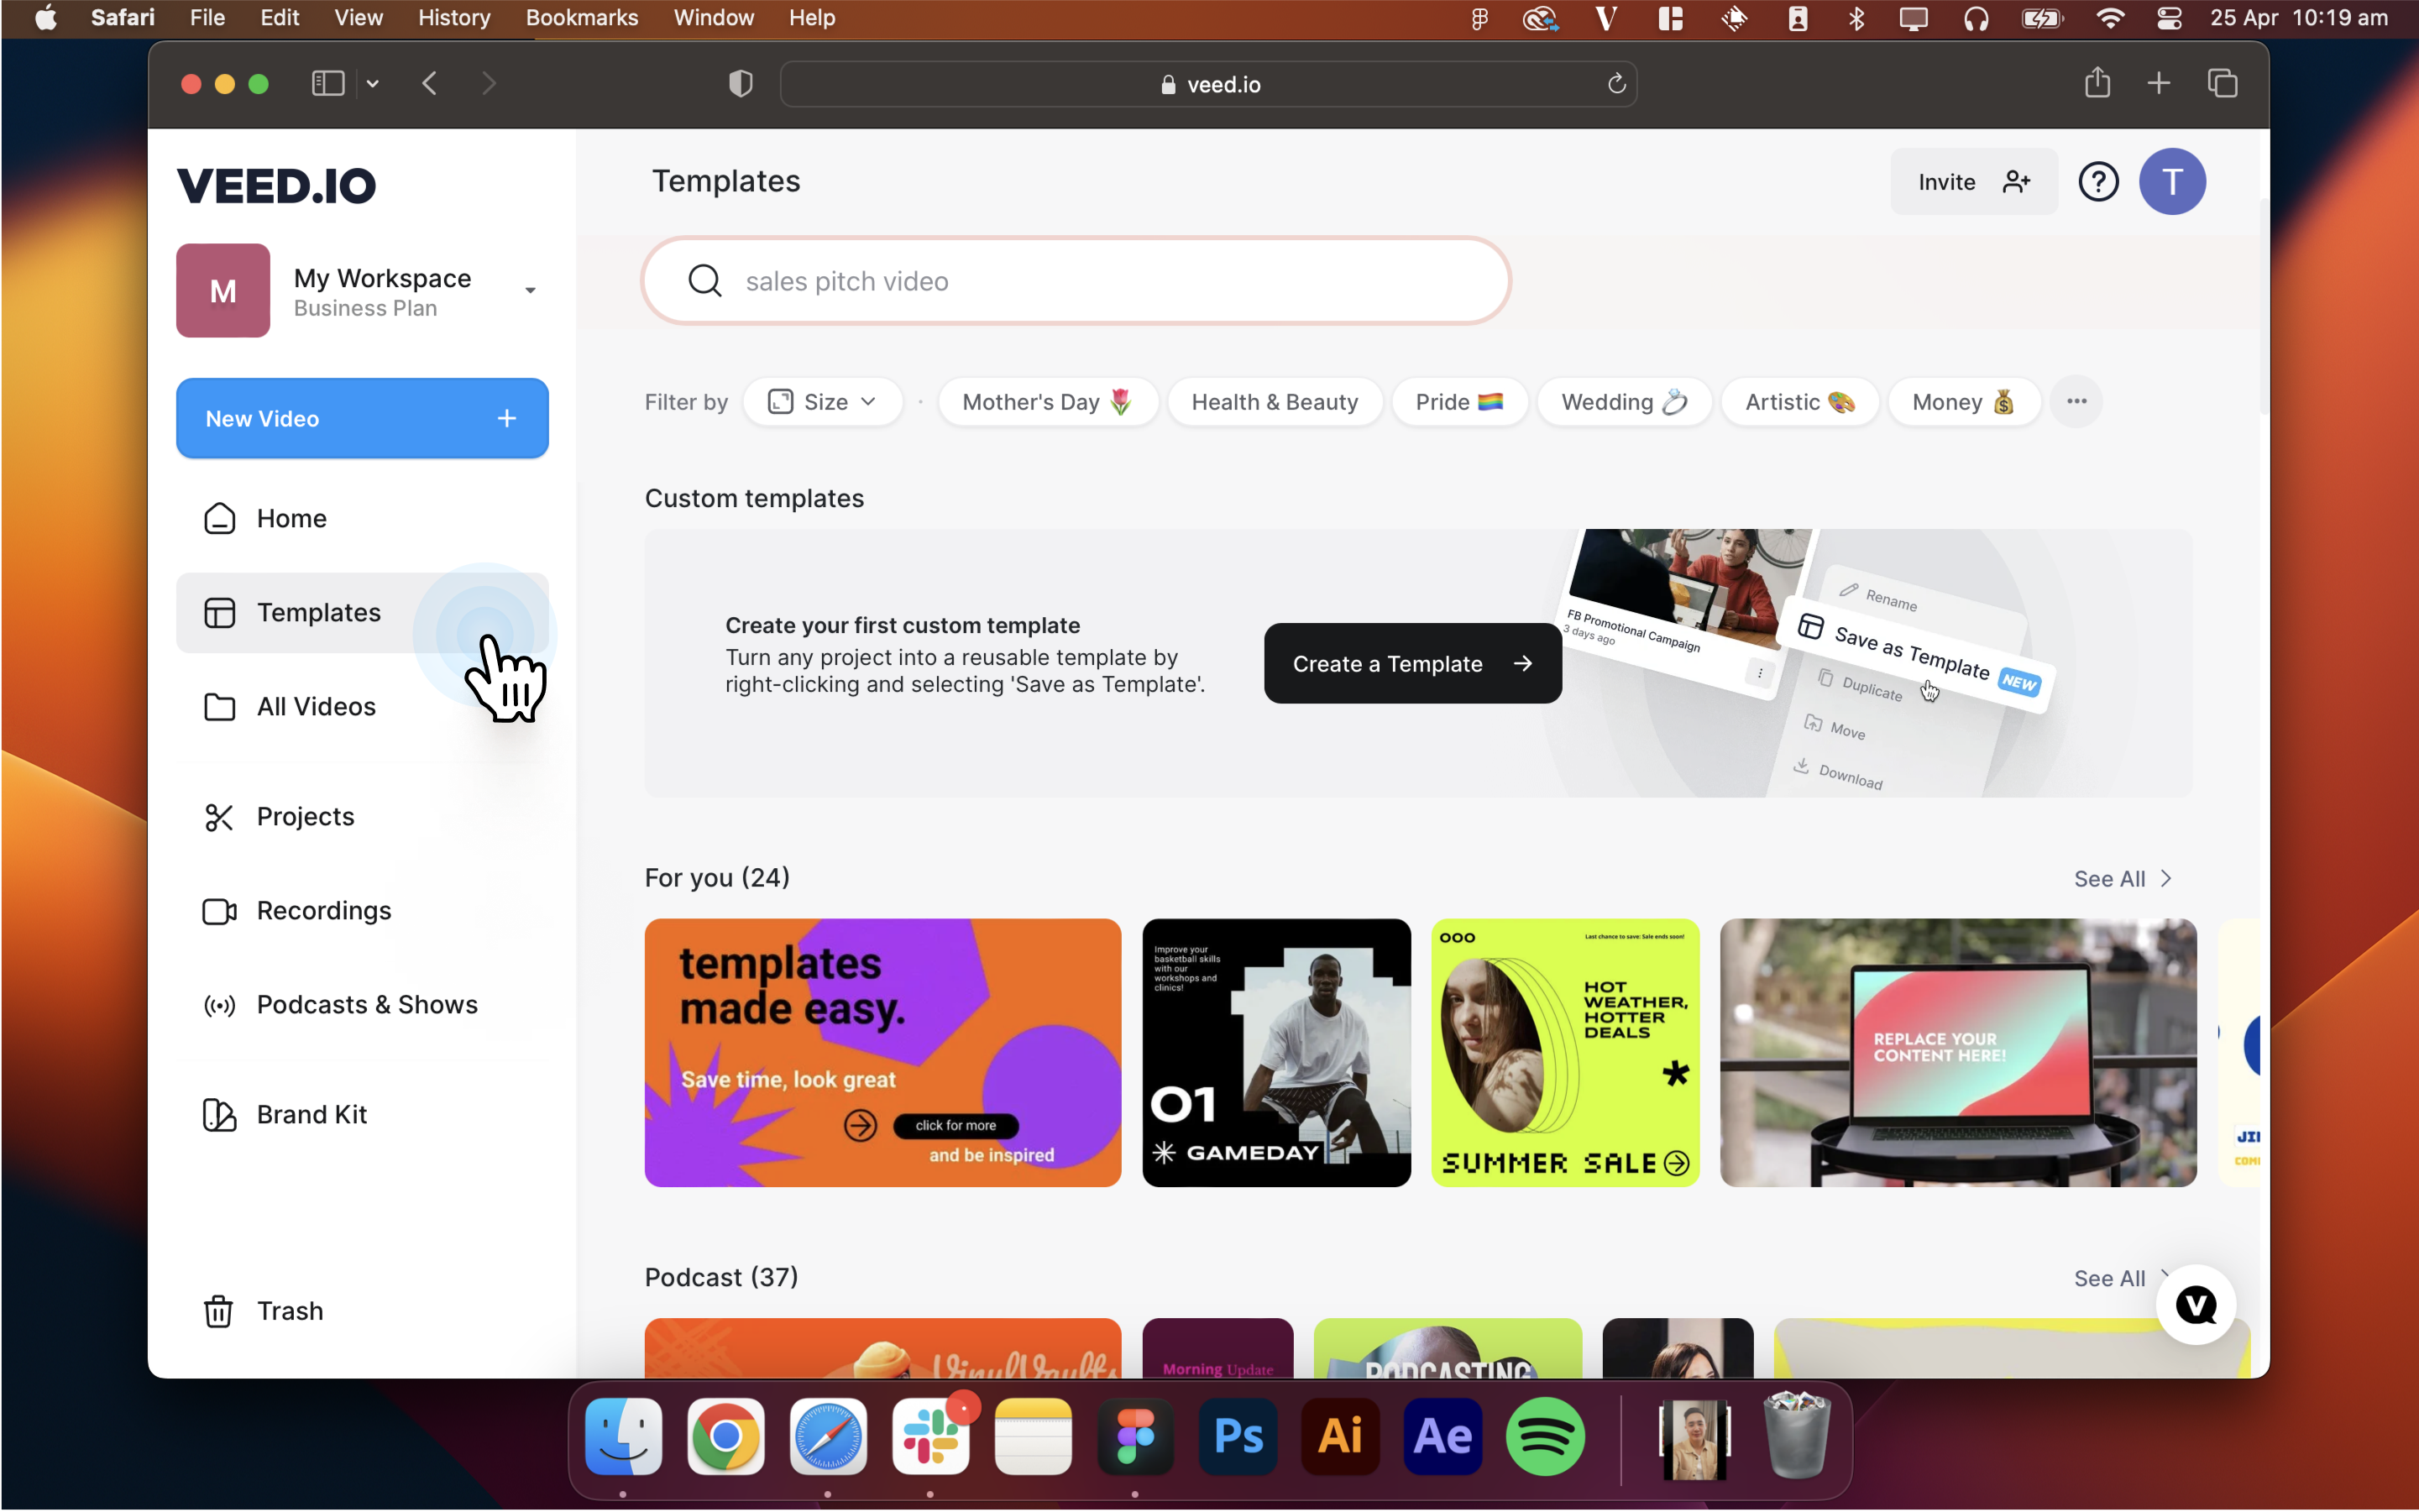
[#TOC2]2. Set Up Your Video Project[#TOC2]
On your VEED workspace, click on Create Project at the top to get started. This will lead you to the free video editor, where you can:
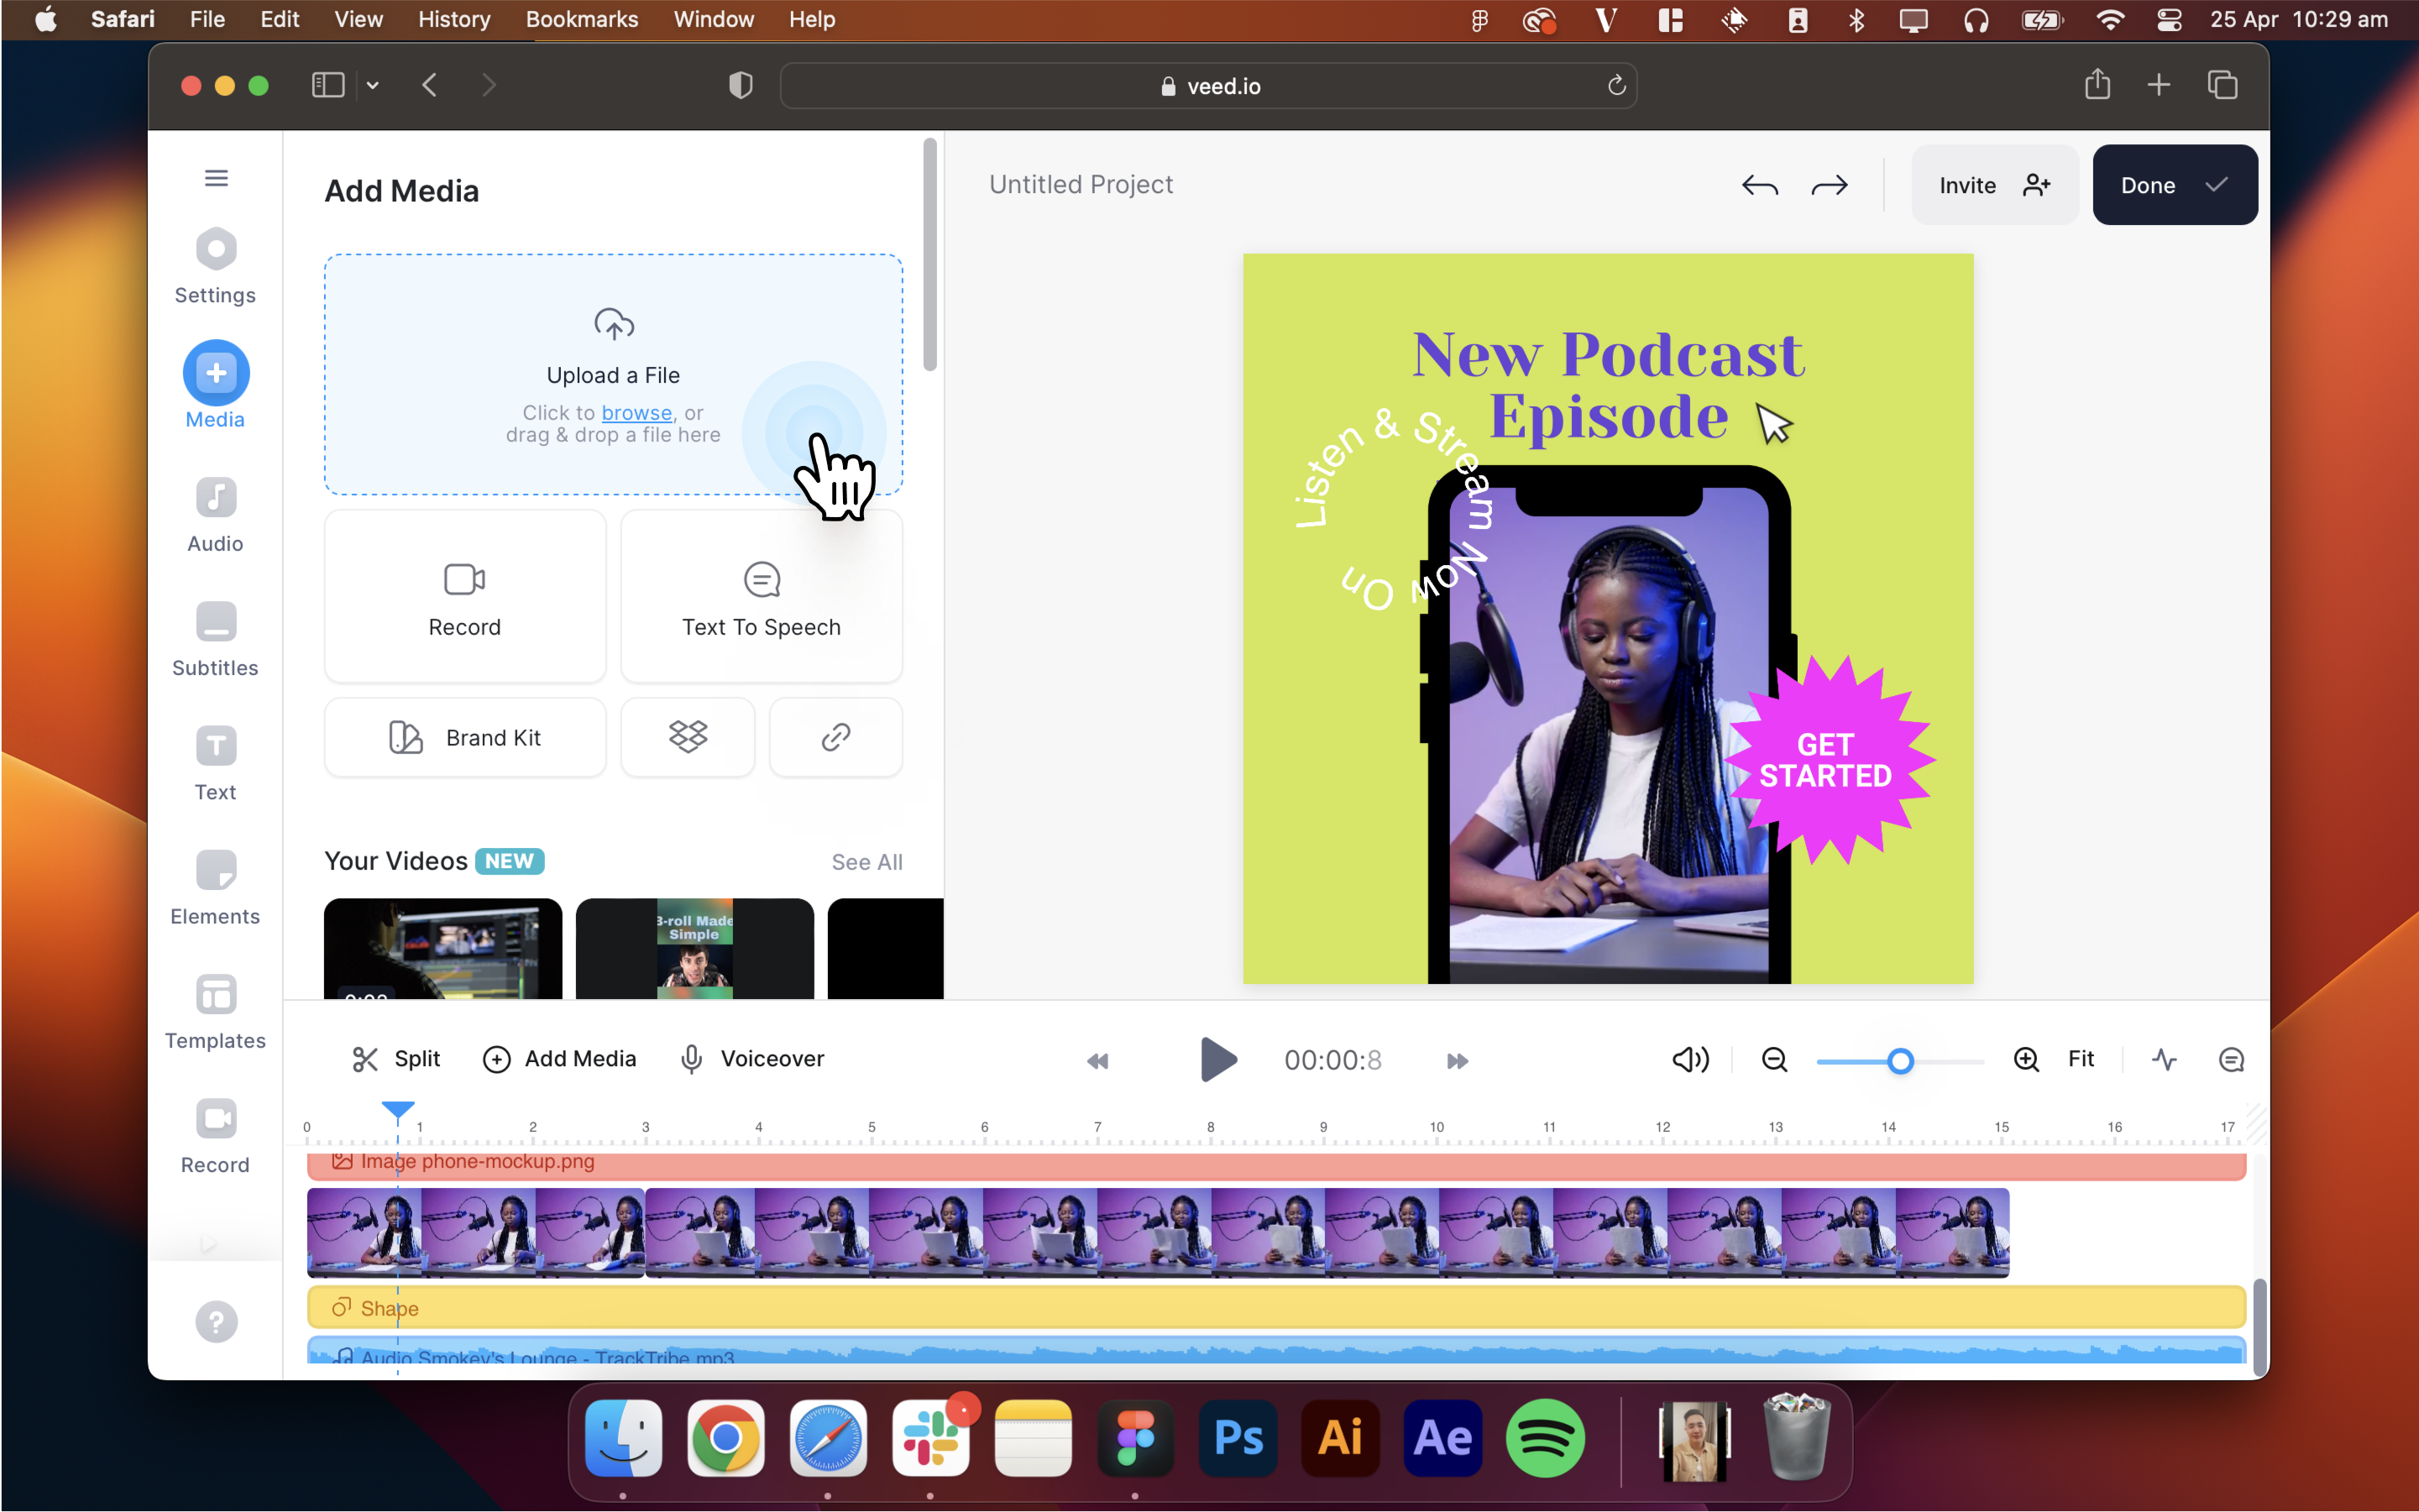
- Upload your video, audio, and/or image file(s). VEED supports a wide range of video formats, including M4V, MP4, AVI, MOV, and more.
- Record yourself (from within VEED).
- Load up a TikTok or a Twitch video via a URL.
- Start working with free stock footage or audio.
- Proceed with one of our ready-to-use templates.
- Proceed with a completely blank canvas.
Tip: Give your new project a name by clicking on "Untitled Project" above the video on the editor. This will allow you to easily sort through your video projects on your workspace later.
[#TOC3]3. Set Your Aspect Ratio[#TOC3]
Next, you want to set a suitable aspect ratio for your project depending on where you plan on sharing your video. You can easily configure this on VEED. Simply click on Settings in the toolbar to the left. Next, find the dropdown menu under where it says Size and select the most suitable option.
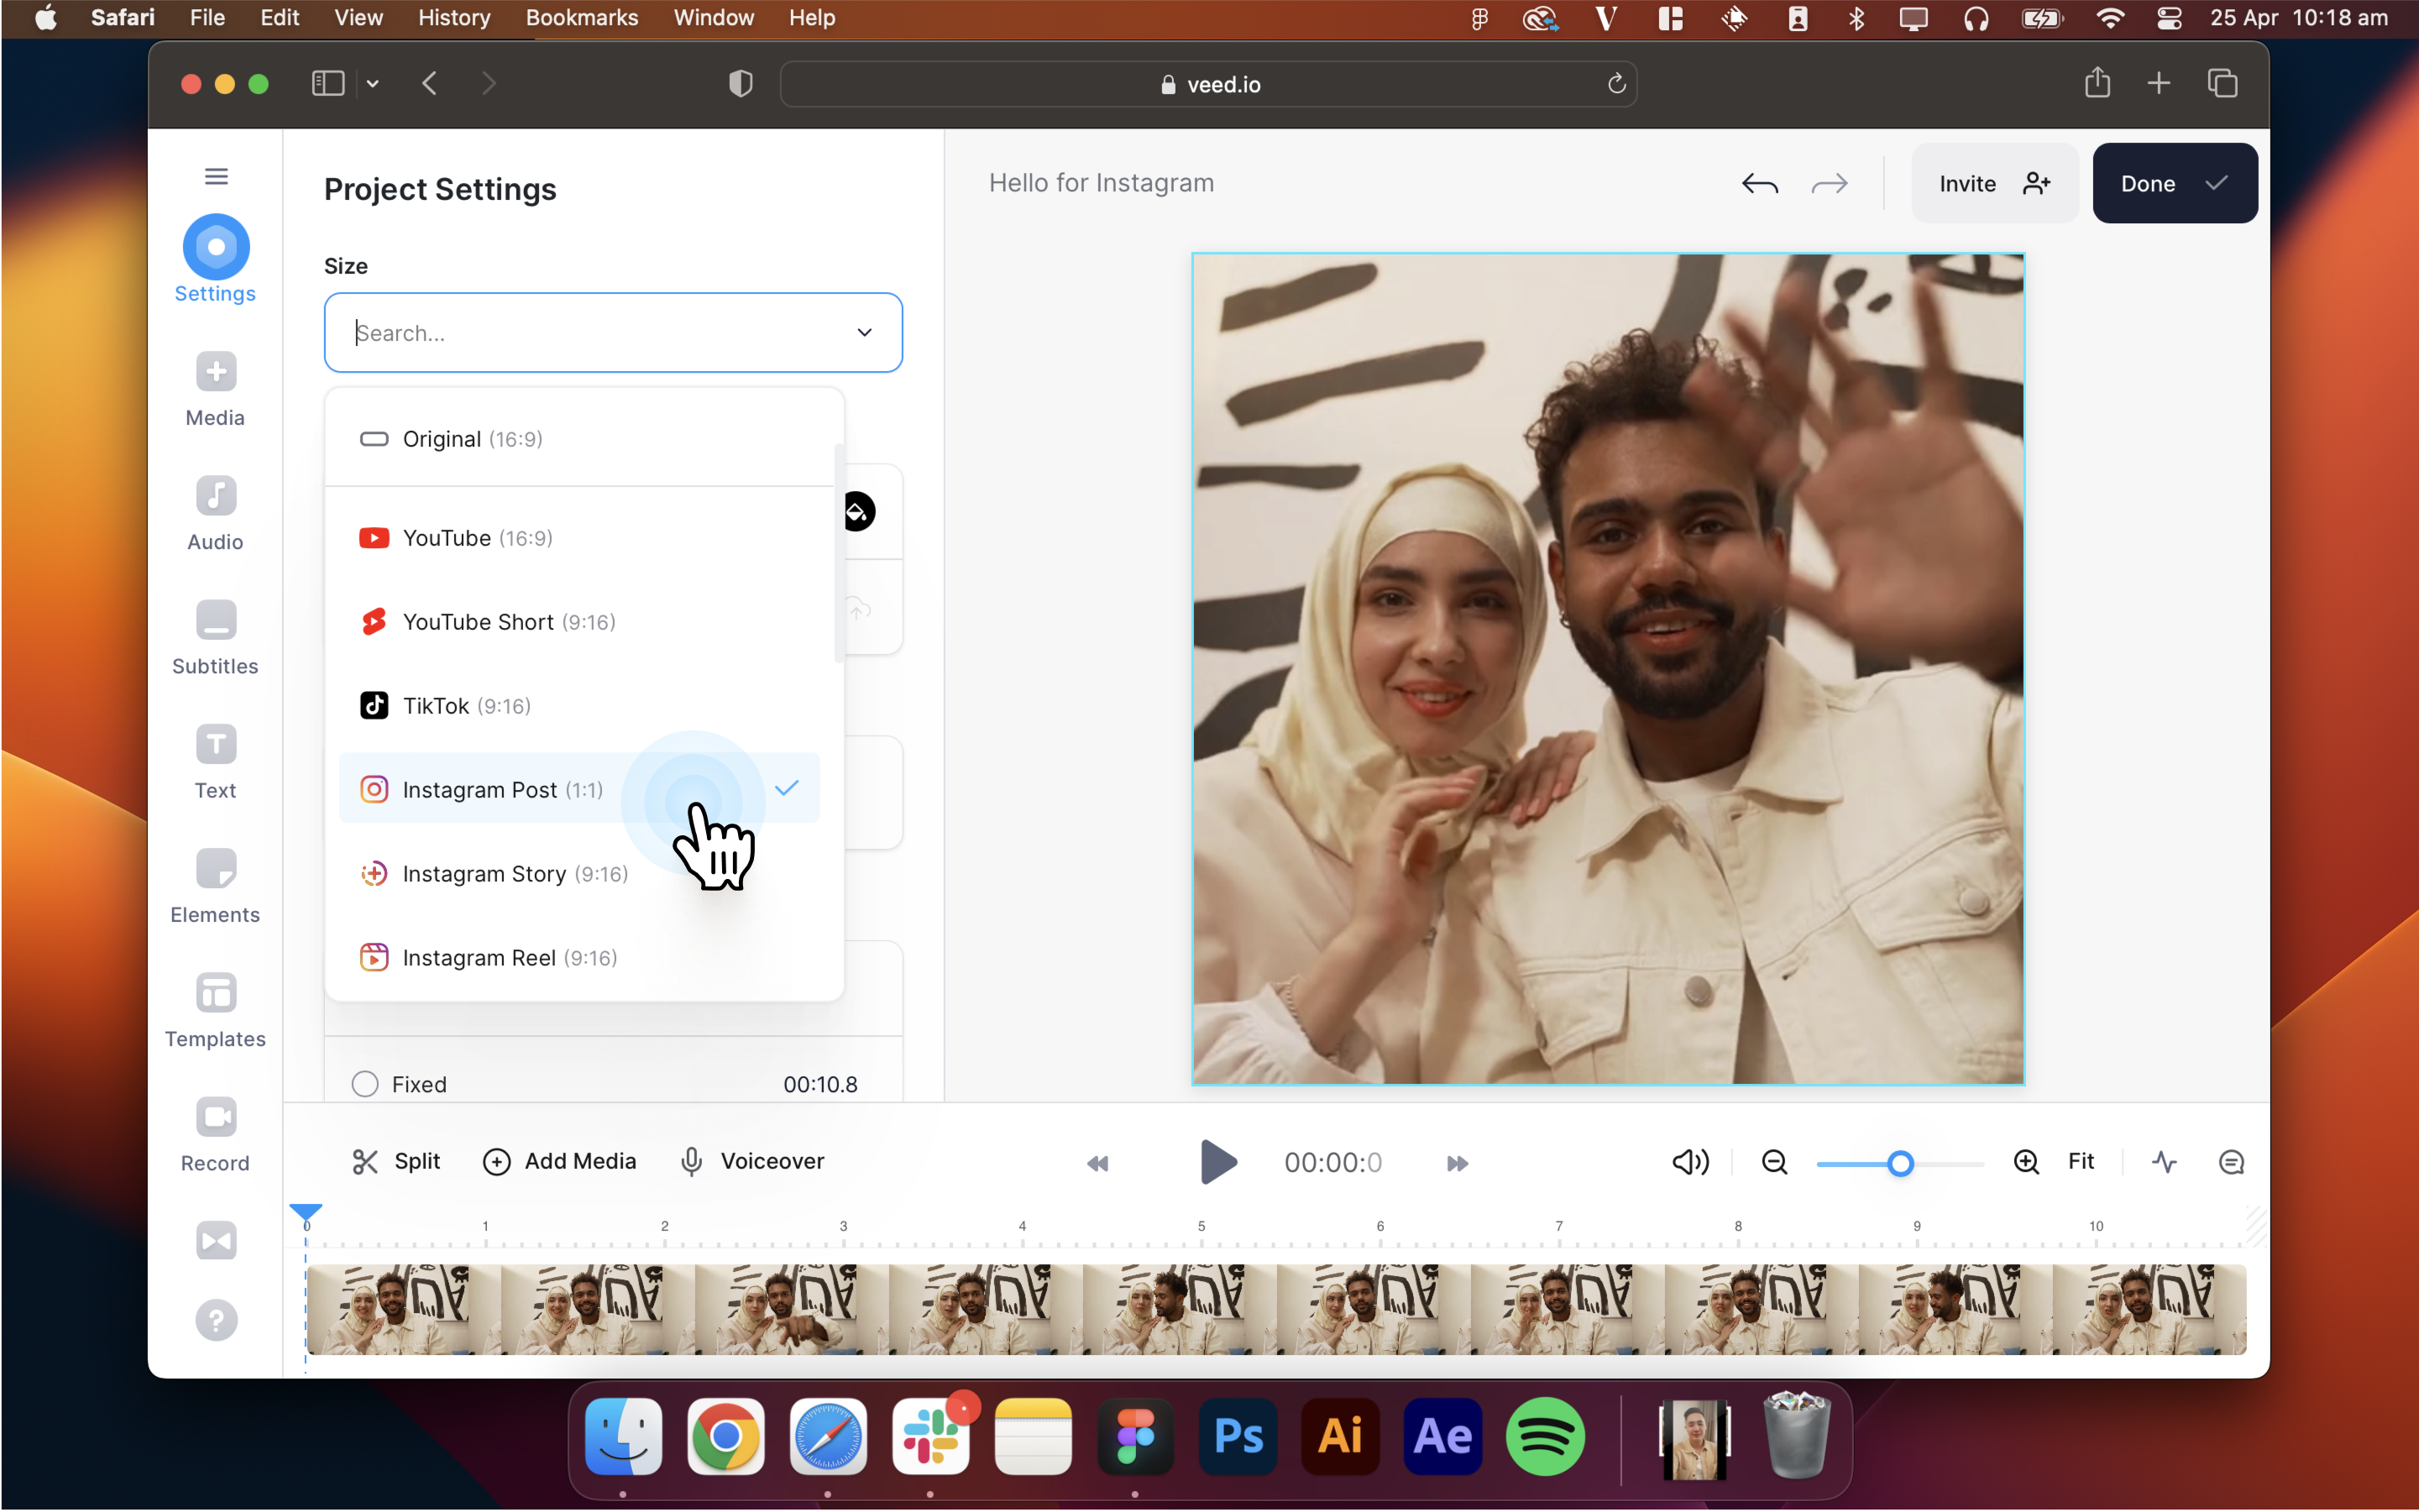
We’ve made it easier to pick the ideal aspect ratio based on the platforms where you want to share your video content. Choose from ready-to-use aspect ratios for YouTube, YouTube Shorts, Instagram Posts, and more.
[#TOC4]4. Start Editing Your Video[#TOC4]
Use a Template to Get Started
If you're creating a project from scratch and are pressed for time, don't worry. VEED offers numerous templates for you to choose from. Simply pick the one that best suits your topic, goal, audience, and platform.
Trim and Split Your Videos
Often, our videos will have parts that we don’t want to include. These parts may be too long, awkward, or contain mistakes. Or maybe the lighting in some scenes is just off and you’d rather not show them. Whatever the case, VEED lets you do that with ease. All you need to do is to drag the end tail of your video in the timeline towards a desired part to get rid of any unwanted moments. This will trim or cut out the section of your video which you do not wish to include.
VEED also offers a Split feature that allows you to split your video into smaller segments. To use this feature, simply place the video time bar at the time stamp where you want to split the video, then click on Split. Your video will be divided into two separate clips, which you can edit individually. You can even combine two separate video clips together.
Trim out unwanted bits from your videos with Magic Cut (Coming Soon!) Imagine cutting out filler words, outtakes, and dead air from your videos with the single click of a button. Well, this will be possible with Magic Cut — one of VEED’s upcoming AI editing features that will revolutionize the way we edit videos. It will allow you to automatically edit out unwanted bits (outtakes, mistakes, throat clearing, filler words, etc.) from your video recordings…with only a single click! Sign up for early access here.
Add Audio
High quality audio can go a long way in improving the production value of your video and keeping your viewers engaged. VEED offers a wide selection of useful audio features to help you on that front, including, but not limited to:
- Voiceover: this option lets you record your voice and place it over your video. A good microphone embedded in a quality headset, or even the built-in microphone in your Mac device will do the trick. Just click Record and start talking. Once you are done recording, click Done to apply your voiceover to your video. It's that easy!

- Clean Audio: an AI-powered feature that automatically removes unwanted background noise — chatter, car honks, wind, etc. — from your audio. This tool is perfect if you don’t have a high-end microphone.
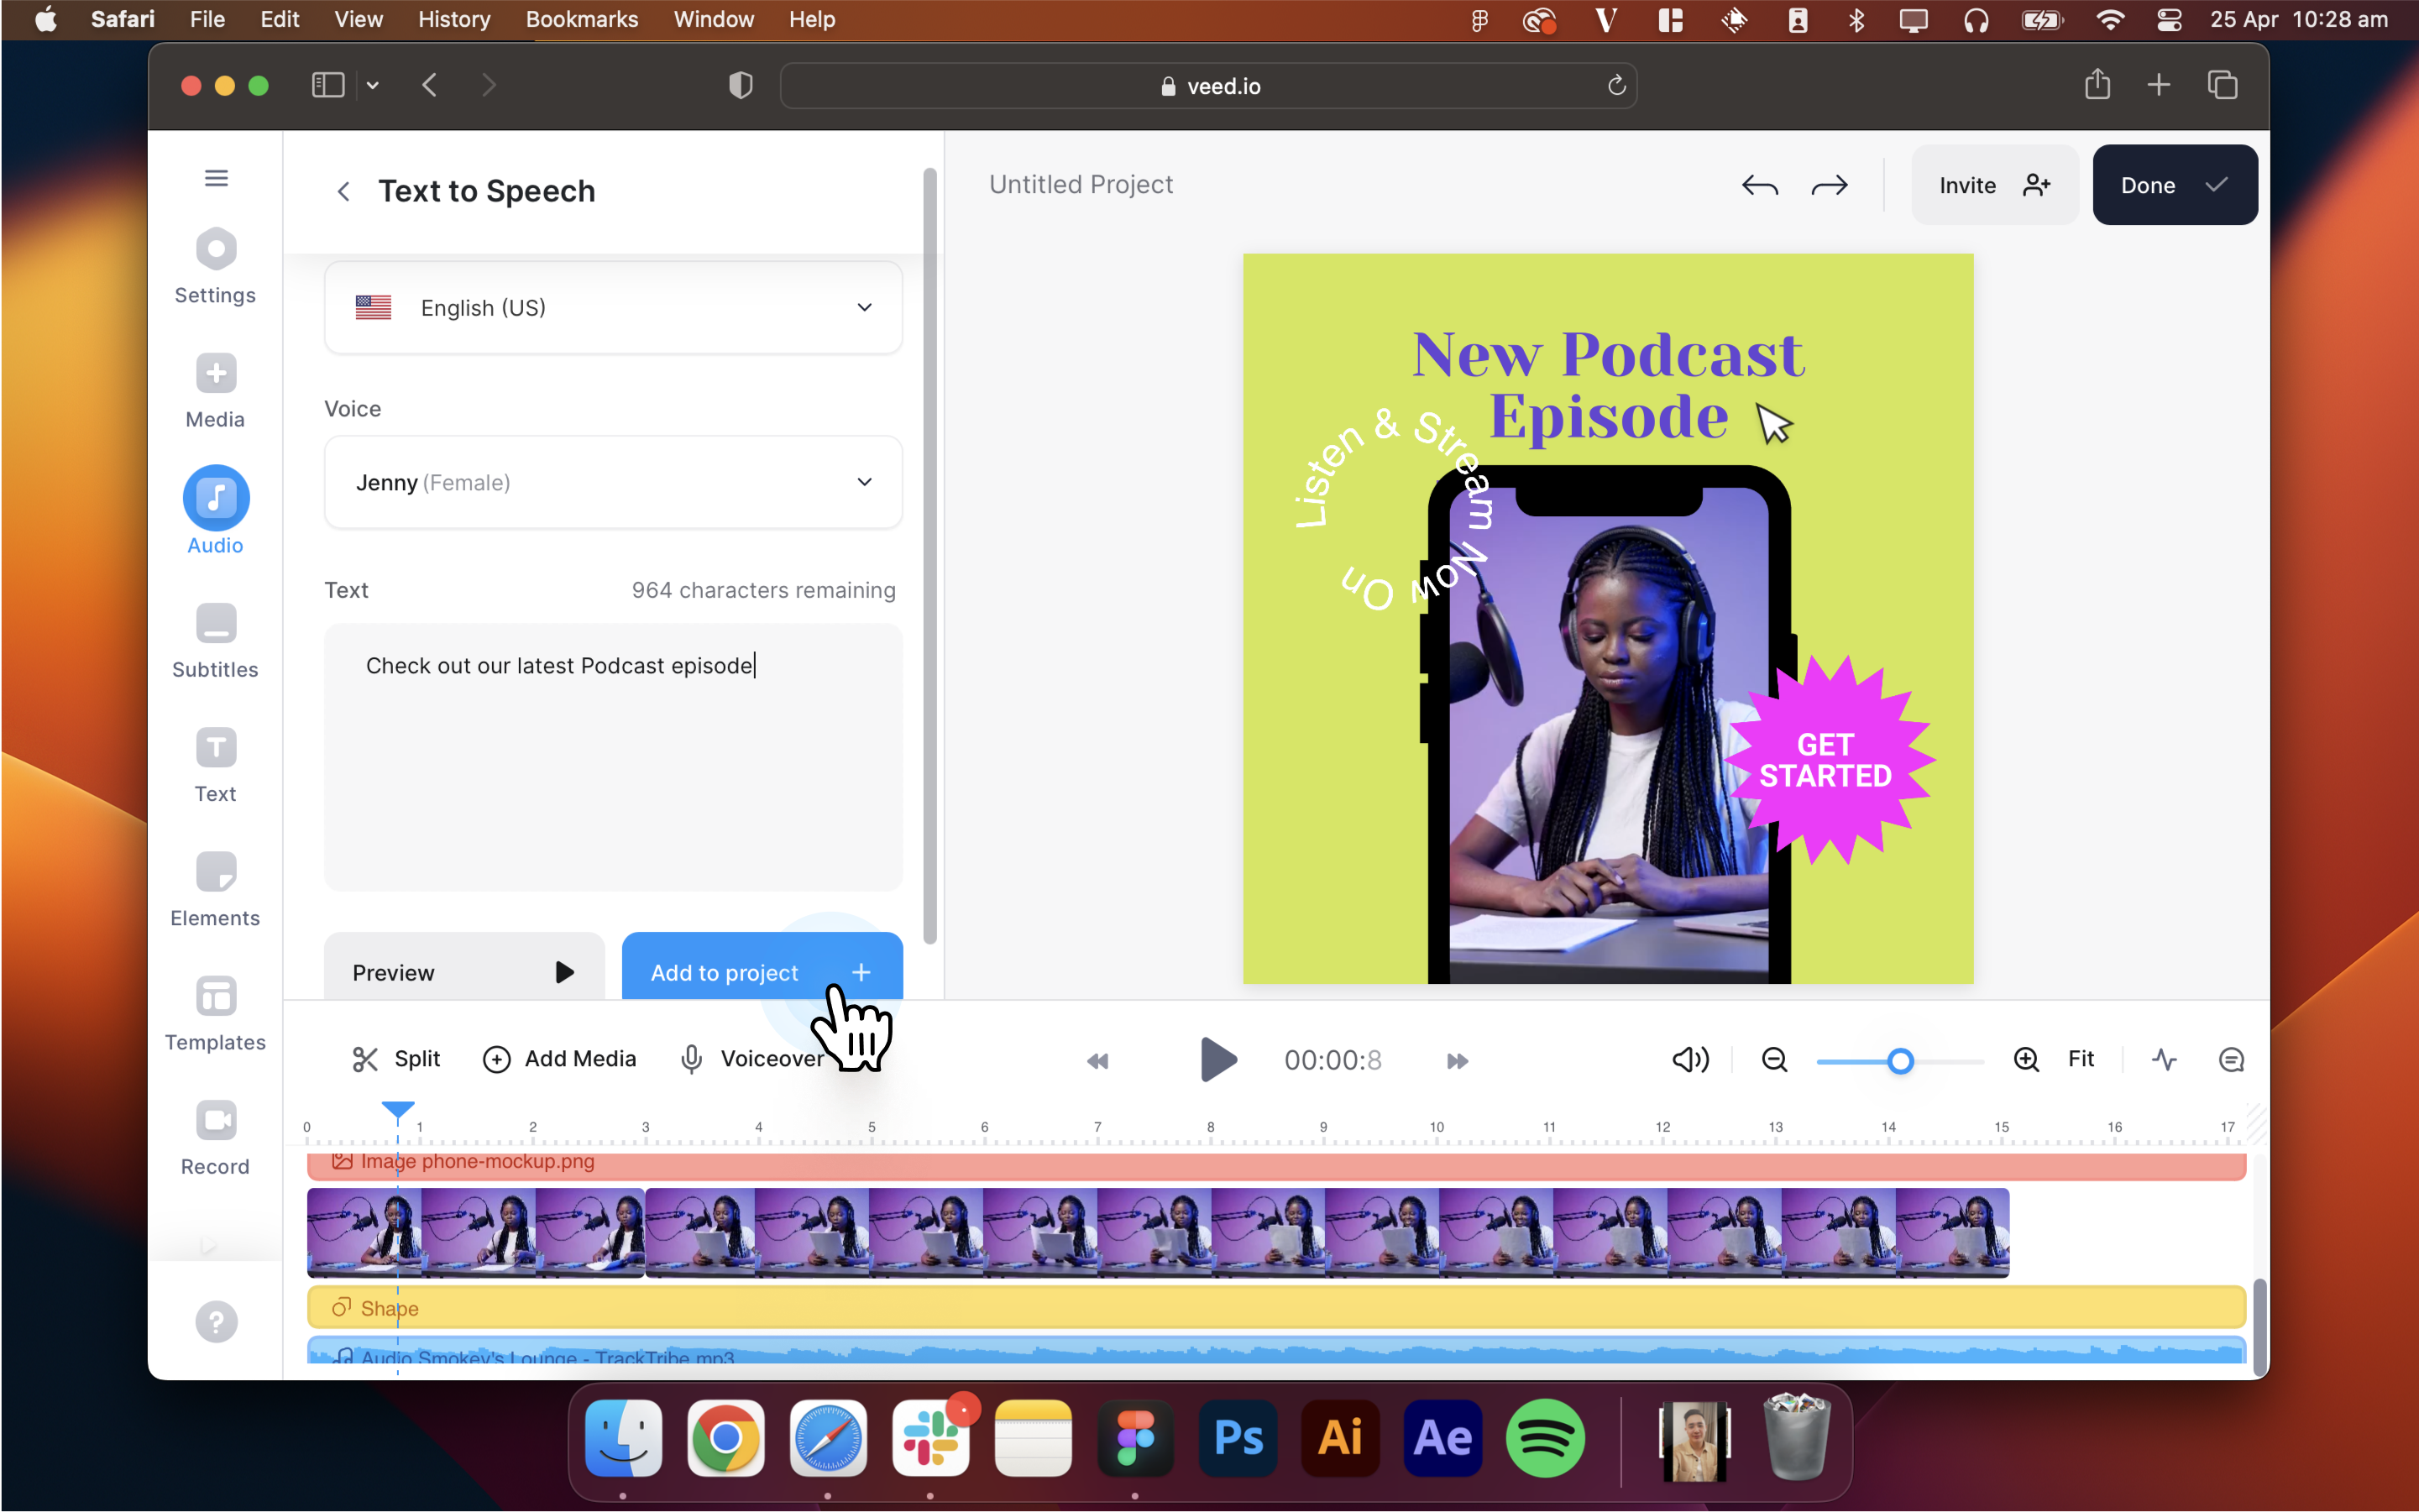
- Text-to-Speech: if you don't want to use your own voice, you can use VEED’s AI-powered Text-to-Speech feature instead. With this tool, all you need to do is to write down a script and let an AI voice narrate it for you. You get to choose your desired language, along with a voice you like. To use this feature, click the Text-to-Speech button, select the language and the voice you want, and write your script in the text field.
- Upload your own files: if you have pre-recorded audio files you’d like to use, you can add them to your project by clicking Upload a File on either the Audio or Media tab. Navigate to your files on your device and open them in the editor. You can also upload audio from another video, provided that the video is in AAC, MID, MP3, OGA, OPUS, WAV, WEBA, or 3GP format.
- Stock music: you can fill in the silence and make your video more engaging with some nice stock music. Select a beat that fits with the vibe of your video from our vast library of stock music.
Include Text in Your Videos
Sometimes, you need to add on-screen text in your video to engage your viewers and drive important points home. And with VEED, it’s super easy to do that. Simply click on the Text option in the toolbar. From there, you will get a variety of text templates to choose from.
Make your texts stand out by playing around with the font style, size, color, bold or italic, placement, and justification. You can even add some animation or effects to your text to make them more visually engaging.
Add Subtitle to Your Videos
Adding subtitles to your videos can make them more accessible and engaging to watch, but the process can be very time-consuming. Luckily, you can instantly do that with VEED’s AI-powered Auto Subtitles feature.
To use this feature, click on Subtitles, and then:
- Select Auto Subtitles.
- Choose the language being spoken in the video.
- Click on Create Subtitles. Let the AI generate the subtitles automatically for your video.
And that’s it! You can also auto translate the generated subtitles to another language. VEED even lets you add subtitles manually and upload ready-to-use subtitles files to your video projects.
Once the subtitles are ready, you can configure their timing and style. You may even hardcode them onto your videos (perfect for TikTok and Instagram videos) or download the SRT/VVT file (for use on channels like YouTube and Facebook).
Other Cool Features
Here are a few more best-in-class, user-friendly video editing tools offered by VEED:
- Screen Recording: VEED offers a built-in powerful screen recorder that lets you record content through your camera, your screen, and more. Once you finish recording your video, you can go straight into VEED’s editor and begin the editing process.
- Stock Library: VEED offers numerous templates, music, transitions, sound effects, and filters for free. This is helpful for the Mac users who don’t have a video to work with or want to add extra flair into their content.
- Video Background Remover: another AI feature that allows you to remove and replace the background from your videos with a color, image, or another video.
- Elements: this feature allows you to add shapes, emojis, stickers, GIFs, frames, and more to improve your videos.
Explore the full list of video editing tools offered by VEED here.
[#TOC5]5. Export and Share Your Video[#TOC5]
Once you're satisfied with your work, you can export and share your video by hitting the Done button in the top-right corner of the editor. This will open up a small pop-up. From here, follow these steps:
- (Optional) Set the final desired quality of your video project. Click on the gear icon and select a quality level for your video. You can even select a preset quality level for different platforms (including YouTube, Instagram, and Twitter). Note that the higher the quality of your video, the longer it will take for it to render.
- Click on Export Settings at the top of the pop-up and then click on Export Video. VEED will now start rendering your project.
- Download your video straight to your Mac computer or share it with others (while keeping it hosted on VEED). VEED lets you download your projects in MP4, MP3, and GIF formats.
Enjoy Effortless Mac Video Editing with VEED
Thanks to VEED, you neither have to work with iMovie’s intimidating UI, nor feel restricted by Quicktime to create professional videos. Our online Mac video editing software offers all the classic and advanced features needed to create a top-tier video, but with half the effort.
Now that you’ve learned how to edit videos on Mac using our online editor, give it a shot yourself!

![Twitter's Video Limit: Best Video Size, Length, & More [Cheat Sheet]](https://cdn.prod.website-files.com/616e938268c8f0a92cb2b540/616e938268c8f07573b2c21d_Twitter-video-limit-guide.png)