In the fast-paced world of content creation with tight deadlines, maintaining visual consistency across team members is tough. Misaligned branding can dilute your message and diminish the impact of your videos. Fortunately, VEED's Brand Kit tool makes it a lot easier.
This tool empowers every member of your team to effortlessly access and utilize your brand assets, ensuring every video is on brand.
In this VEED 101 guide for businesses, we'll guide you through the extremely easy 3-step process of using VEED's Brand Kit tool to craft cohesive, on-brand professional-looking videos.
Step 1: Head to your workspace and select the Brand Kit feature
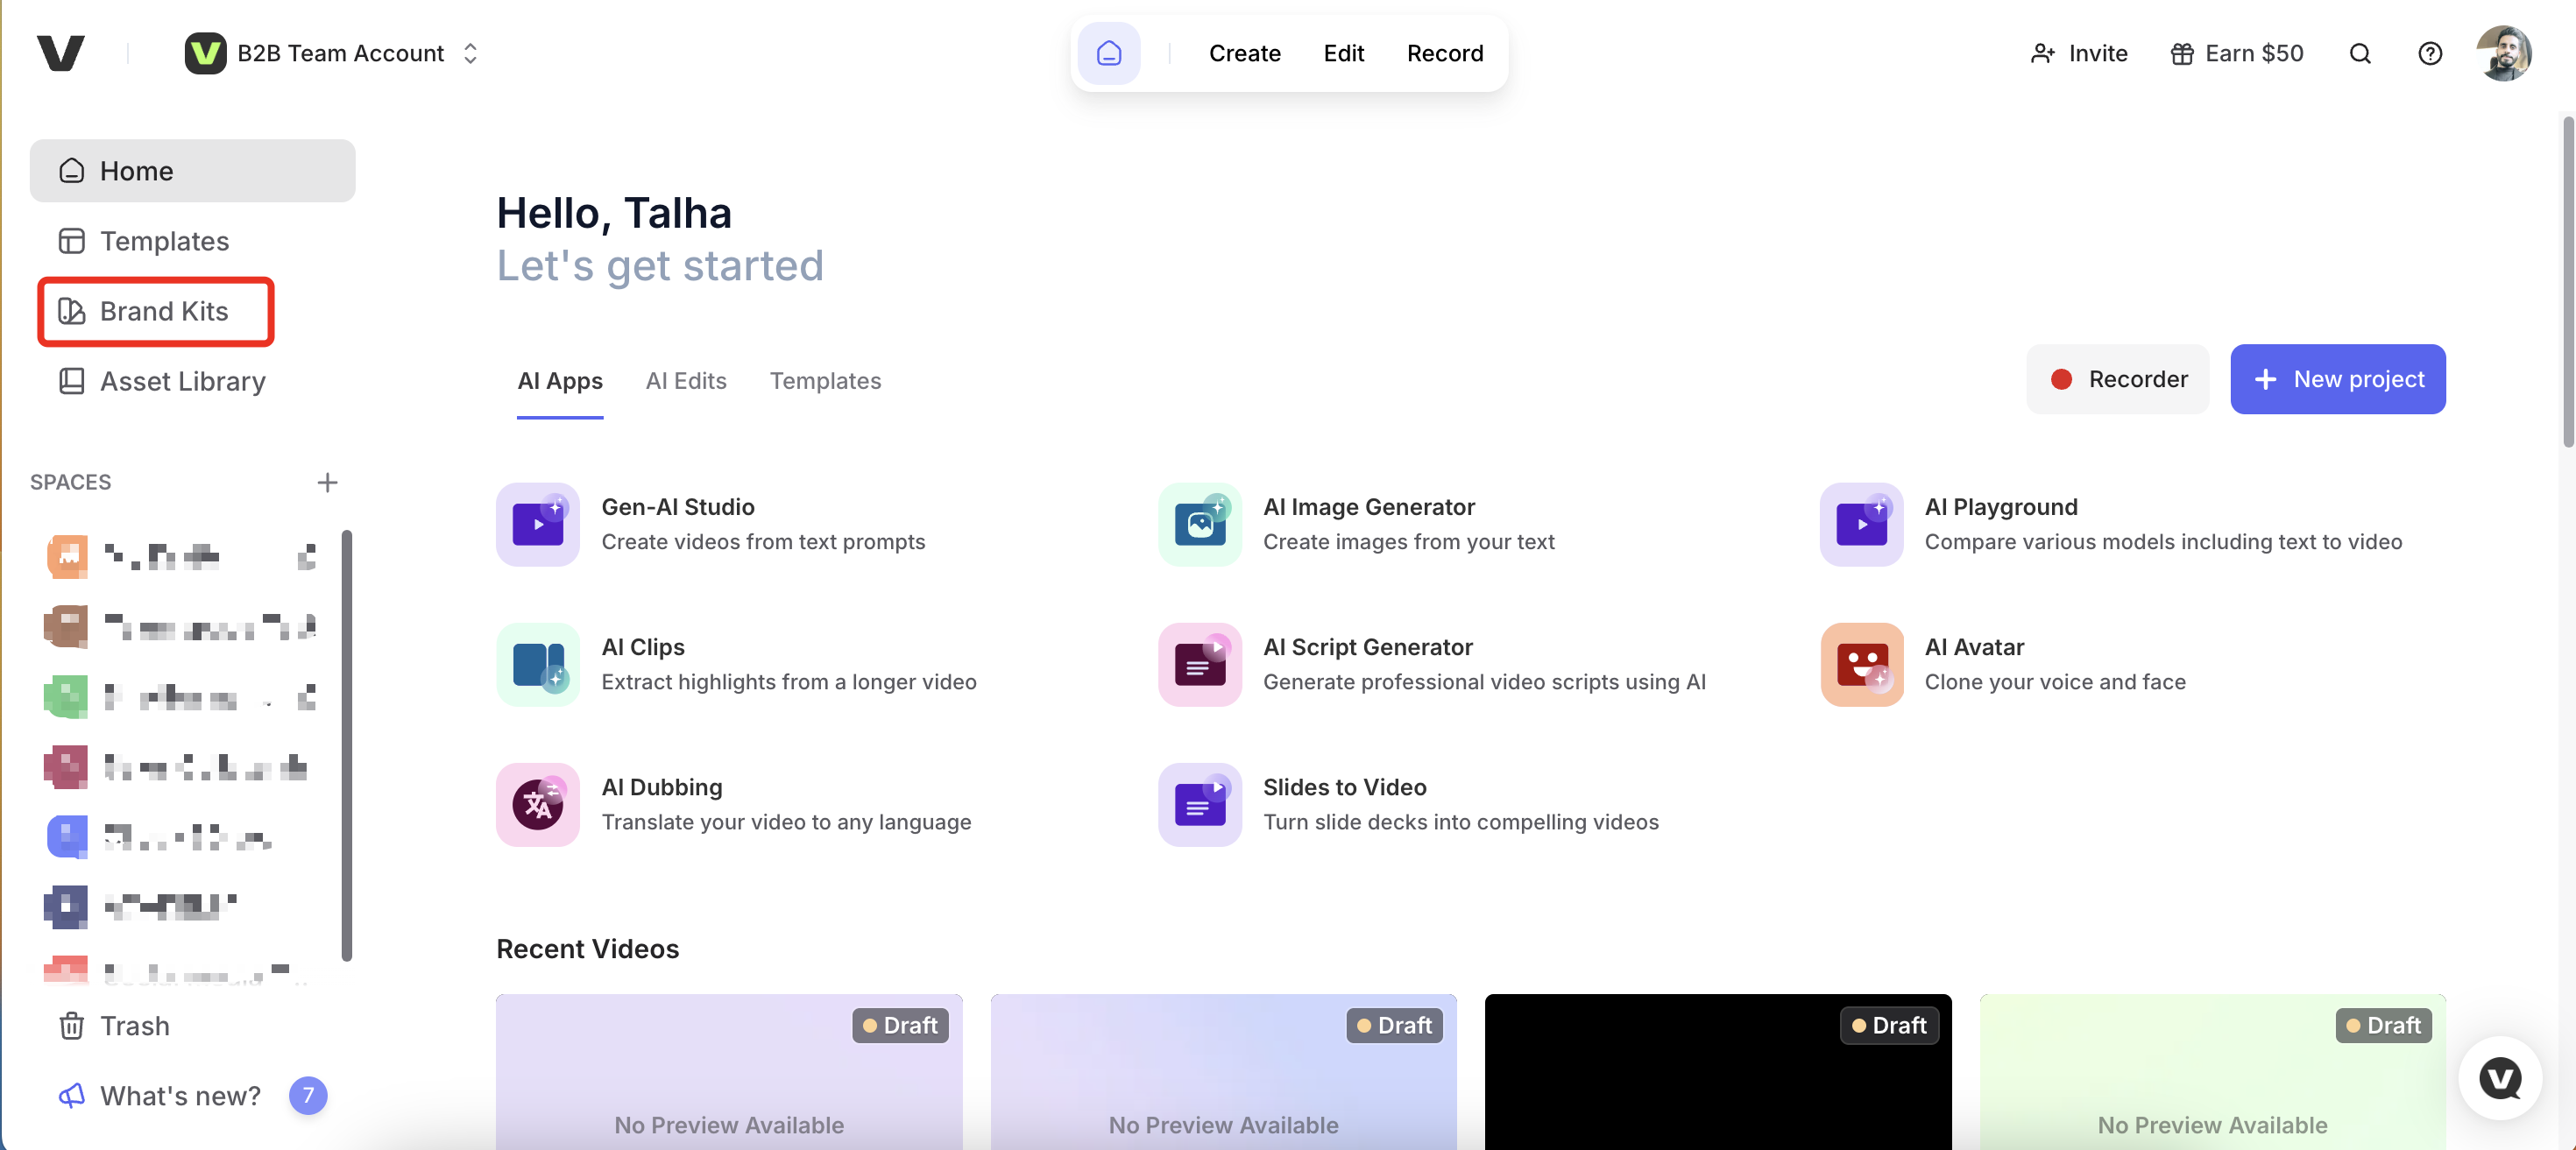
First, log into your VEED account. You want to make sure you have access to the workspace with other team members you want to share your brand kit with.
Once you're in, click on Brand Kits on the left side to access the available kits or to create new ones.
Step 2: Create a new Brand Kit (or update an existing one)
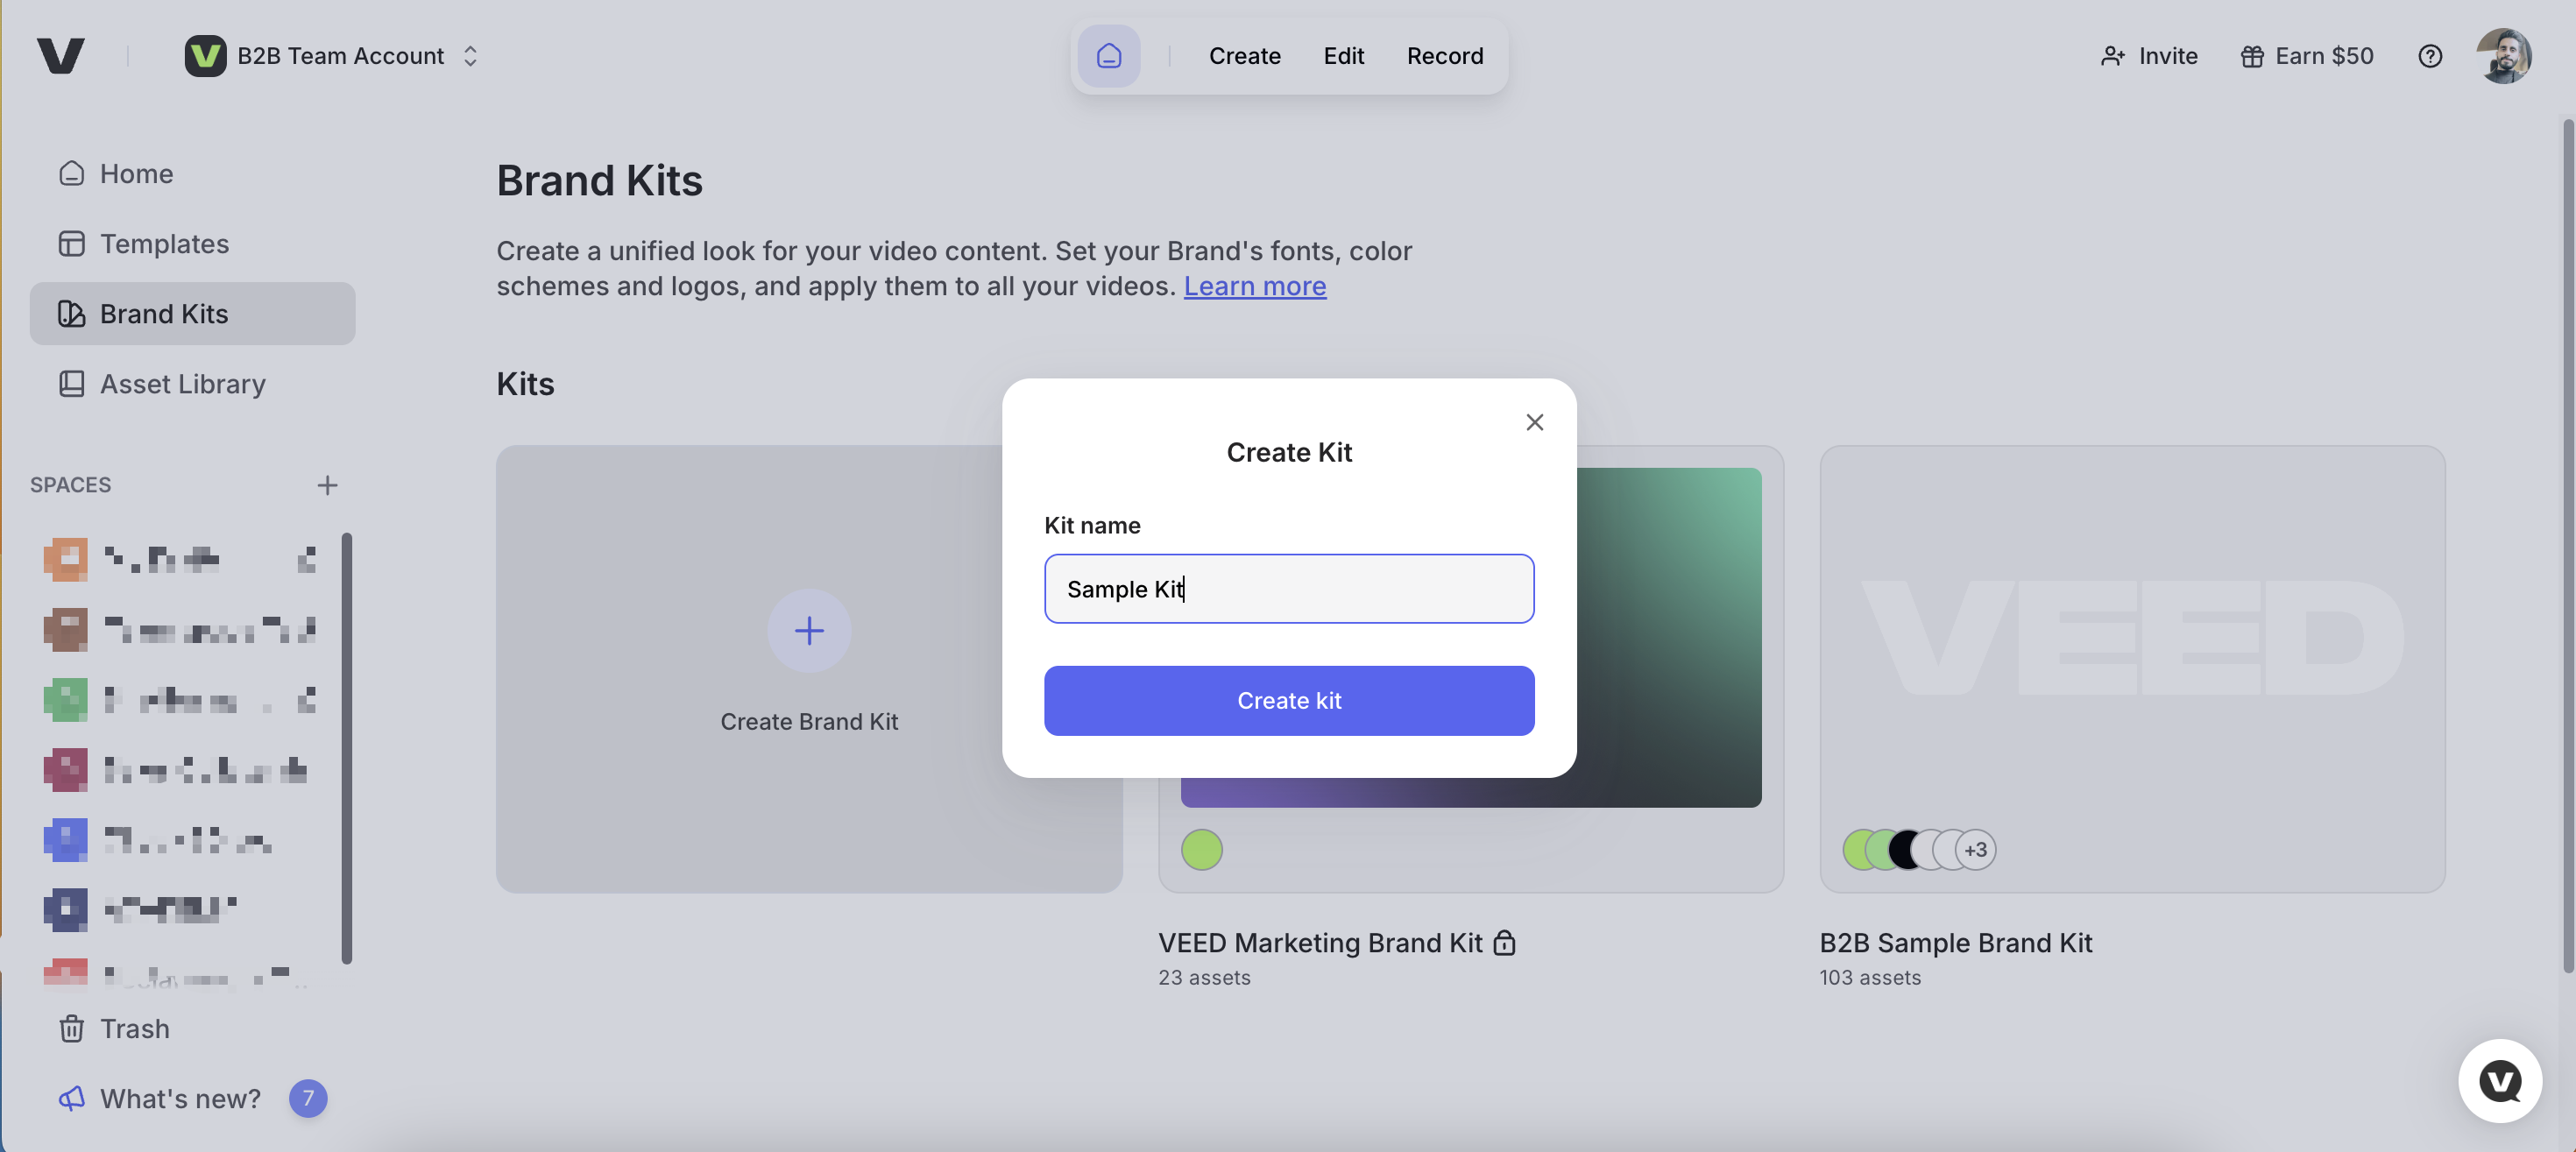
Once you're on the Brand Kits. tab, you can start creating new Brand Kits or access and update an existing one.
To create a new one from scratch, simply click on Create Brand Kit. You will be prompted to name your kit, after which, you can go in and start uploading your assets.
Click on your newly created kit and start building it. You can start uploading your brand elements, such as your logos, brand colors, fonts, videos, and audio. You can conveniently upload them straight from your computer.
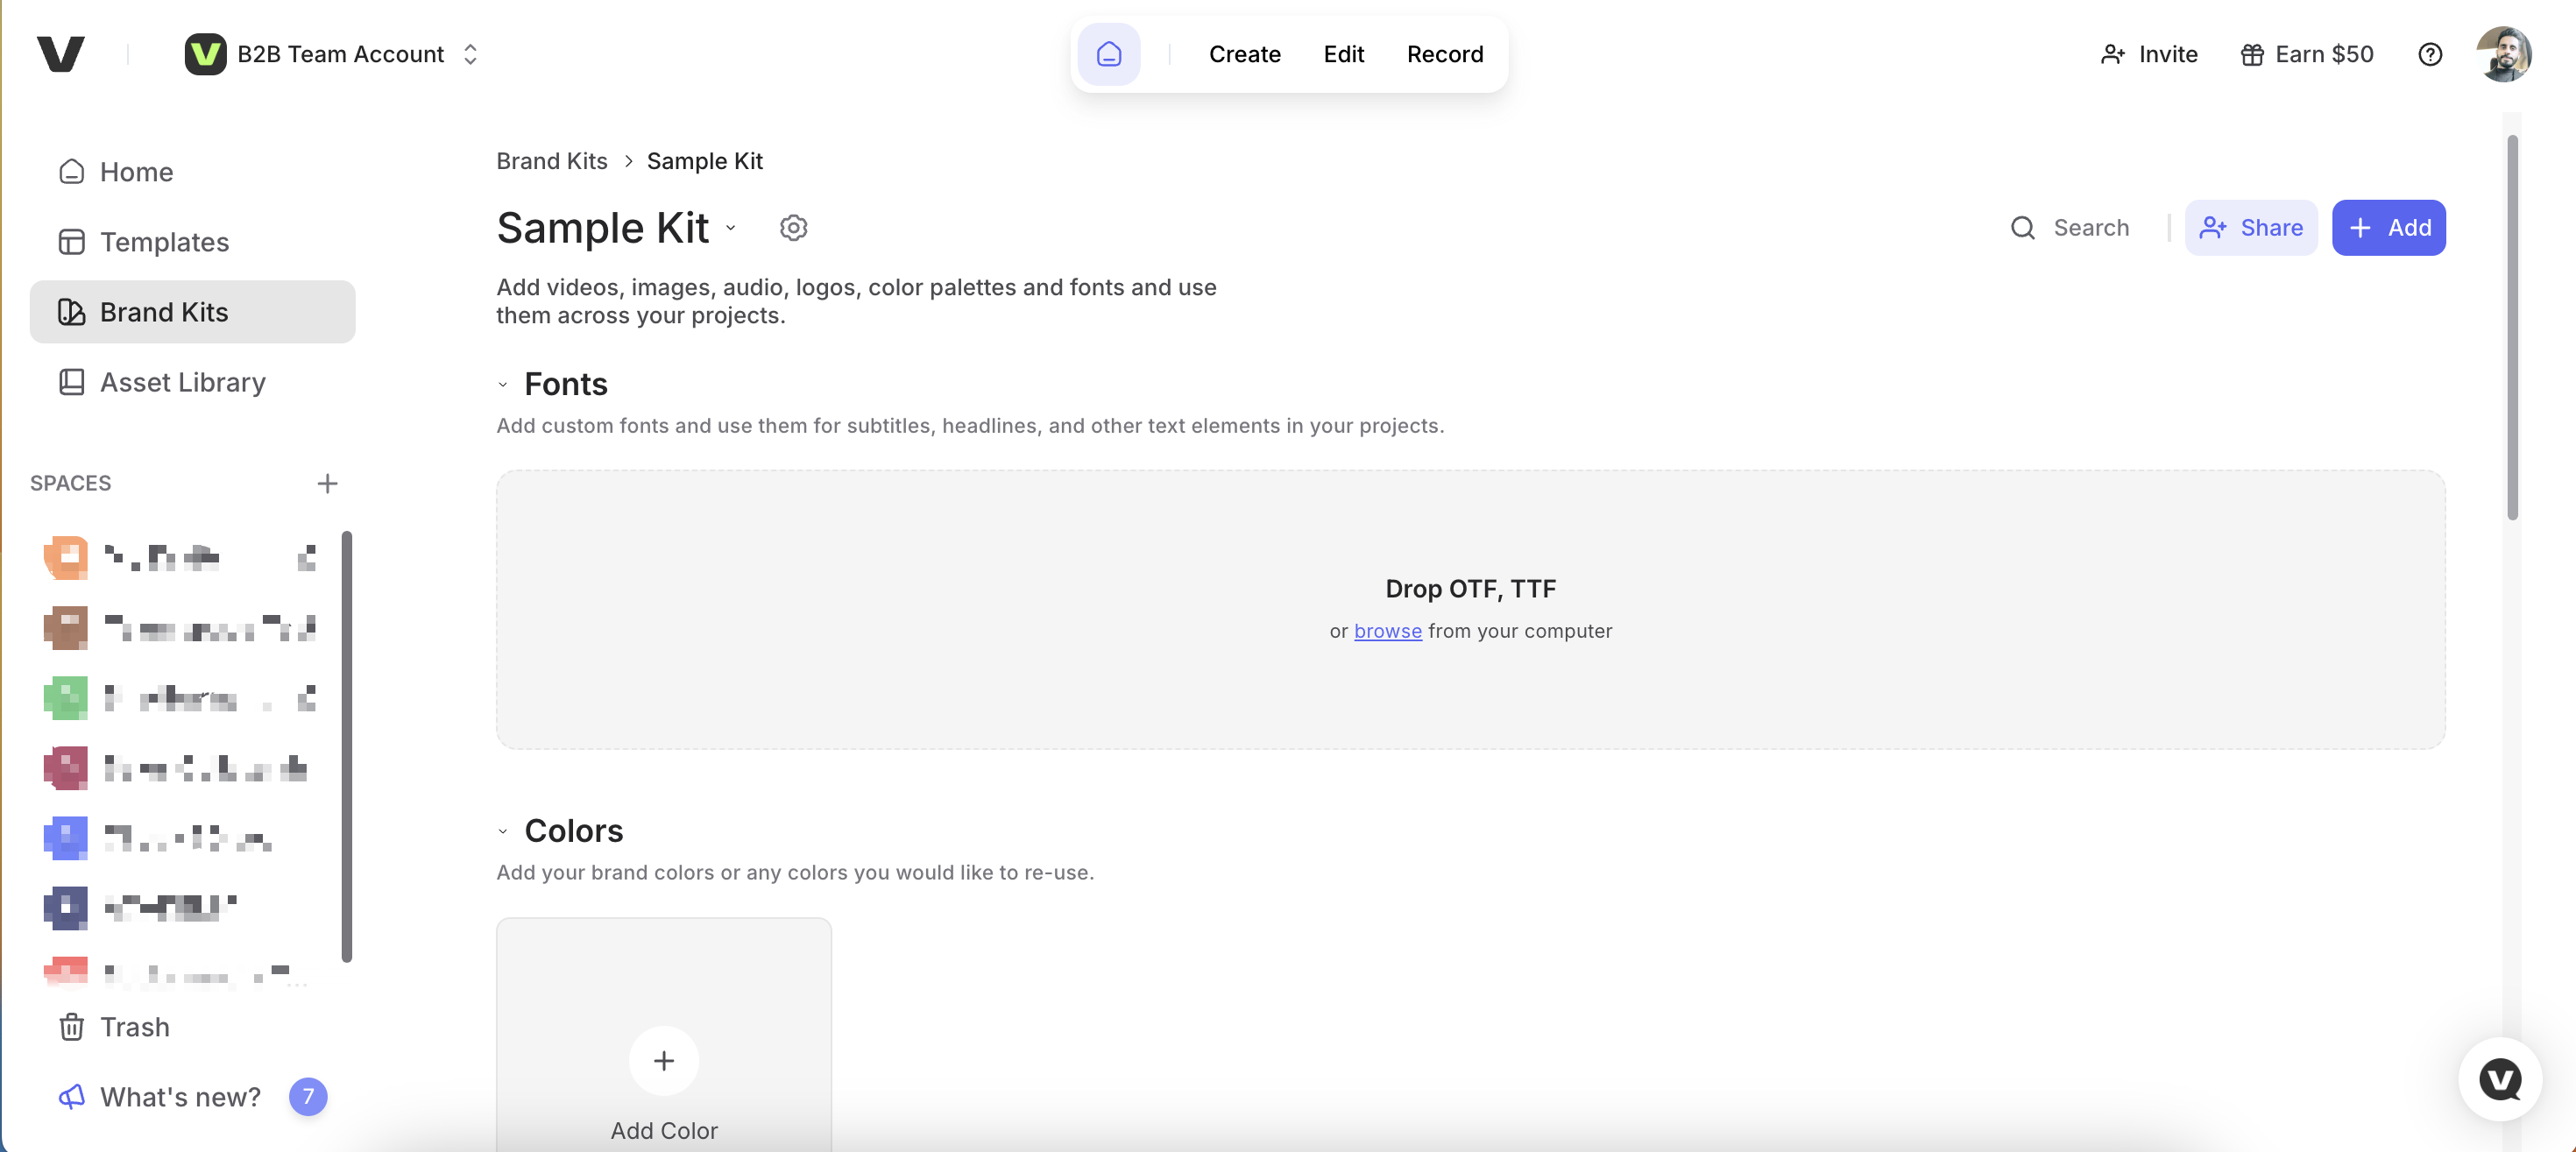
When building out your brand kit, it’s essential that you ask for the right assets from your design department and share them with the rest of the team. Here are the main things to consider:
- Logo variations: apart from your main logo, make sure to ask for and upload alternate variants, including a dark and a light version for use on different backgrounds. In addition, also ask for a reduced version of your logo for use as watermarks (i.e. a smaller version that’s different from the main one). Also, make sure that all the logo variants have transparent backgrounds and are saved as .pngs for ease of use.
- Brand fonts: these can be .otf or .ttf files. Make sure that you also include the alternate versions of your branded fonts, including the bold, italic, thin, and regular variants.
- Brand color palettes: acquire the hex codes for your brand colors (a hex code is a # followed by 6 digits that specify a unique color, written like this: “#XXXXXX”).
- Other brand assets: these include assets like any branded backgrounds, product shots, stock photography, mockups, etc.
Step 3: Start using your brand elements
Once your brand assets are uploaded, you can easily drag and drop them to your video projects from within the editor (such as a variation of your logo). Similarly, if you add any text to your video, you can also change it to your brand’s specified color with ease.
Other team members on your VEED workspace will also be able to conveniently access the brand kit, ensuring everyone consistently creates on-brand video content.
Liked this VEED 101 guide for businesses? Check out our previous guide on how to add and translate subtitles.