Raise your hand if you’ve ever recorded a video in landscape mode when you originally wanted it to be in portrait or vice versa. Don’t be shy. It happens to the best of us more than we’ll like to admit.
No matter how good your video is, only a few would enjoy watching it if it’s looking crooked. So what can you do when you unintentionally shoot a video in the wrong orientation? Well, you could pull your hair out in frustration as you figure out how to create a new video from scratch.
Another option, one that we recommend, is learning how to flip or rotate a video. If you want to learn, then you’ve come to the right place.
This article will show you six different easy and quick ways you can rotate a video.
The six methods we’ll cover are how to rotate a video in/on:
- VEED (Web-based Editor)
- Windows Movie Maker (Windows OS)
- VLC (Desktop)
- iMovie (Mac desktop)
- iPhone (iOS Mobile)
- Android (Android Mobile)
As you read on, you’d also find a solution that best fits your needs — whether you want to rotate just one video or need an all-in-one video editing solution.
Let’s begin.
1. How to Rotate a Video with VEED
VEED is a web-based video editor that allows you to make and edit videos with a single click. It’s free to use, and the steps to rotate video clips with the tool are pretty easy to follow.
Here is a summary of what to do.
1. Upload your video file on VEED
Open VEED’s website by typing www.veed.io into your search bar.
Once the page loads, click the large black button that reads “Upload Your Video.”
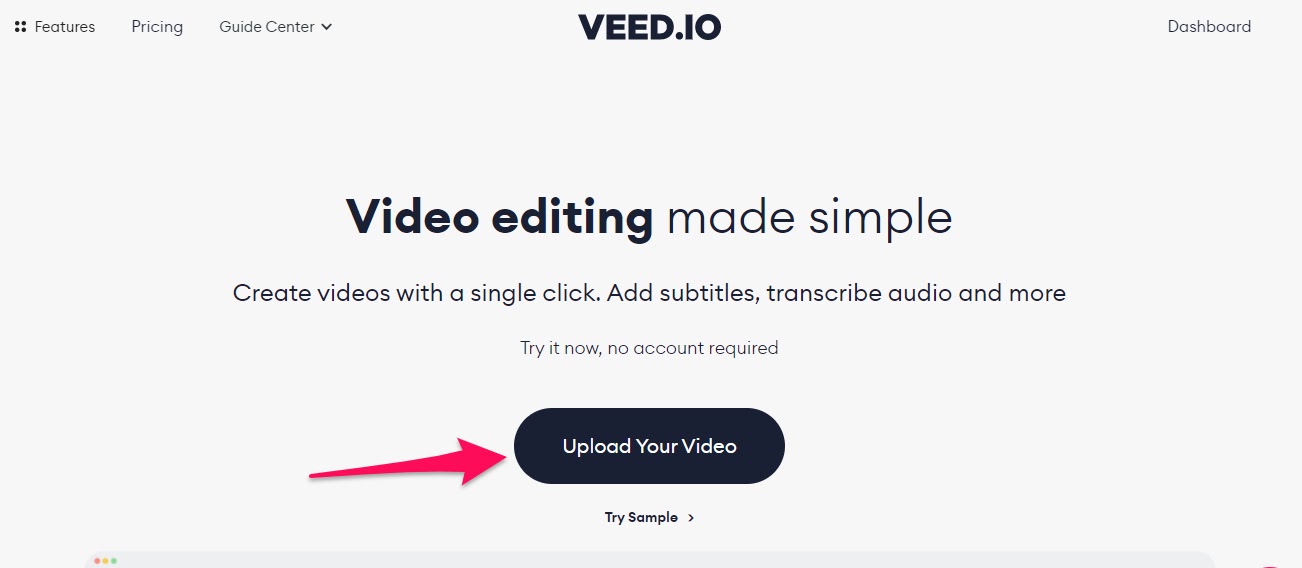
Don’t worry; you can upload and edit your video whether you have an account with VEED or not (we’re nice like that).
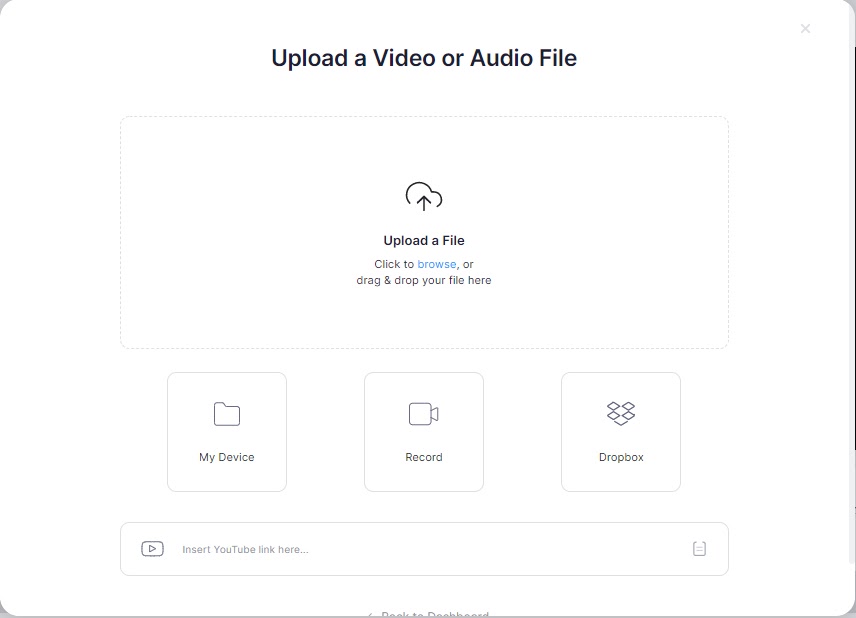
You can choose to upload an existing video file from your phone or PC. VEED also gives you the option to record a new video or use other upload options like Dropbox or a YouTube URL.
2. Rotate the video
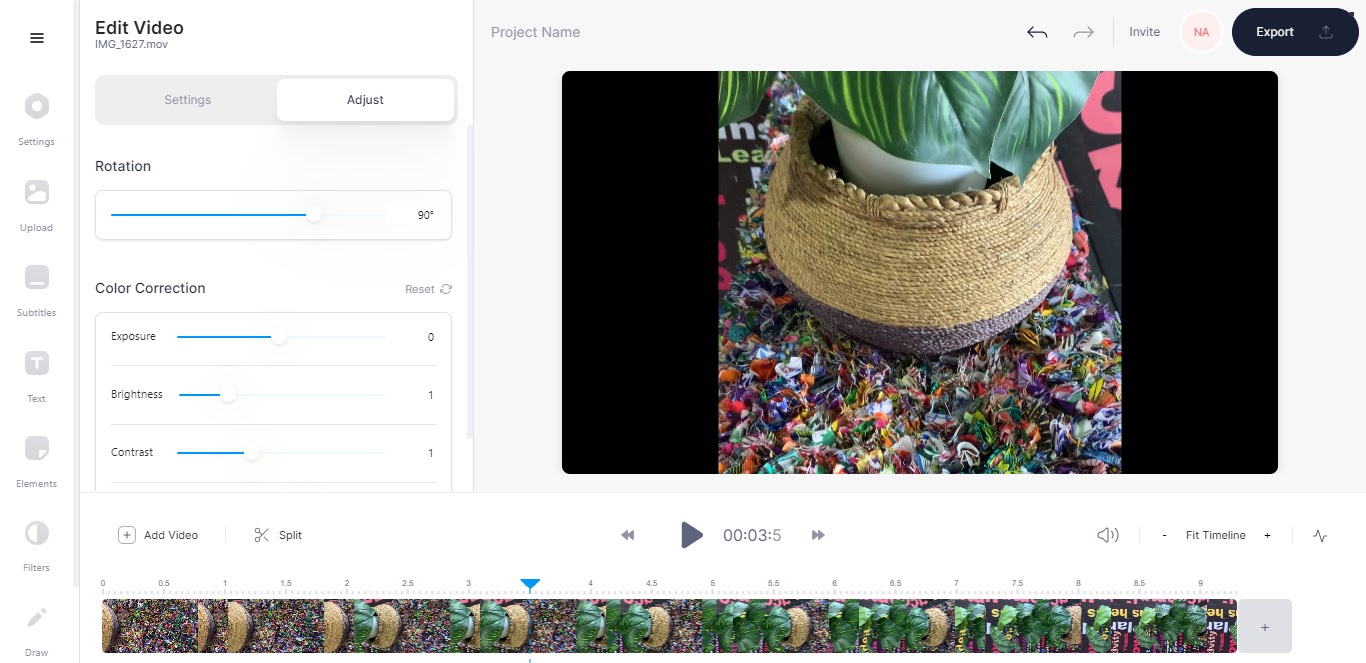
In the video editor, click the video to change the “Project Setting” tab on the left to an “Edit Video” tab.
In the “Edit Video” tab, click on “Adjust.”

To rotate your video, drag the rotation slider left or right to align with the orientation or final angle you want the video clip to appear in.

You’ll notice from the screenshots that we’ve rotated the video from its original horizontal orientation to become vertical.
3. Change the video size
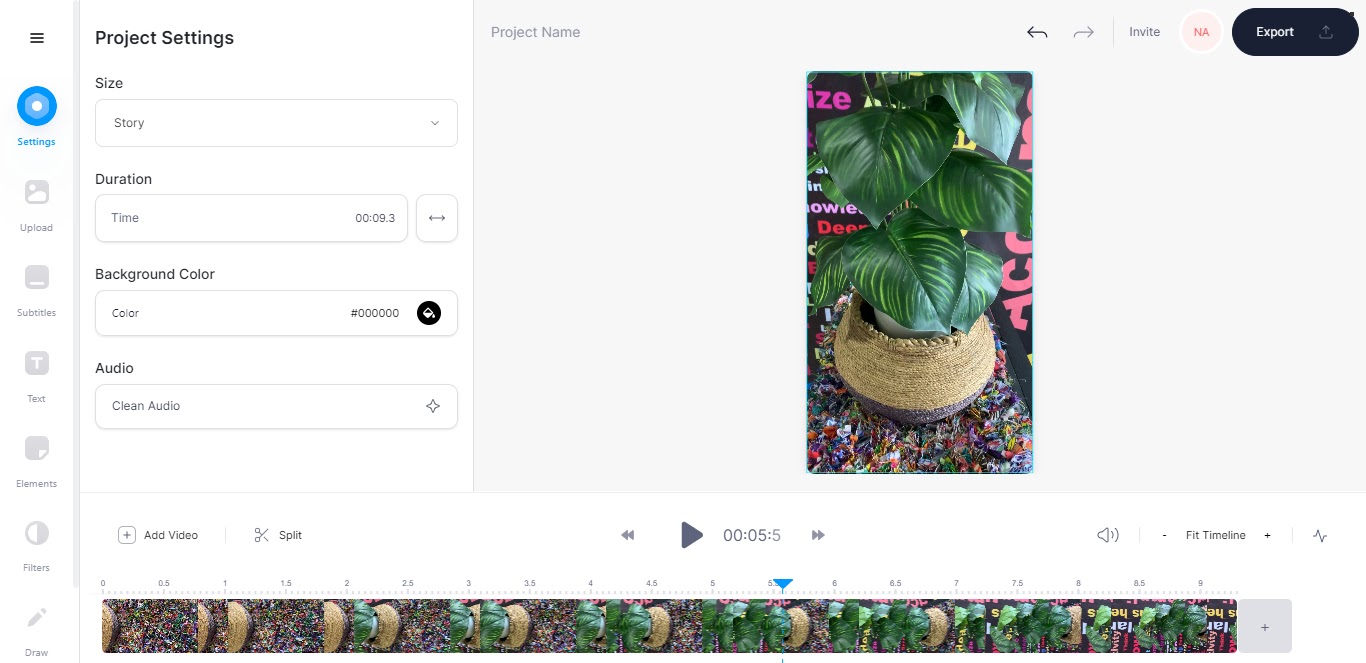
Although you’ve successfully rotated the video, it’s not yet time to save it. When you rotate a video — especially from a horizontal (sideways) to vertical orientation — black bars usually appear by the sides or top and bottom of the screen.
These bars cause distractions. And they often make a video clip not look native for the social media platform you want to post. So, you’ll need to change the video size and choose an aspect ratio that best fits the video.
VEED allows you to choose video sizes or aspect ratios to fit:
- Tiktok
- YouTube
- Twitter Portrait
- Instagram Story
- LinkedIn Portrait
- Facebook Cover
- Facebook Portrait
- Twitter Landscape
- LinkedIn Landscape
- Facebook Landscape
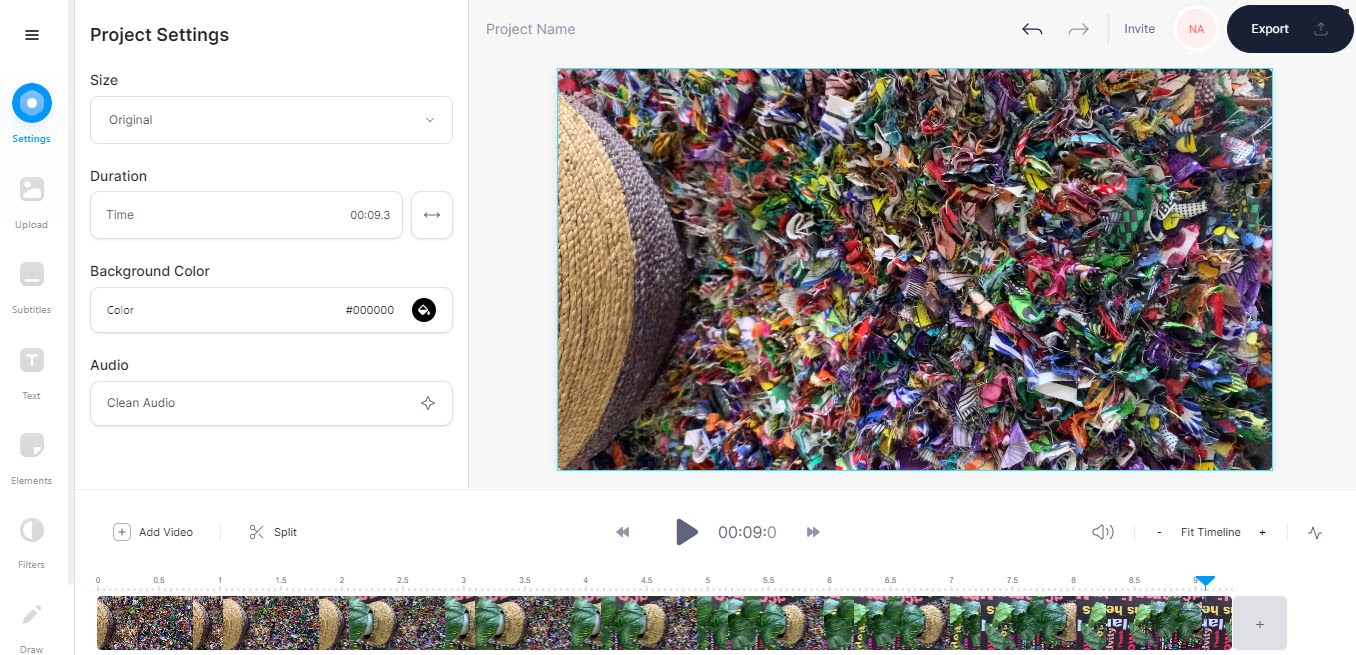
To choose the size you want, click on “Settings” on the left side of the VEED video editor screen.
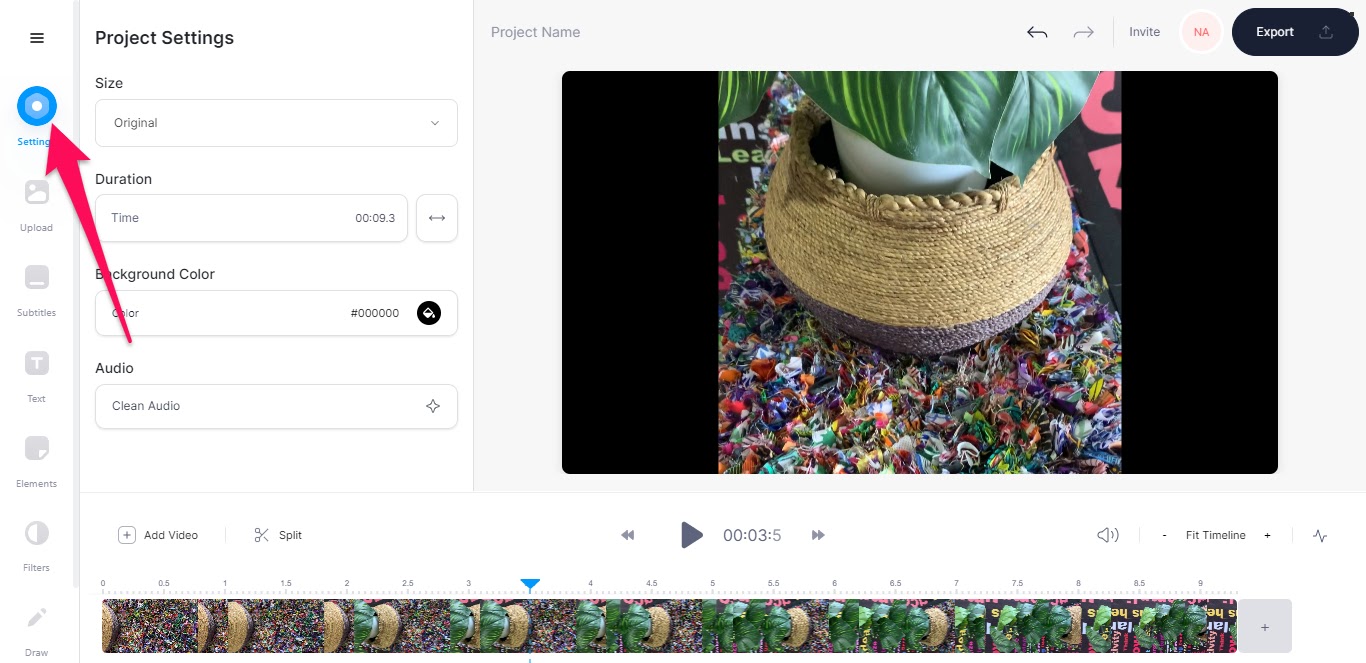
Then choose what you want from the dropdown menu under “Size.”
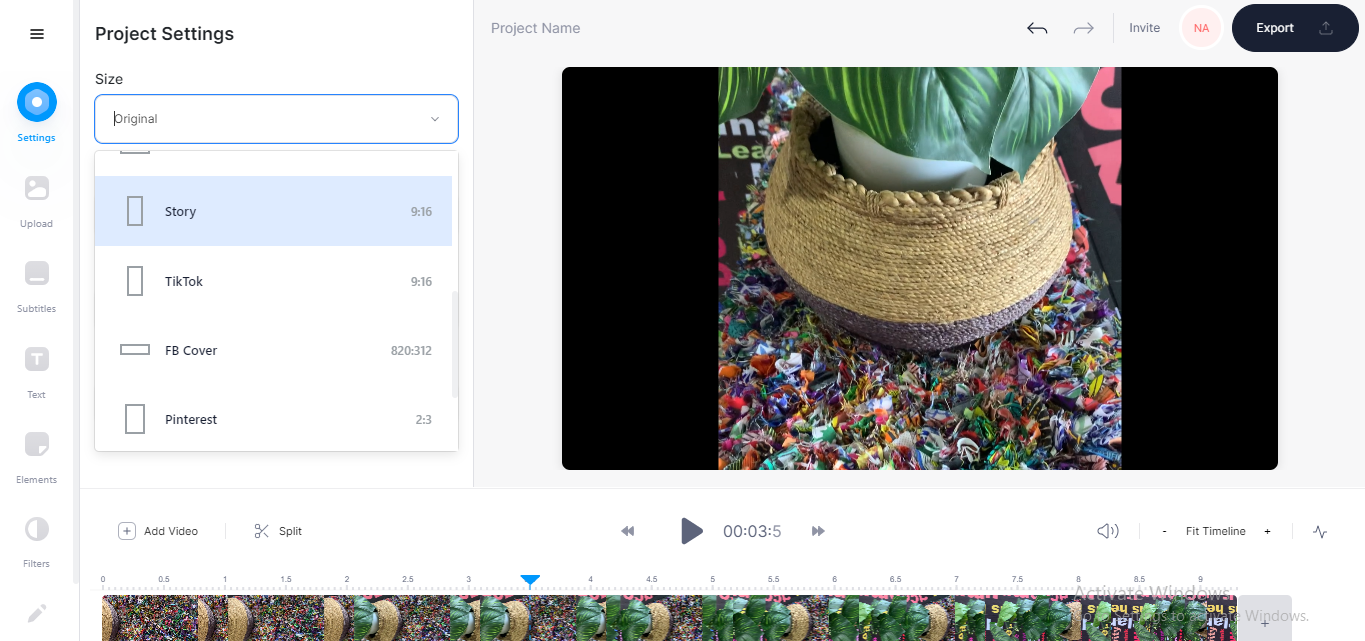
Your video would automatically fit into the size or aspect ratio you choose.
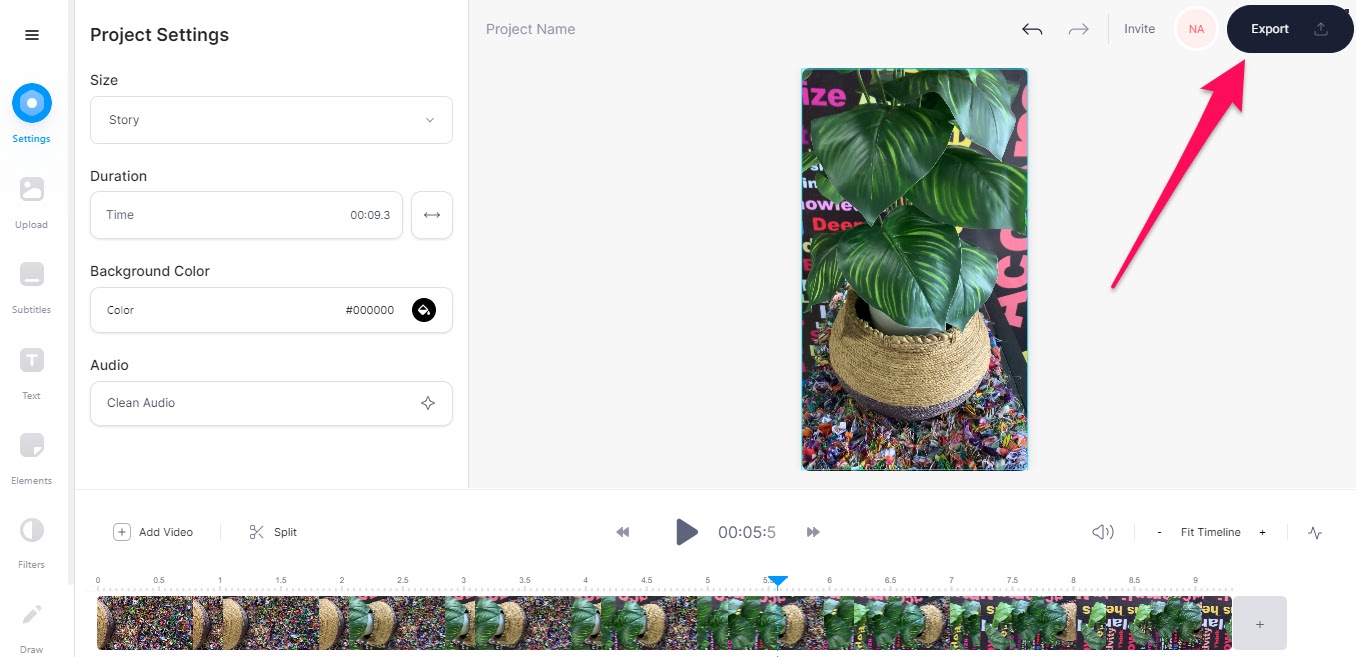
4. Export your video
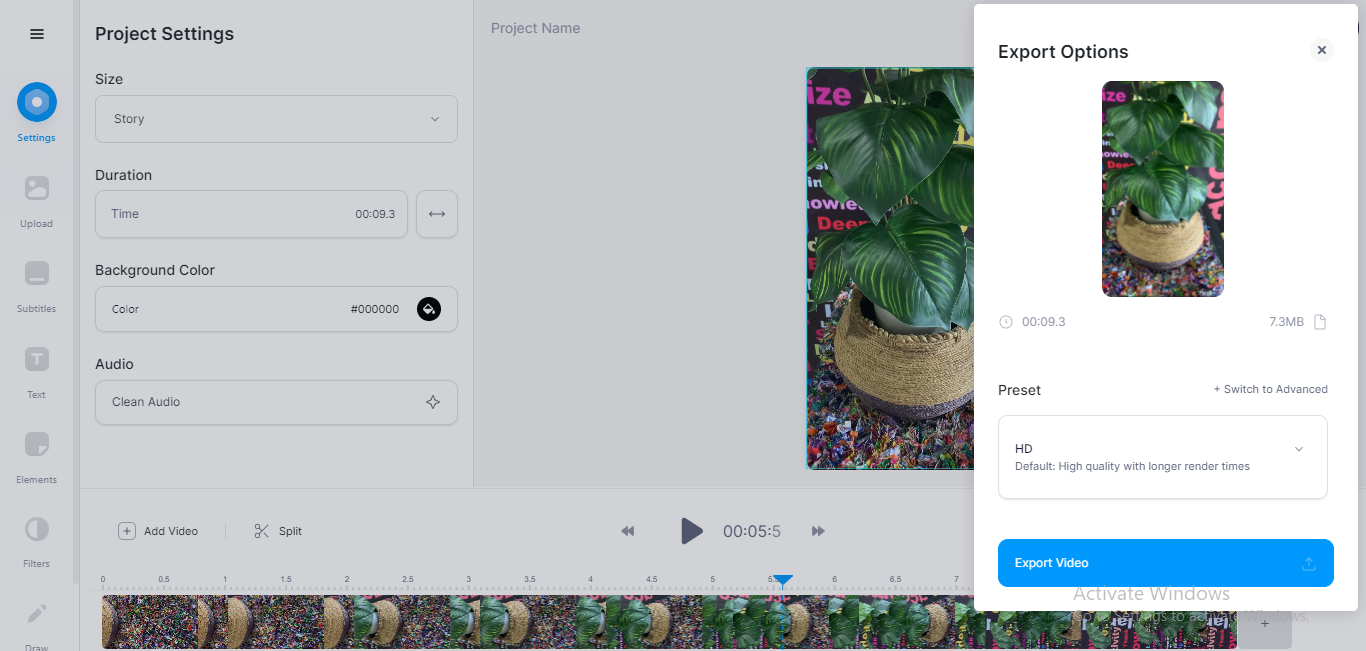
Once you’re happy with how your video now looks, click on the “Export” icon on the top right corner of the screen to download the video.
You can choose to download your video in different resolutions like Standard, HD, 4K, Super-8, or Cinematic.
Other export options are Instagram, Twitter, YouTube (4K, 1440P, 1080P, and 720P) video resolutions that already have the ideal settings — like file size and frames per second — for each platform, so you don’t have to worry about tinkering with the specifics.
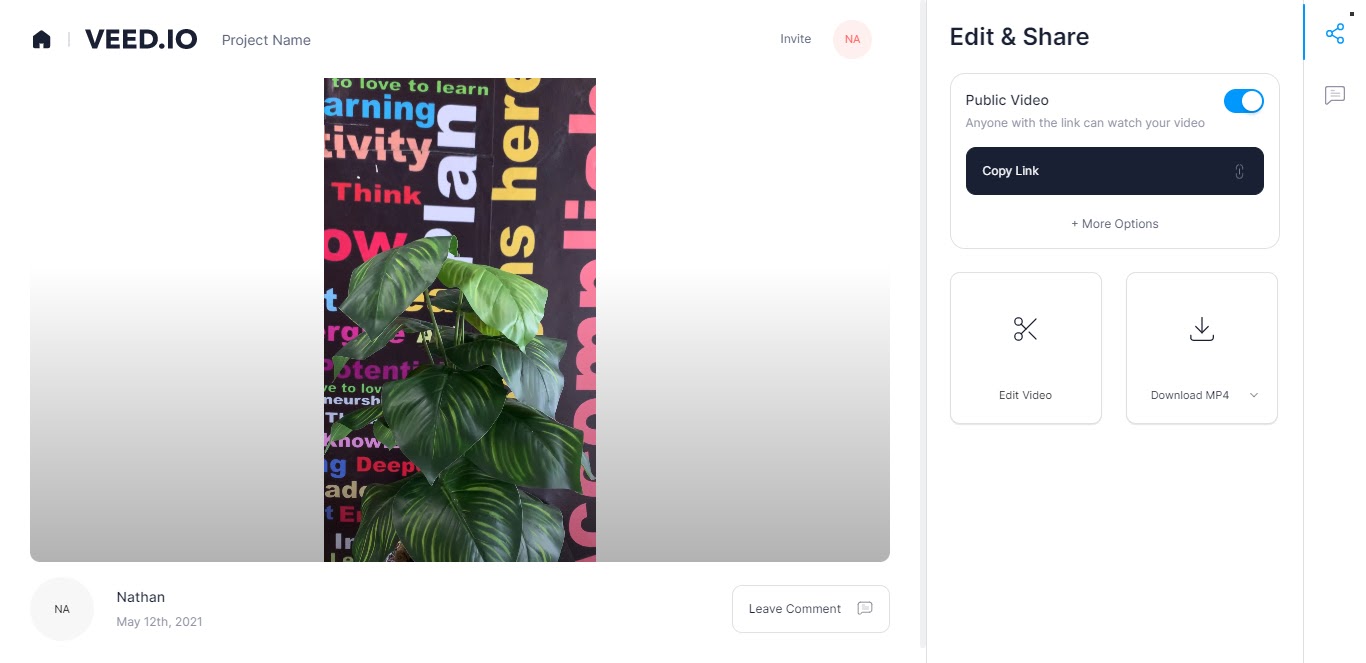
Once downloaded, you can share the video link with your audience on social media, mom, or save it on your PC or mobile phone.
Besides rotating videos, you can also use VEED to add subtitles, music, GIFs, or merge and combine your videos online.
2. How to Rotate a Video in Windows Movie Maker
What if the internet connection on your Windows PC is terrible, but you want to rotate a video clip?
You can use the Windows Movie Maker to rotate your videos. This tool works only for PCs running on Windows operating system.
Note: Although Microsoft has discontinued Windows Movie Maker, many PCs still have the tool installed.
If you still have Windows Movie Maker on your computer or are simply curious about how to use it to rotate a video, here are the steps to follow:
1. Open Windows Movie Maker
To use the tool, you need to run it by typing “Windows Movie Maker” into your search bar or by clicking on the shortcut on your desktop.
2. Select the video you want to rotate
There are two ways you can select a clip you want to import into the movie maker.
One way is to drag and drop the video clip into the program from your file manager or wherever you stored the video on your PC.
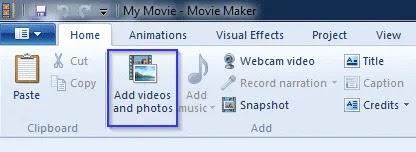
The second way is to use the “Add videos and photos” option in the Home toolbar.
3. Rotate your clip
After opening the video, click the “Visual Effects” tab and scroll to the “Mirror” section on the tab.
Sometimes the Mirror section is hidden, so you might need to expand the tab to find it.
Once you've identified it, click on “Rotate Left” or “Rotate Right,” depending on the orientation you want.
You can keep changing the orientation until you find the one that suits your needs.

4. Save your video
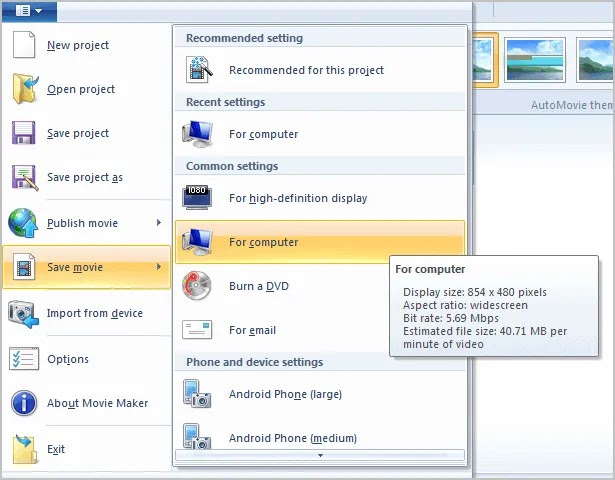
After you have achieved your desired rotation, save the new video by clicking on the “File” icon.
On the new screen, click on “Save movie.” You can save the file in different formats, and the program offers you various options like MP4, 3GP, AVI, and so on.
Once saved in your preferred destination folder, you can now watch the rotated MP4 video whenever you want.
Aside from the Windows Movie Maker, another desktop tool you can use to flip or rotate videos on a PC is VLC Media Player.
3. How to rotate a video on VLC
You likely already use VLC to watch movies, but did you know you could use it to rotate video clips too?
Follow these quick and easy steps to rotate your videos on VLC.
1. Open the Video in VLC and click on “Tools”
Select the video you want to rotate and open it with the VLC player. If VLC is not your default media player, right-click on the video file, click “Open with,” and then choose VLC.
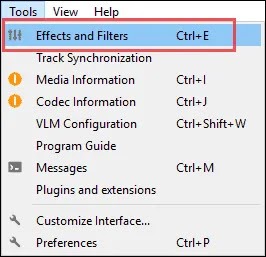
Once the video starts playing, click on “Tools” at the top of the screen.
2. Navigate through the settings
Click “Effects and Filters,” then “Video Effects,” then select “Geometry.”
You can either rotate or transform the video. The Transform option will allow you to turn it 90, 180, or 270 degrees.
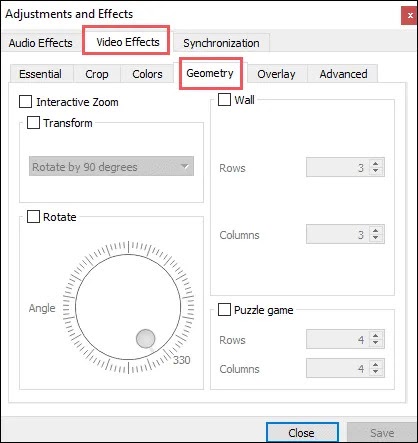
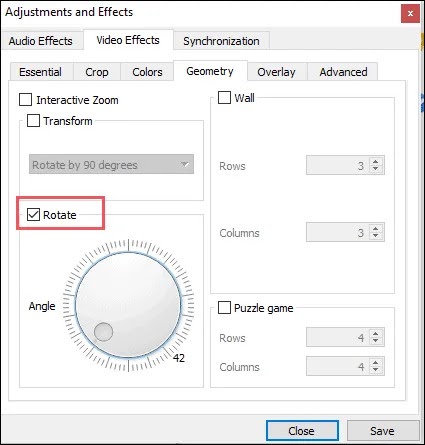
Choosing the Rotate option gives you more control over the final video orientation, as you would be able to select from angles other than 90, 180, or 270 degrees.
Note: Rotating videos on VLC is temporary as you'll need to follow these steps all over again anytime you want to watch the video. But it is still helpful to know how to rotate a video using this software.
4. How to Rotate a Video in iMovie
What if you’re trying to rotate your video on a Mac instead of a Windows PC? We’ve got you covered too.
Here’s how to rotate a crooked video on your Mac using iMovie.
1. Open the iMovie app
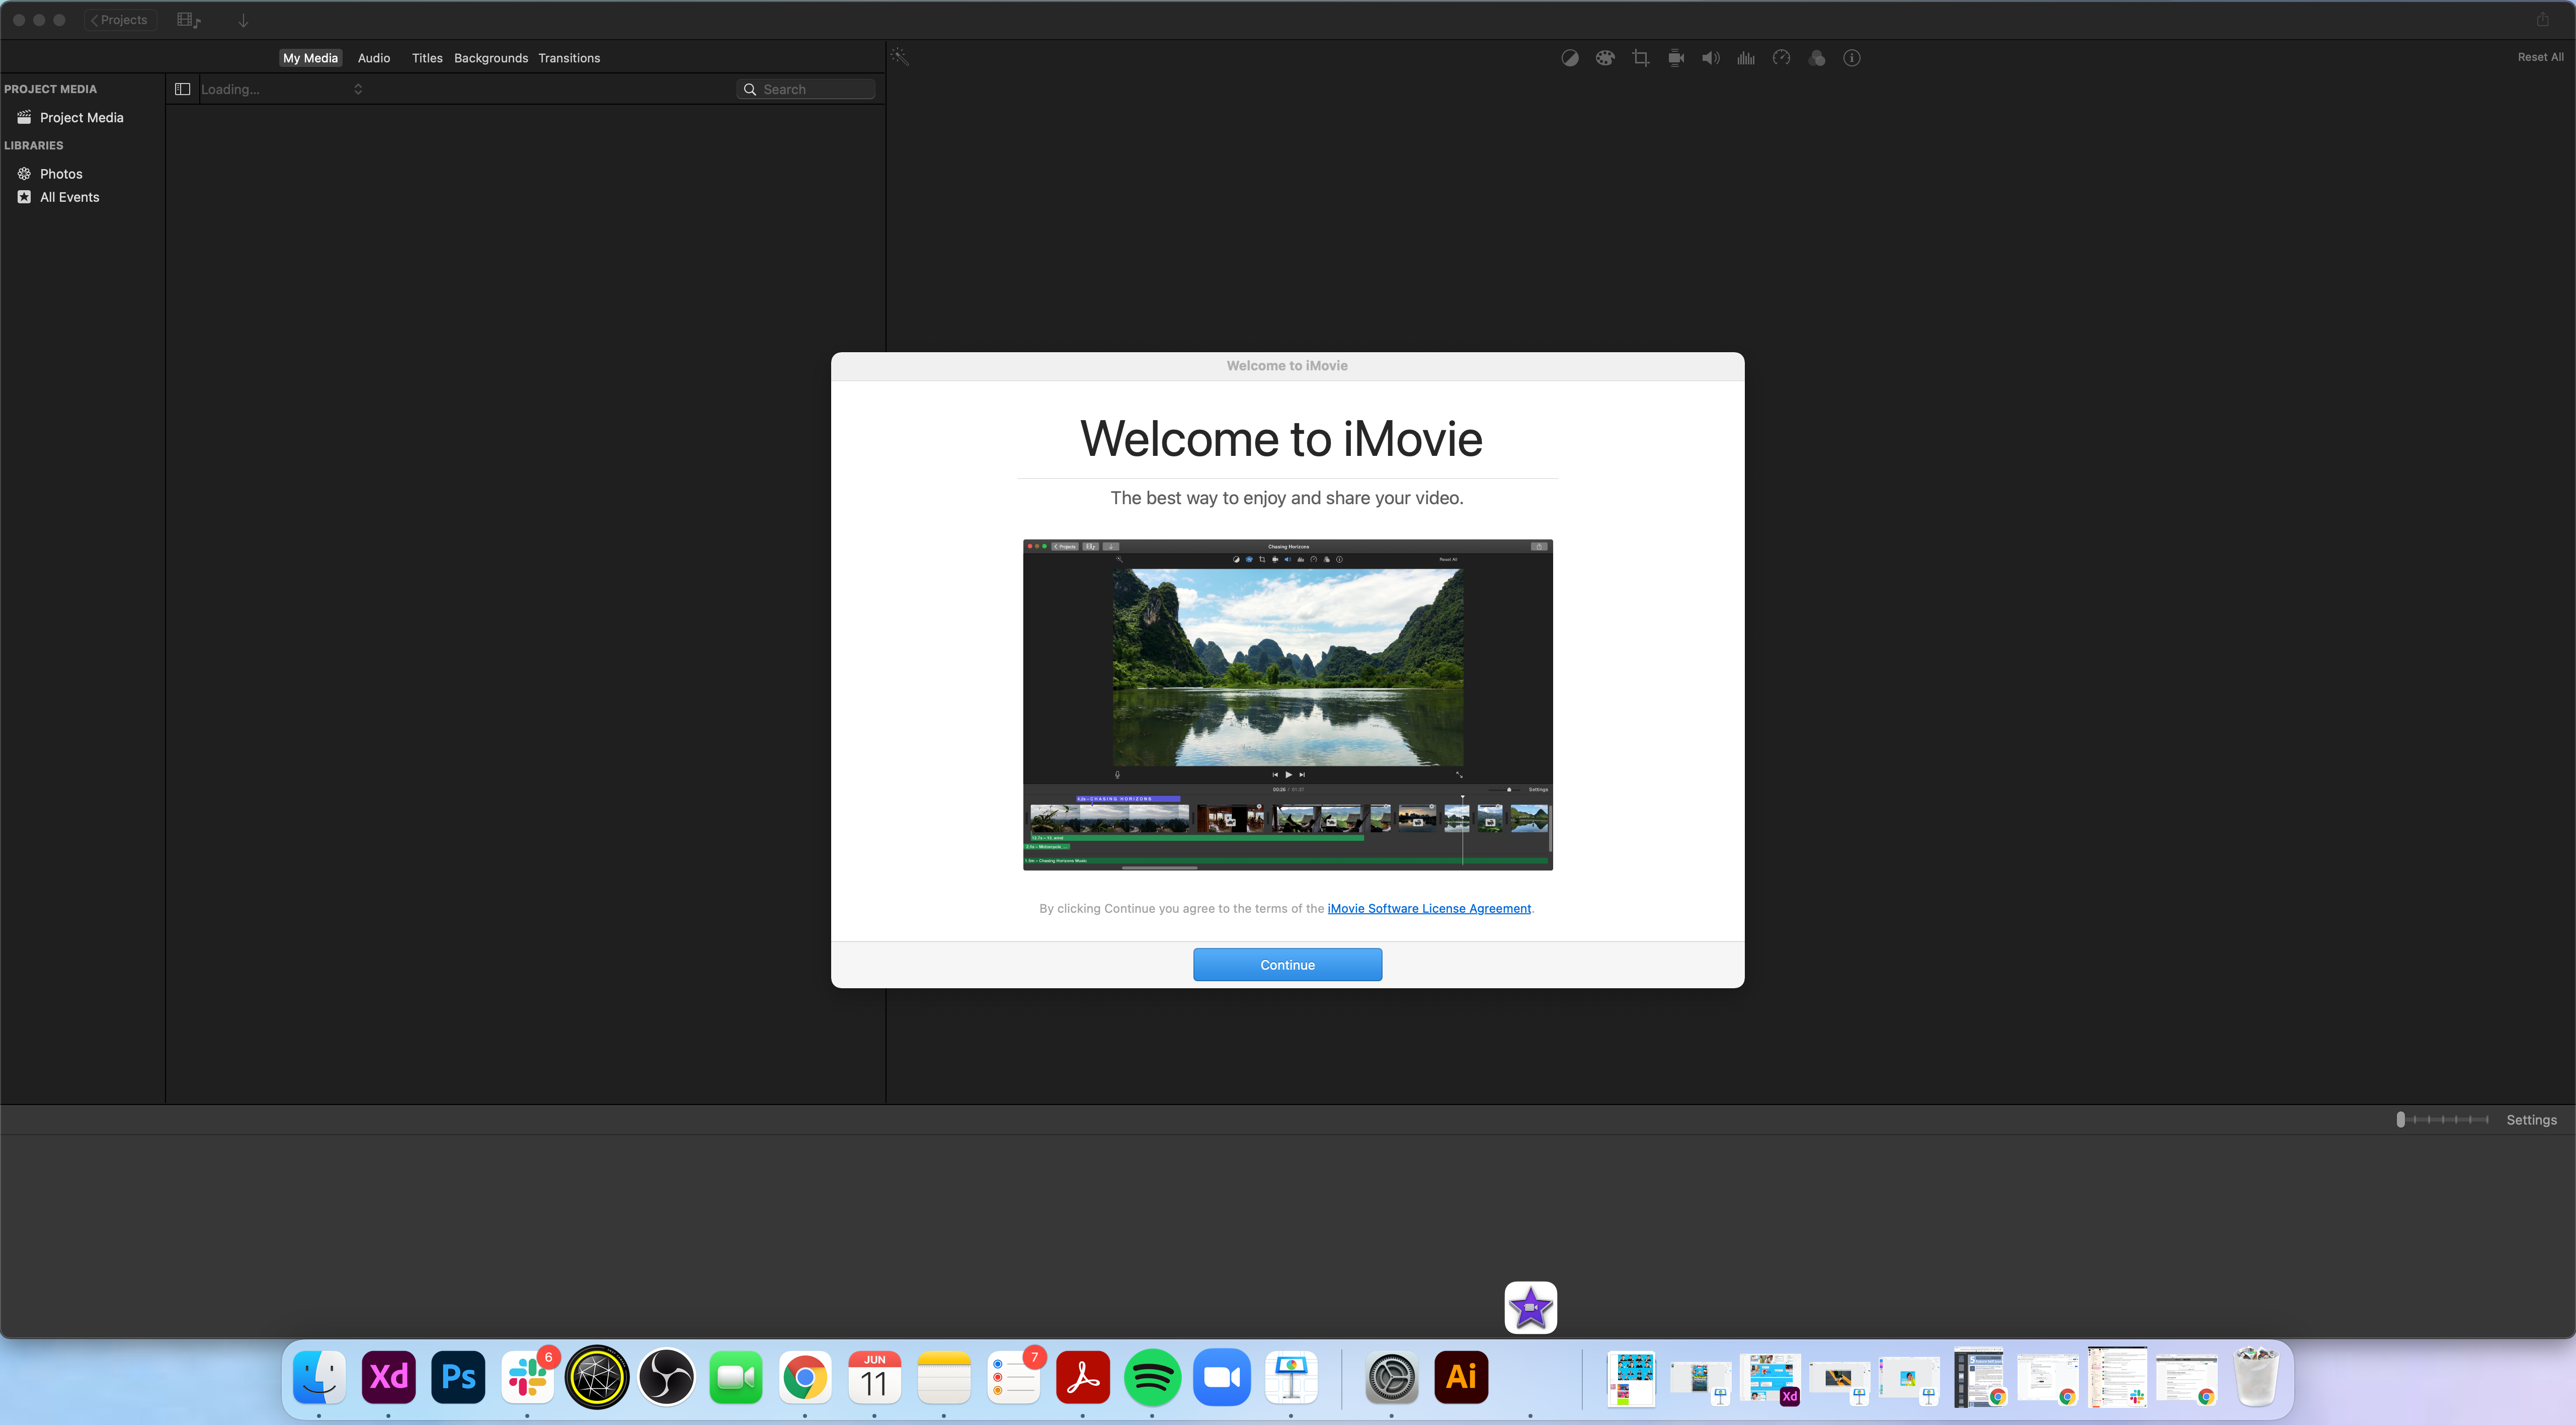
Start by opening the iMovie App.
This app is pre-installed on all Macs, so you don't have to download anything to get started. Also, it can rotate videos that are stored on iPhone 7 or older.
2. Import video
Import the video by creating a new project via the “Create new” option. This should bring up the “Movie” and “Trailer” options.
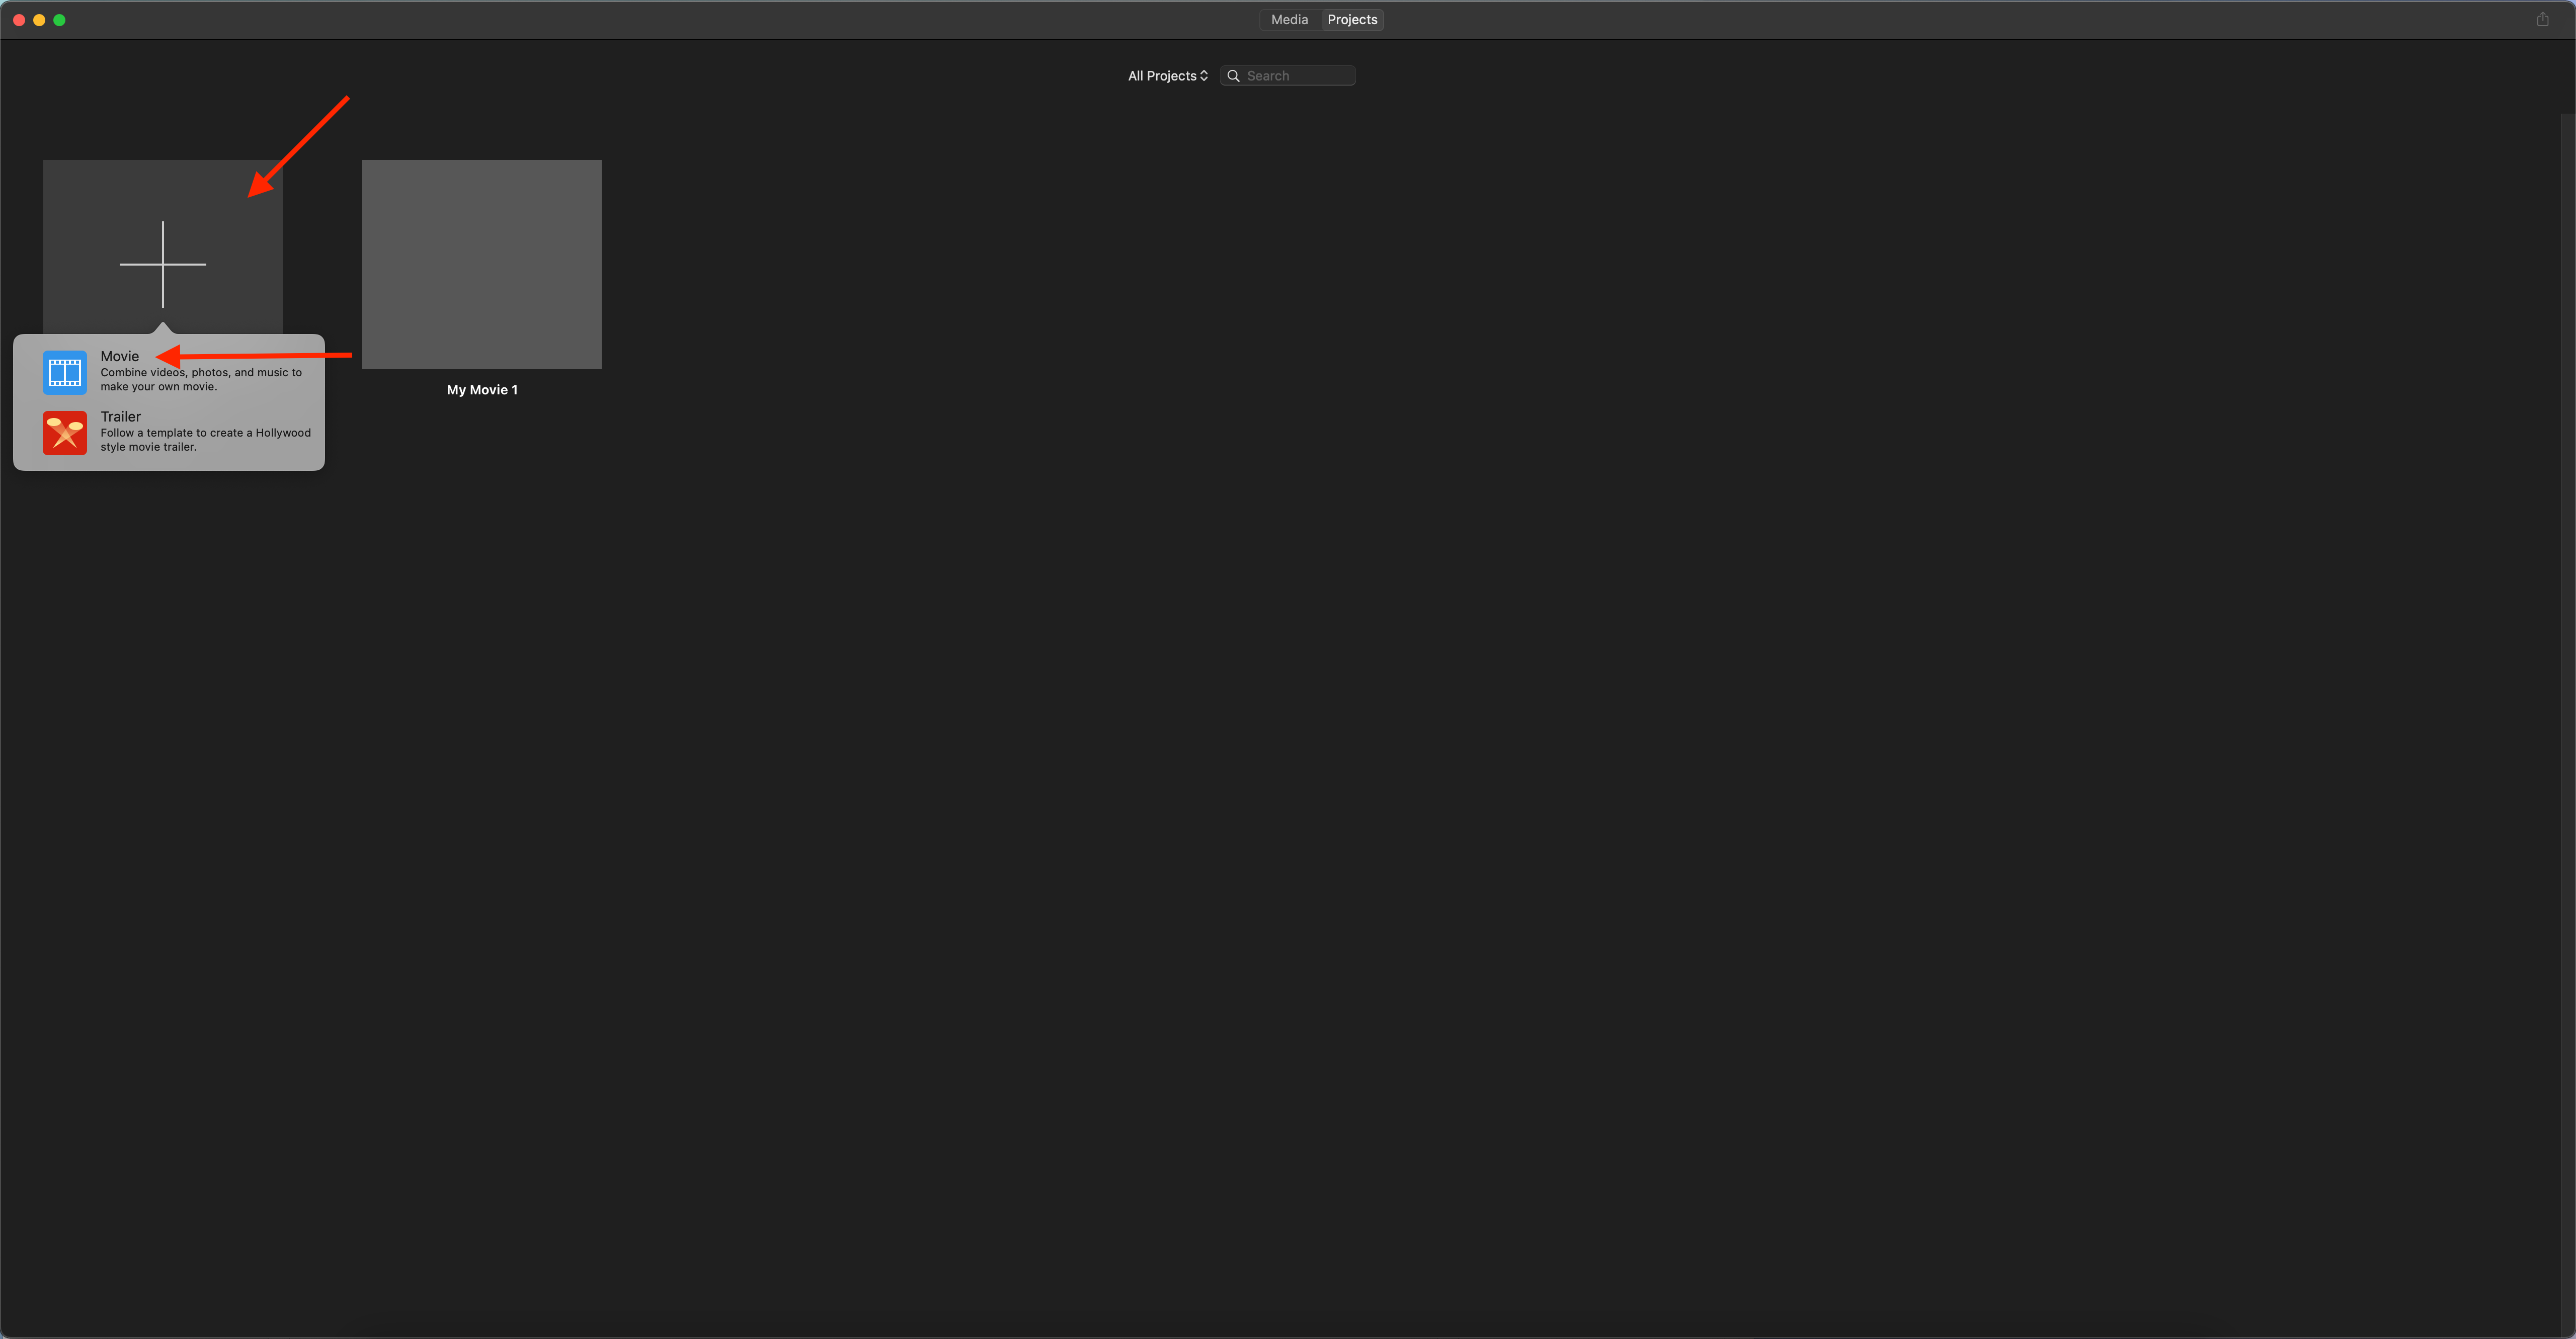
Select “Movie” and click on “Import Media.”
Then browse through your library to select the footage that you want to import.
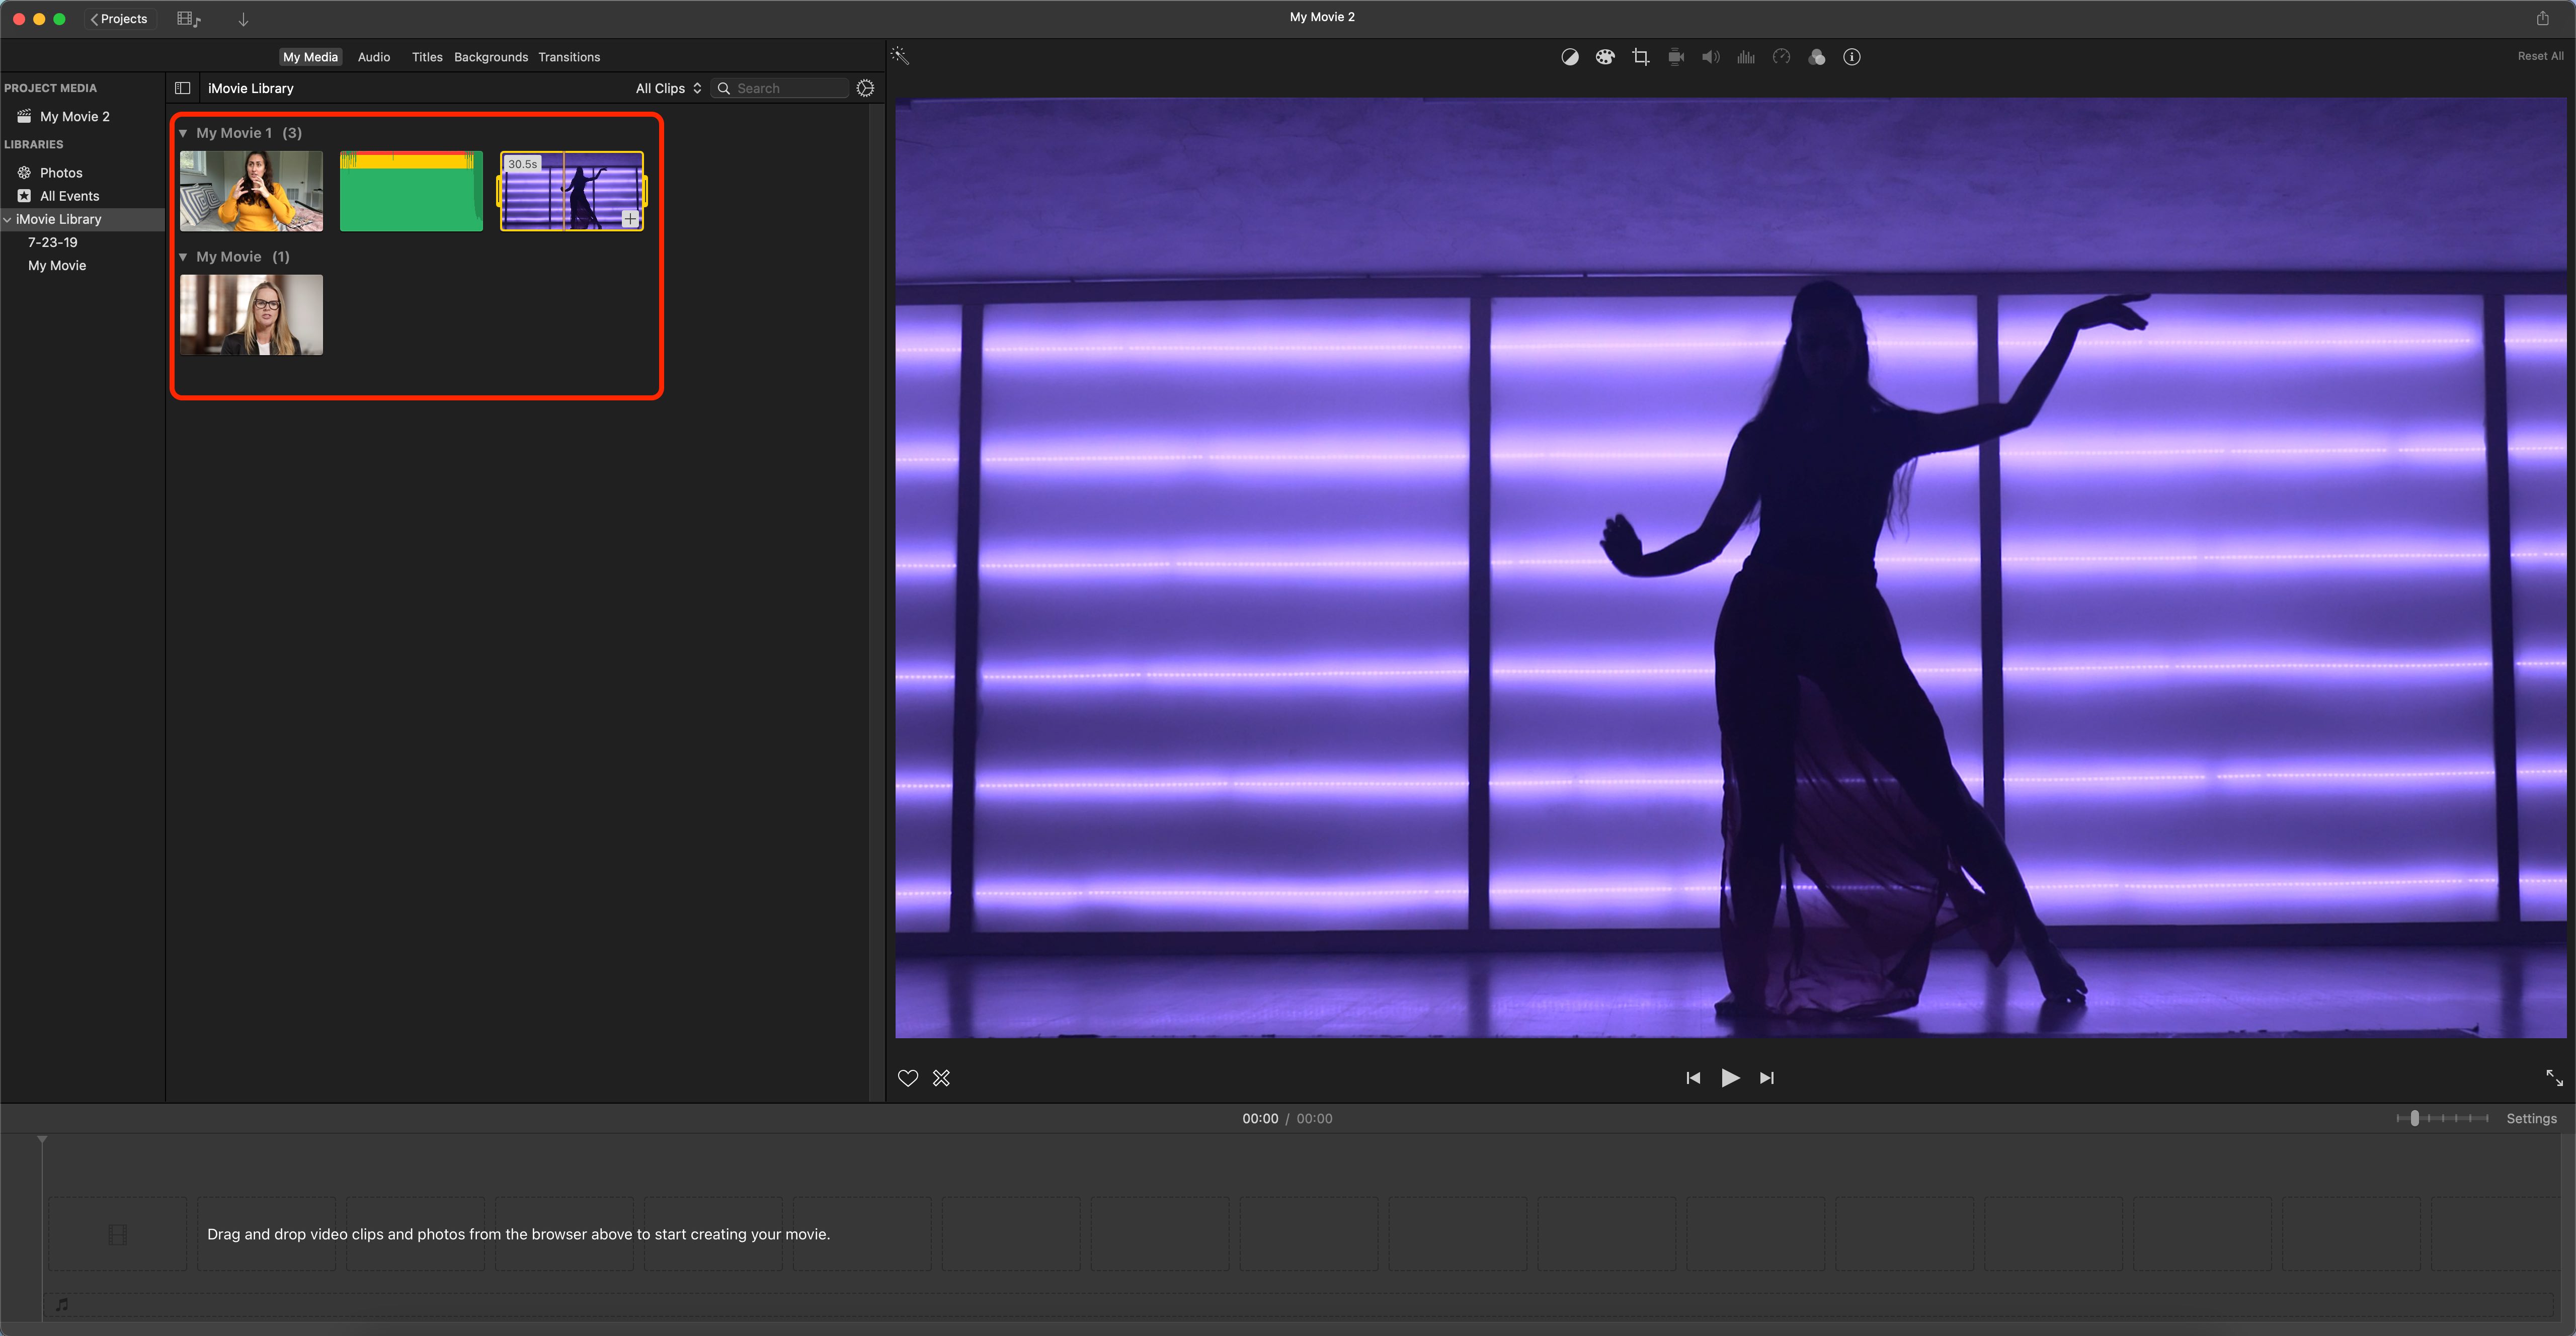
3. Edit the footage
After importing the video, you will see the Media pane. Click on the clip, and select the “Crop” button on the Preview window that pops up.

4. Rotate the video
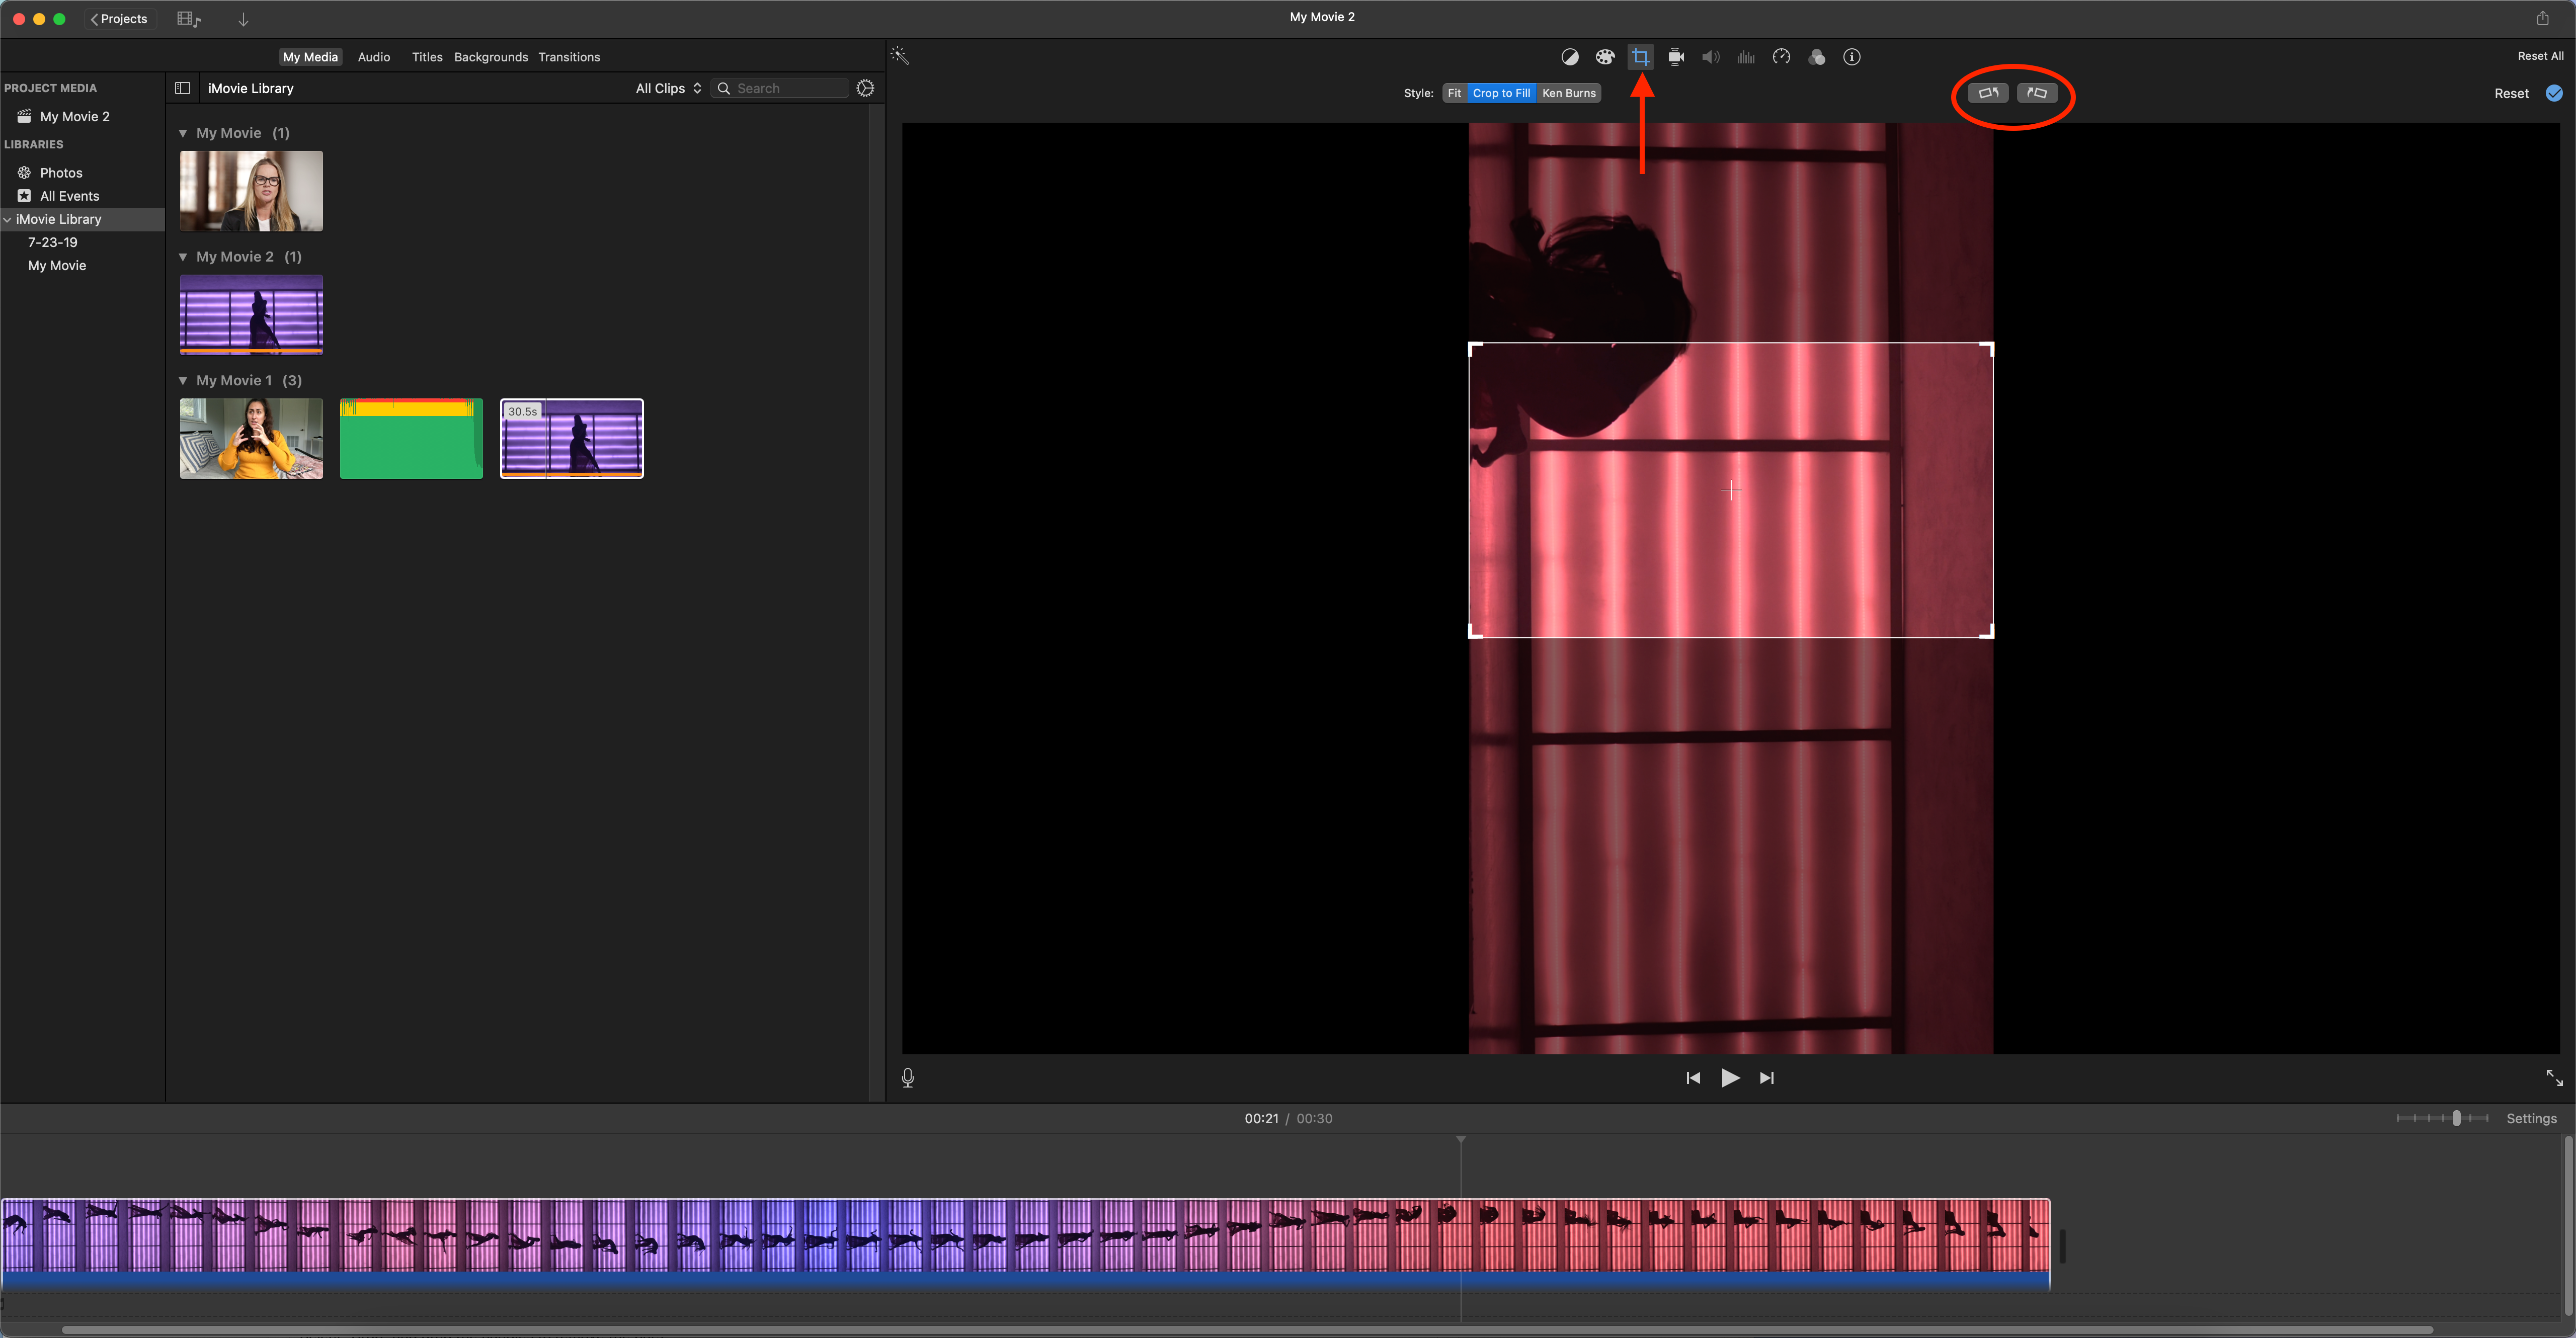
You should now be able to decide your video’s orientation.
Above the video canvas, you’ll see a pair of icons that mean “Rotate Clockwise” or “Rotate Anticlockwise.”
Click on these as many times as you want until you achieve the video orientation that you want.
5. Remove the black bars

As you rotate the video, you can expect black bars to form above and below (or by the sides of) the video.
Use the Crop tool to get rid of these bars.
Select “Crop” and drag the handles to remove the bars.
After removing the black bars, select the blue check on the right corner of the video canvas to effect the changes.
6. Save the video
After successfully rotating the video, save it by clicking on “Share.”
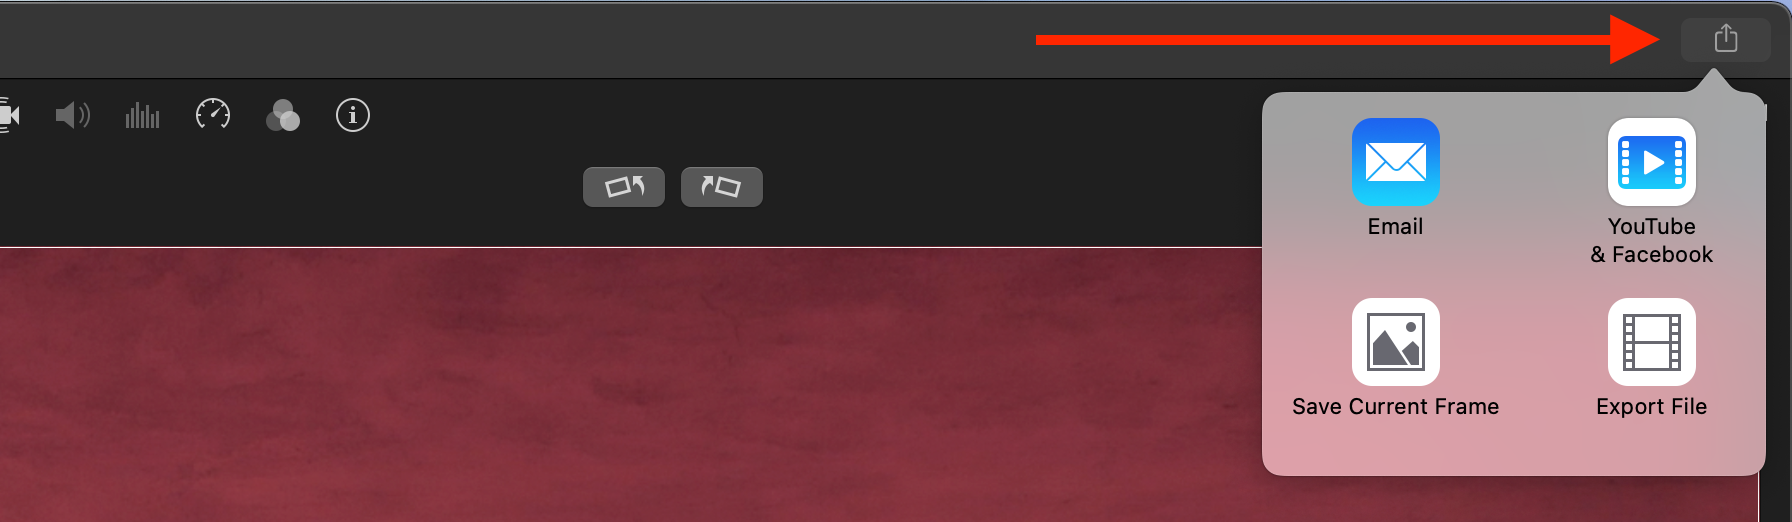
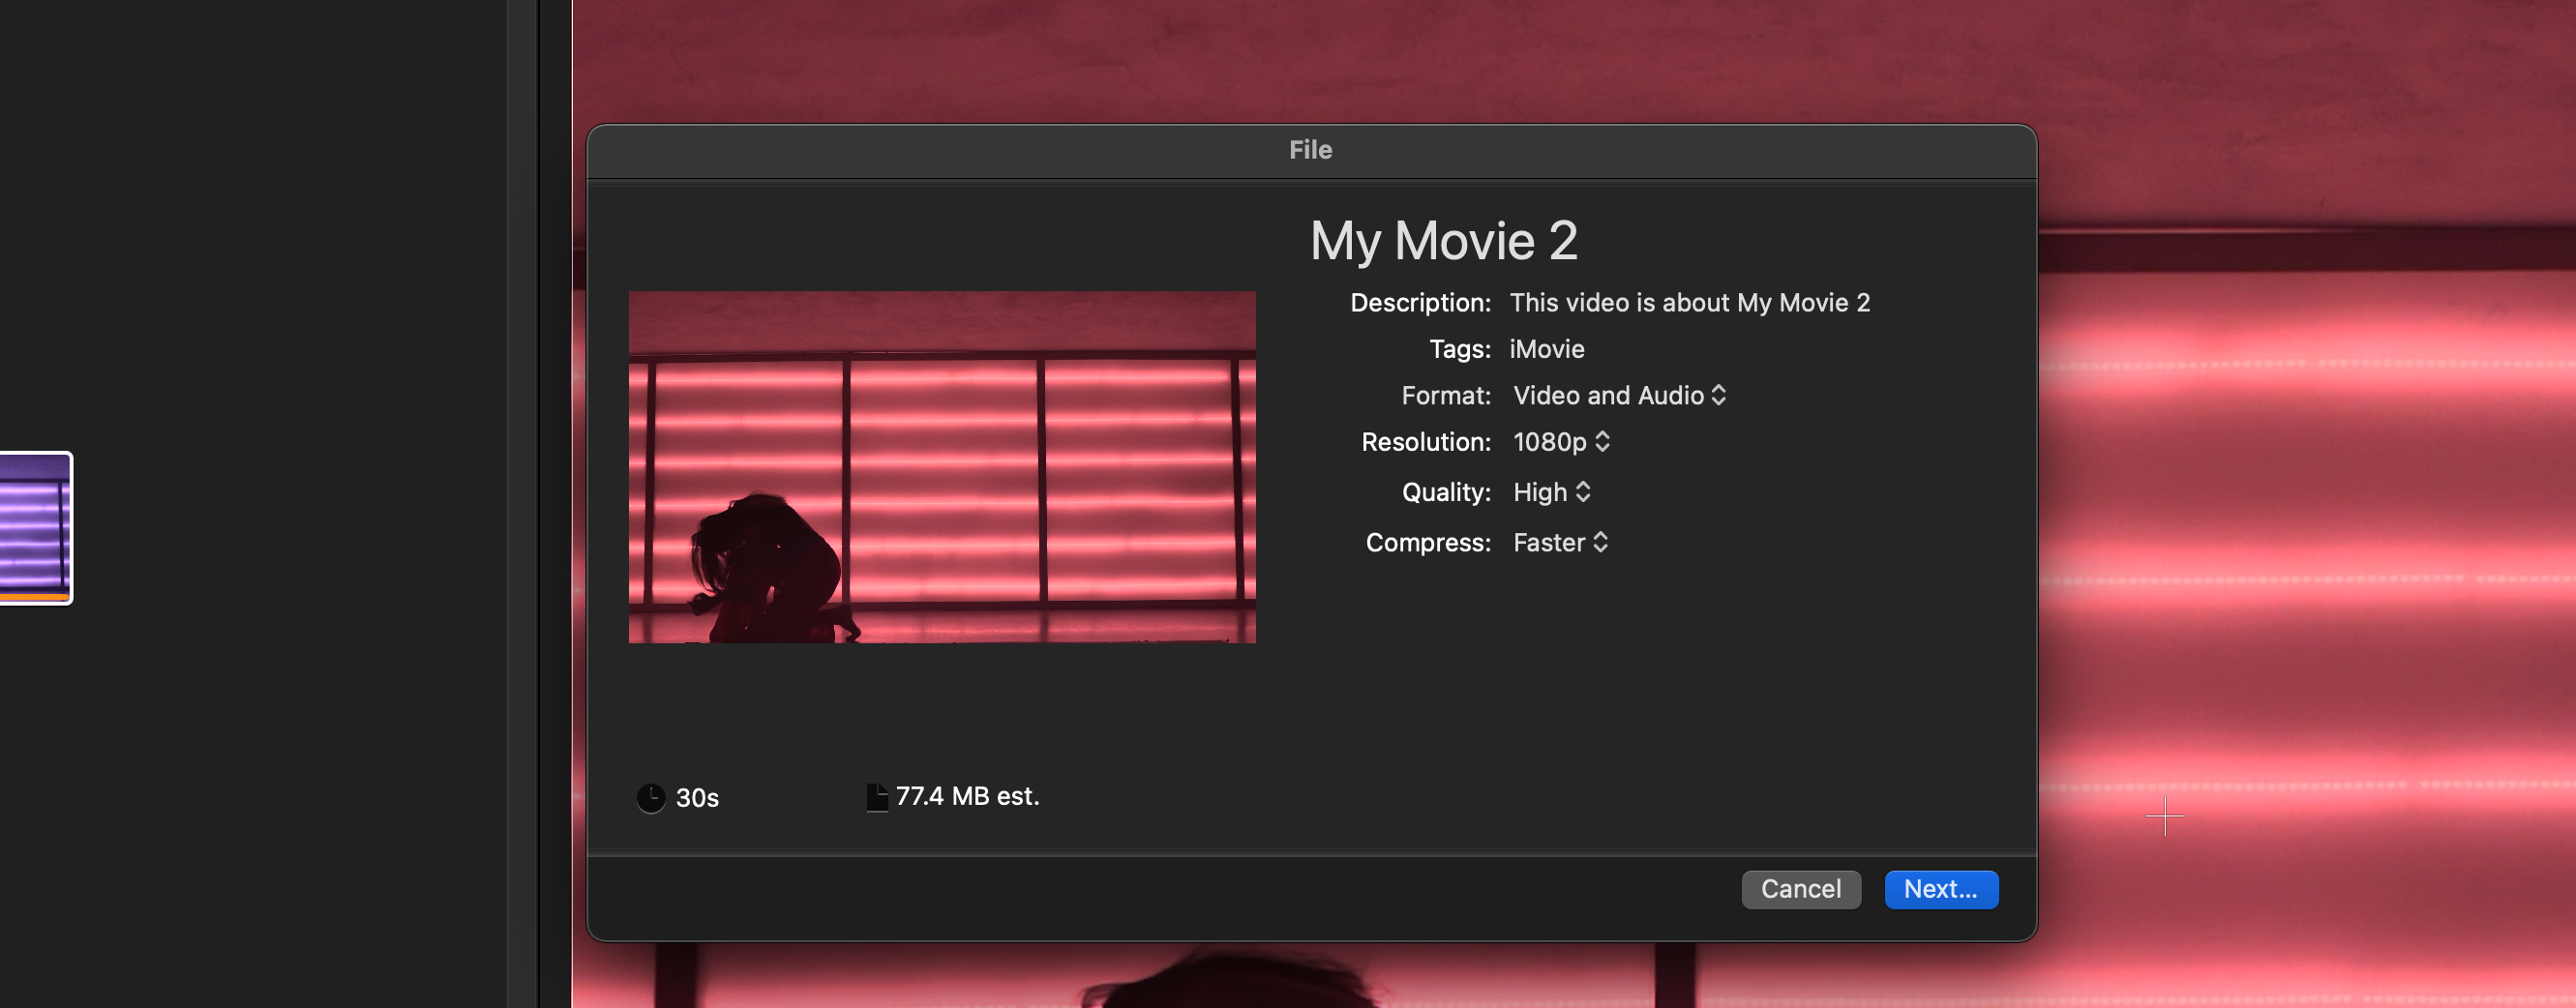
Then, click on “File” and follow the prompts that put you through naming the file and deciding on the location to save it. Easy-peasy.
5. How to Rotate a Video on iPhone
Unless you own a camera, it’s most likely that you use an iPhone to record your videos.
You’ve probably just shot a video that you bet could win you the “Best Director” at the Oscars, only to find out it’s in the wrong orientation. Yikes.
To rotate a video straight from your iPhone, you can use the Photos app.
Here’s how to do it.
1. Open Your Photo and Video Album
First, open the photos app and select the video you want to rotate.
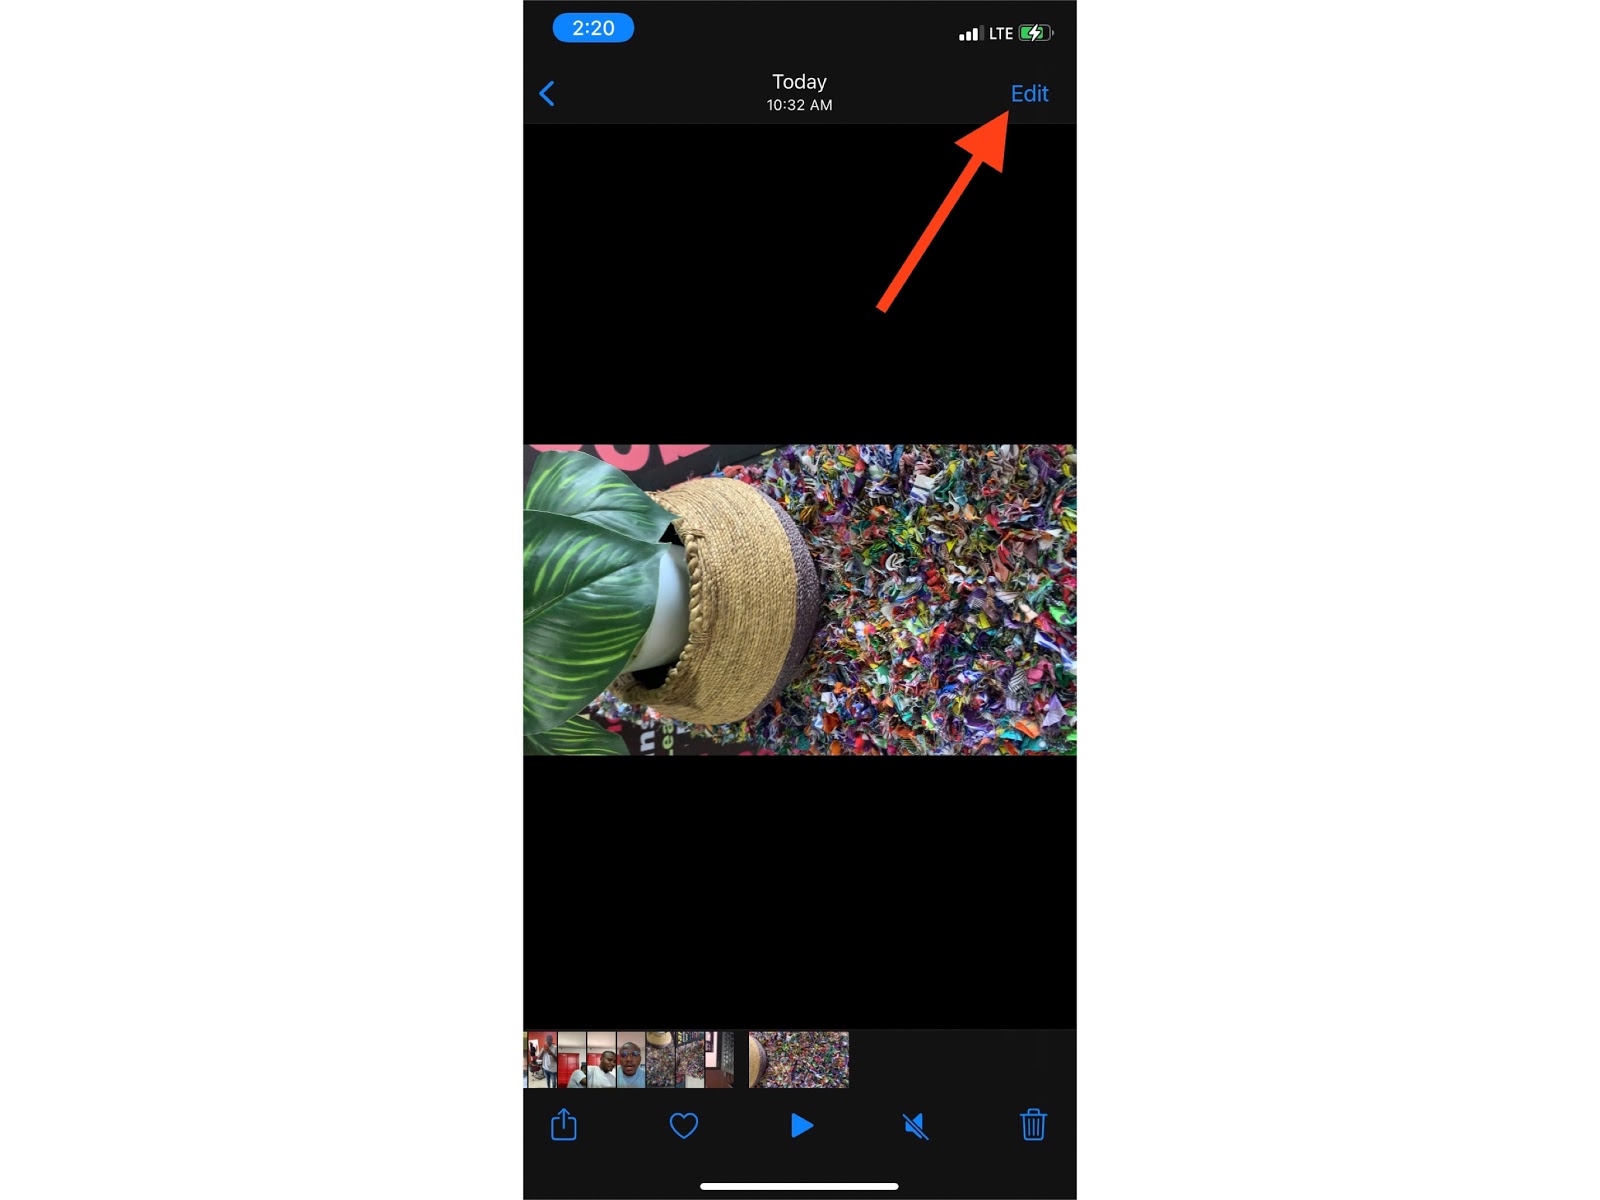
2. Edit the Video
Click “Edit” in the top right corner.
Select the “Crop and Straighten” icon at the bottom of the screen.
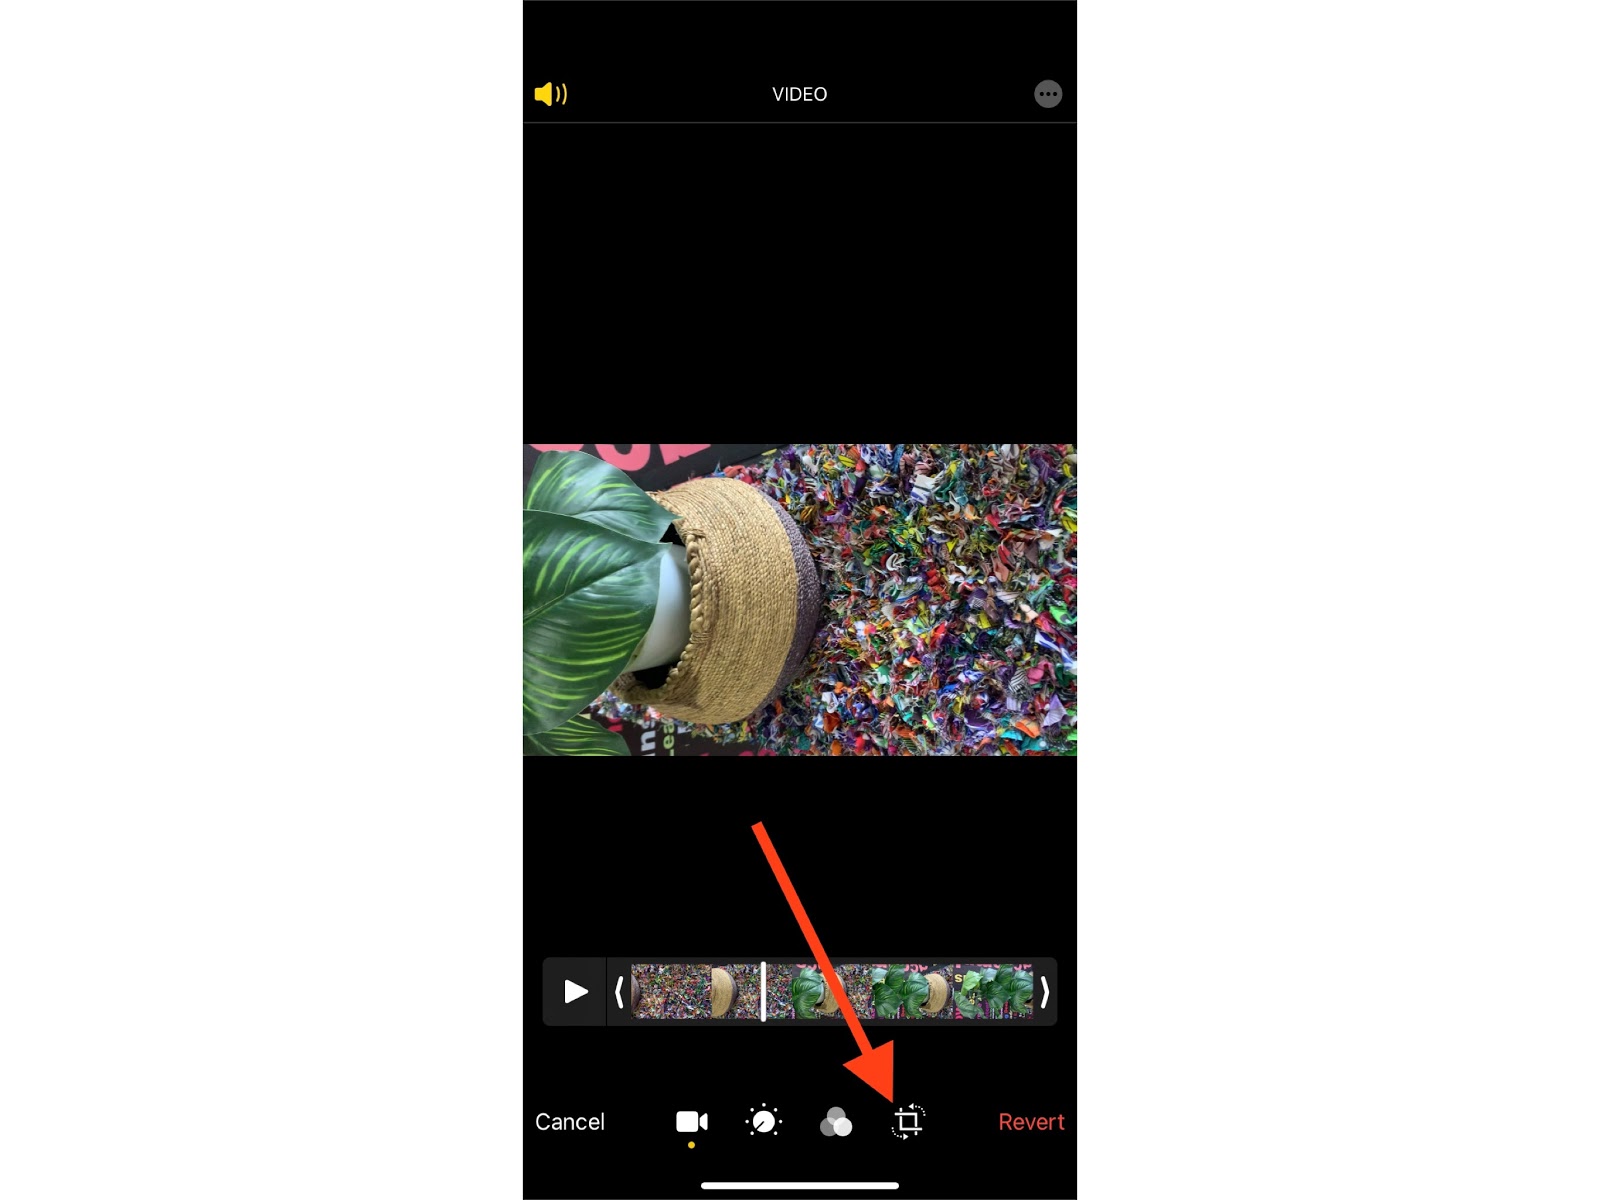
Then, select “Rotate,” represented in the top left corner by a box with a curving left arrow.
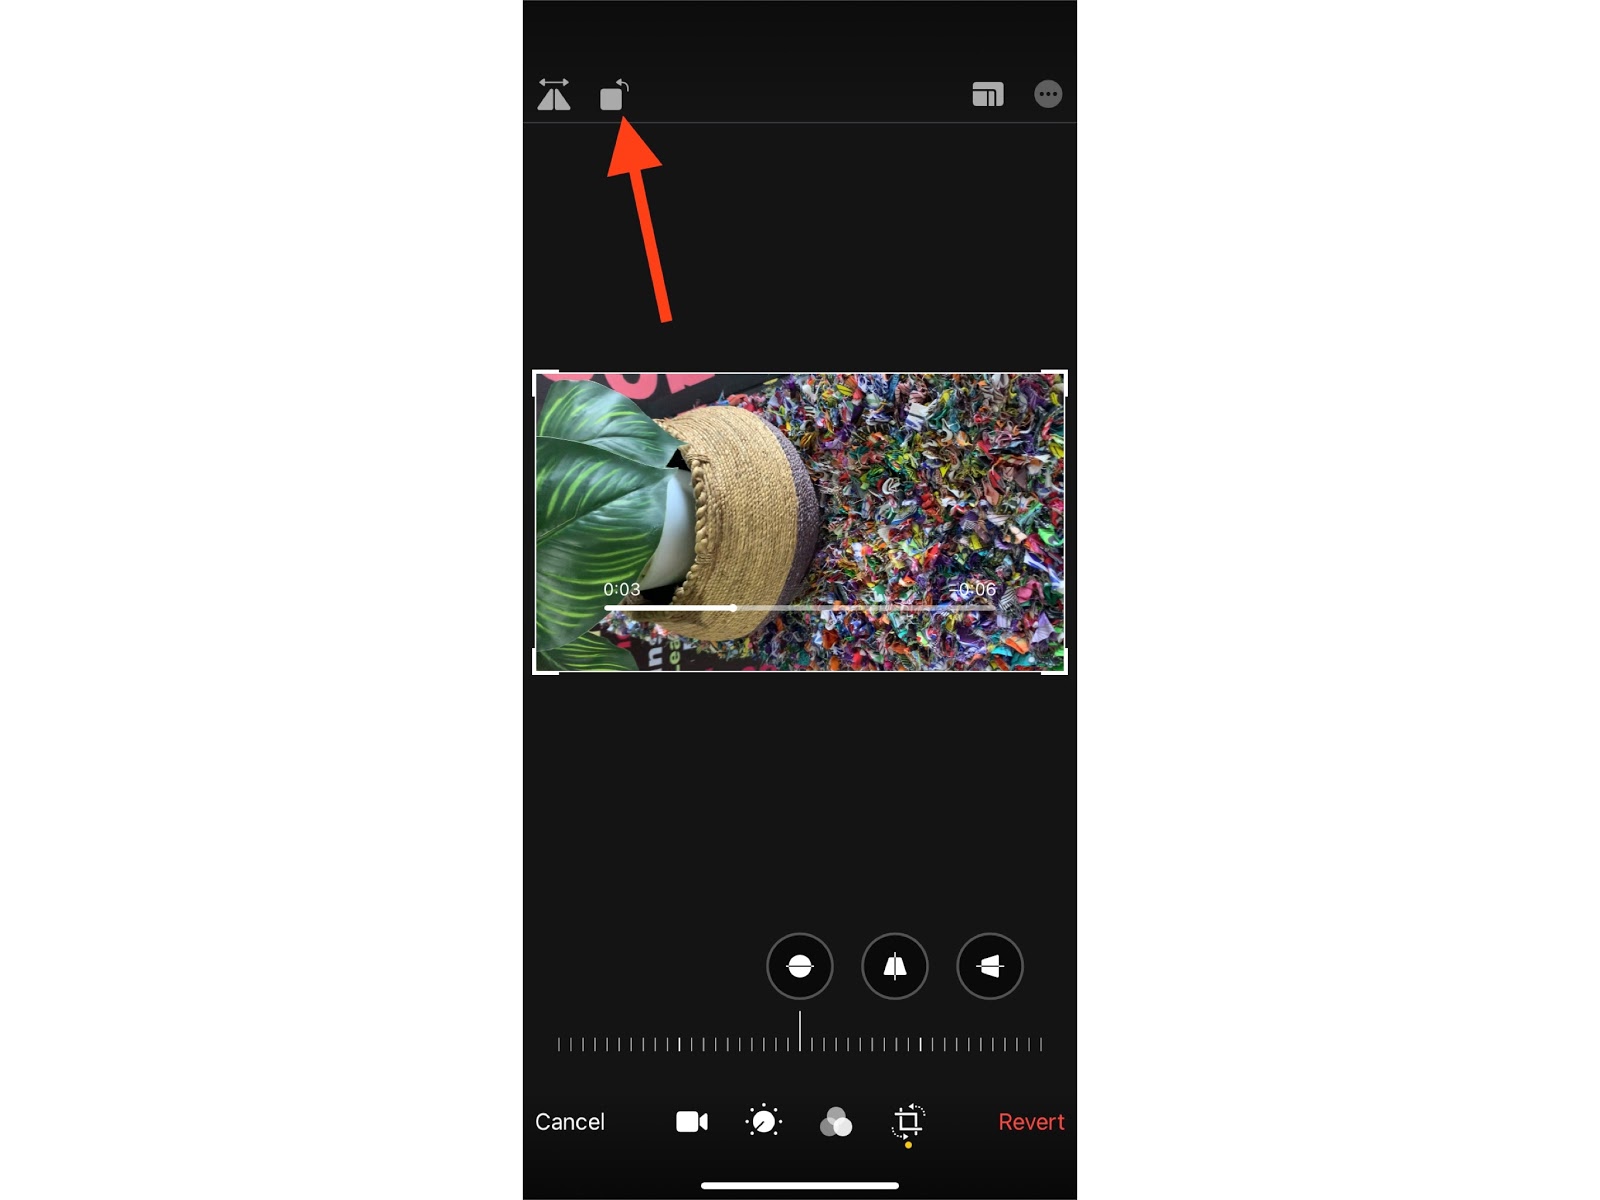
Each tap of “Rotate” will change the orientation of the video. Continue tapping until you get your preferred direction.
3. Save the Video
Tap on “Done” to save the video in the new orientation.

6. How to Rotate a Video on Android
You’ve seen how to rotate a video and save it on iOS, but can you do the same on Android? Yes, you can.
Google Photos can help you to rotate videos that you recorded in the wrong orientation. The Google Photos App comes pre-installed on most Android devices.
1. Open Google Photos
The first thing is to open the Google Photos app on your Android device.
2. Choose the video
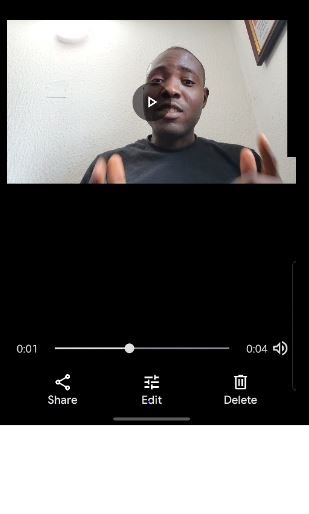
Next, tap the video that you want to rotate.

3. Edit the Video
You’ll find the option to edit your video by clicking “Edit” at the bottom of your screen.
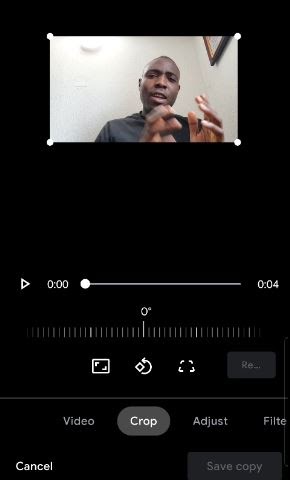
4. Rotate the video
Select “Crop” at the bottom of the video.
Then tap on the “Rotate” icon that lies just beneath the slider. It’s represented by a combination of a left-facing arrow and a box.
Each tap on this icon rotates the video 90 degrees. Do this until you get the perfect orientation for your video.
5. Save your video
After editing and rotating, tap “Save Copy” to save the rotated video as a different file from the original video.

Conclusion
So there you have it — six quick and easy ways to rotate a video.
Now you can shoot whatever kind of video you want, confident that you can correct it even if it comes out in the wrong orientation.
If you only create videos for fun, then you’ll likely be satisfied with the editing solutions on the device you use — whether it’s Android, iOS, Windows, or Mac.
However, if you want a more encompassing video editing solution that does far more than just rotating videos, then you should check out VEED.
With VEED, you get a simple video editing tool that can help you rotate videos, add subtitles, translate, transcribe videos, draw on videos, and so much more.
With just this tool, you can solve many of your video editing problems in a single click and take the quality of your videos to the next level without having to watch a thousand YouTube videos to get things right.