
Hardcoded subtitles or captions transcribing videos improve video engagement and accessibility. In particular, these are super helpful for engaging differently-abled folks like those with ADHD, autism, and hearing impairment.
Unlike closed captions though, hard subtitles play without relying on subtitle plugins or uploading an SRT file.
Meaning: these subtitles are burned into videos so no one can remove them once you’ve added them, and they show irrespective of the player and video host.
Here’s a quick step-by-step summary explaining how to embed subtitles into video, followed by the details:
- Go to VEED and upload your video
- Click on subtitles and then auto subtitle
- Export and download your video
Want to go more in-depth, here's what we'll dig into:
- What are hardcoded subtitles and why do they matter
- How to add (and edit) hardcoded subtitles with VEED
- Best practices to format your hardcoded subtitles
[#TOC1]What are hardcoded subtitles and why do they matter[#TOC1]
A hardcoded subtitle is a caption or line of text that transcribes what the video says, playing without relying on subtitle plugins or uploading an SRT file.
What is an SRT file?
Files with .SRT or SubRip Subtitle file are plain video text files that contain a video’s subtitle information such as the sequential subtitles and time codes of the text so they match the audio. Here’s more on how to create a SRT file for your videos.
Unlike closed captions, these captions are burned into or merged with video images so no one can remove them once you’ve added them.
Typically, viewers can turn video captions on and off on platforms like YouTube where the option is available.
However, if they’re watching video content on platforms like Instagram, TikTok, or Snapchat. Those platforms don’t accept SRT files so viewers have to do without captions unless the video creator burned subtitles into their video.
The other two networks are slowly rolling it out with Instagram story and reels caption stickers that auto-generate subtitles or TikTok that now auto-generates captions.
But here’s the thing...
Expect weird interpretations with auto-generated subtitles you can’t edit — not the text nor its placement. Sure you can change spelling in TikTok captions, but that’s as far as it goes. Meaning: you can’t change their placement or style.
With Instagram Stories, you can customize the closed caption stickers — choosing from a few font and color options. But that’s all.
All this is sad news for content creators.
Because 83% watch videos with the sound turned off. A higher number, 92%, view videos with sound off on their mobile device. To top that, 70% of folks watch videos on mute in public. 25% do the same in a private setting.
Translation: your videos won’t be able to garner as much engagement as they deserve if there are no subtitles. In fact, one of the reports shared above went on to recommend captioning videos as that makes 80% of consumers likely to watch the full video.
In this context, adding hardcoded subtitles that don’t require any SRT file or subtitle plugin to run are the best solution. They’re the tattoo to your videos – permanently inked into the file so there’s no worrying whether your audience might not be able to opt in to them. Bullseye!
So why does adding subtitles matter?
Briefly, hardcoded subtitling videos helps you improve viewers’ experience and grow your engagement.
Here’s a breakdown of the major benefits of adding captions to your videos:
- Subtitles play for everyone regardless of their player settings. Whether your audience is on YouTube or TikTok, they can enjoy captioned videos without having to try and enable captions (and getting disappointed if they’re on Tiktok or IG).
- Better video engagement. Since platforms like Instagram don’t allow you to upload SRT files with your video, you can get more eyeballs to your videos using hardcode subtitles as more people view it and watch time increases. With the increased watch time and user interaction with your video, your content is likely going to get more exposure. Chances of getting comments on it also increase as more people can understand what you’ve covered.
- Perfect sync between video and subtitles. With SRT files, media players have to decode and encode subtitles as they play the video. Any delay in managing the two means viewers are greeted with videos with poorly synced subtitles and the rest of the content. And here’s the kicker: some players, desktop, and websites are incompatible with softcode subtitles or don’t show the correct subtitles.
In contrast, hardcoded subtitles come with no extra baggage like requiring a plugin, player or SRT file to play. Meaning: the audio plays in tandem with the video, delivering your story perfectly to your viewers.
- Great video accessibility and wider audience. With hardcode subtitles in place, differently abled folks like those with ADHD, autism, and hearing impairment can enjoy your video content – regardless of the player and video host.
For online educators using social to share their message, there’s more reason to rejoice. Why? Because captions can improve information retention and focus for people with ADHD and Autism.
People who don’t have any trouble with hearing or focus also tend to use captions for learning. So hardcode subtitling is a definite win-win!
Pro tip: Translate your videos using VEED’s automatic video translator. This way, you overcome language barriers too – boosting engagement with your content further.
[#TOC2]How to hardcode subtitles online with VEED[#TOC2]
The fastest and easiest way to add burn in subtitles to your videos is by using VEED.
Not only does it make it uber simple to automatically add hard subtitles, but it also makes editing and resizing videos a piece of cake.
Simply follow these 5 easy steps:
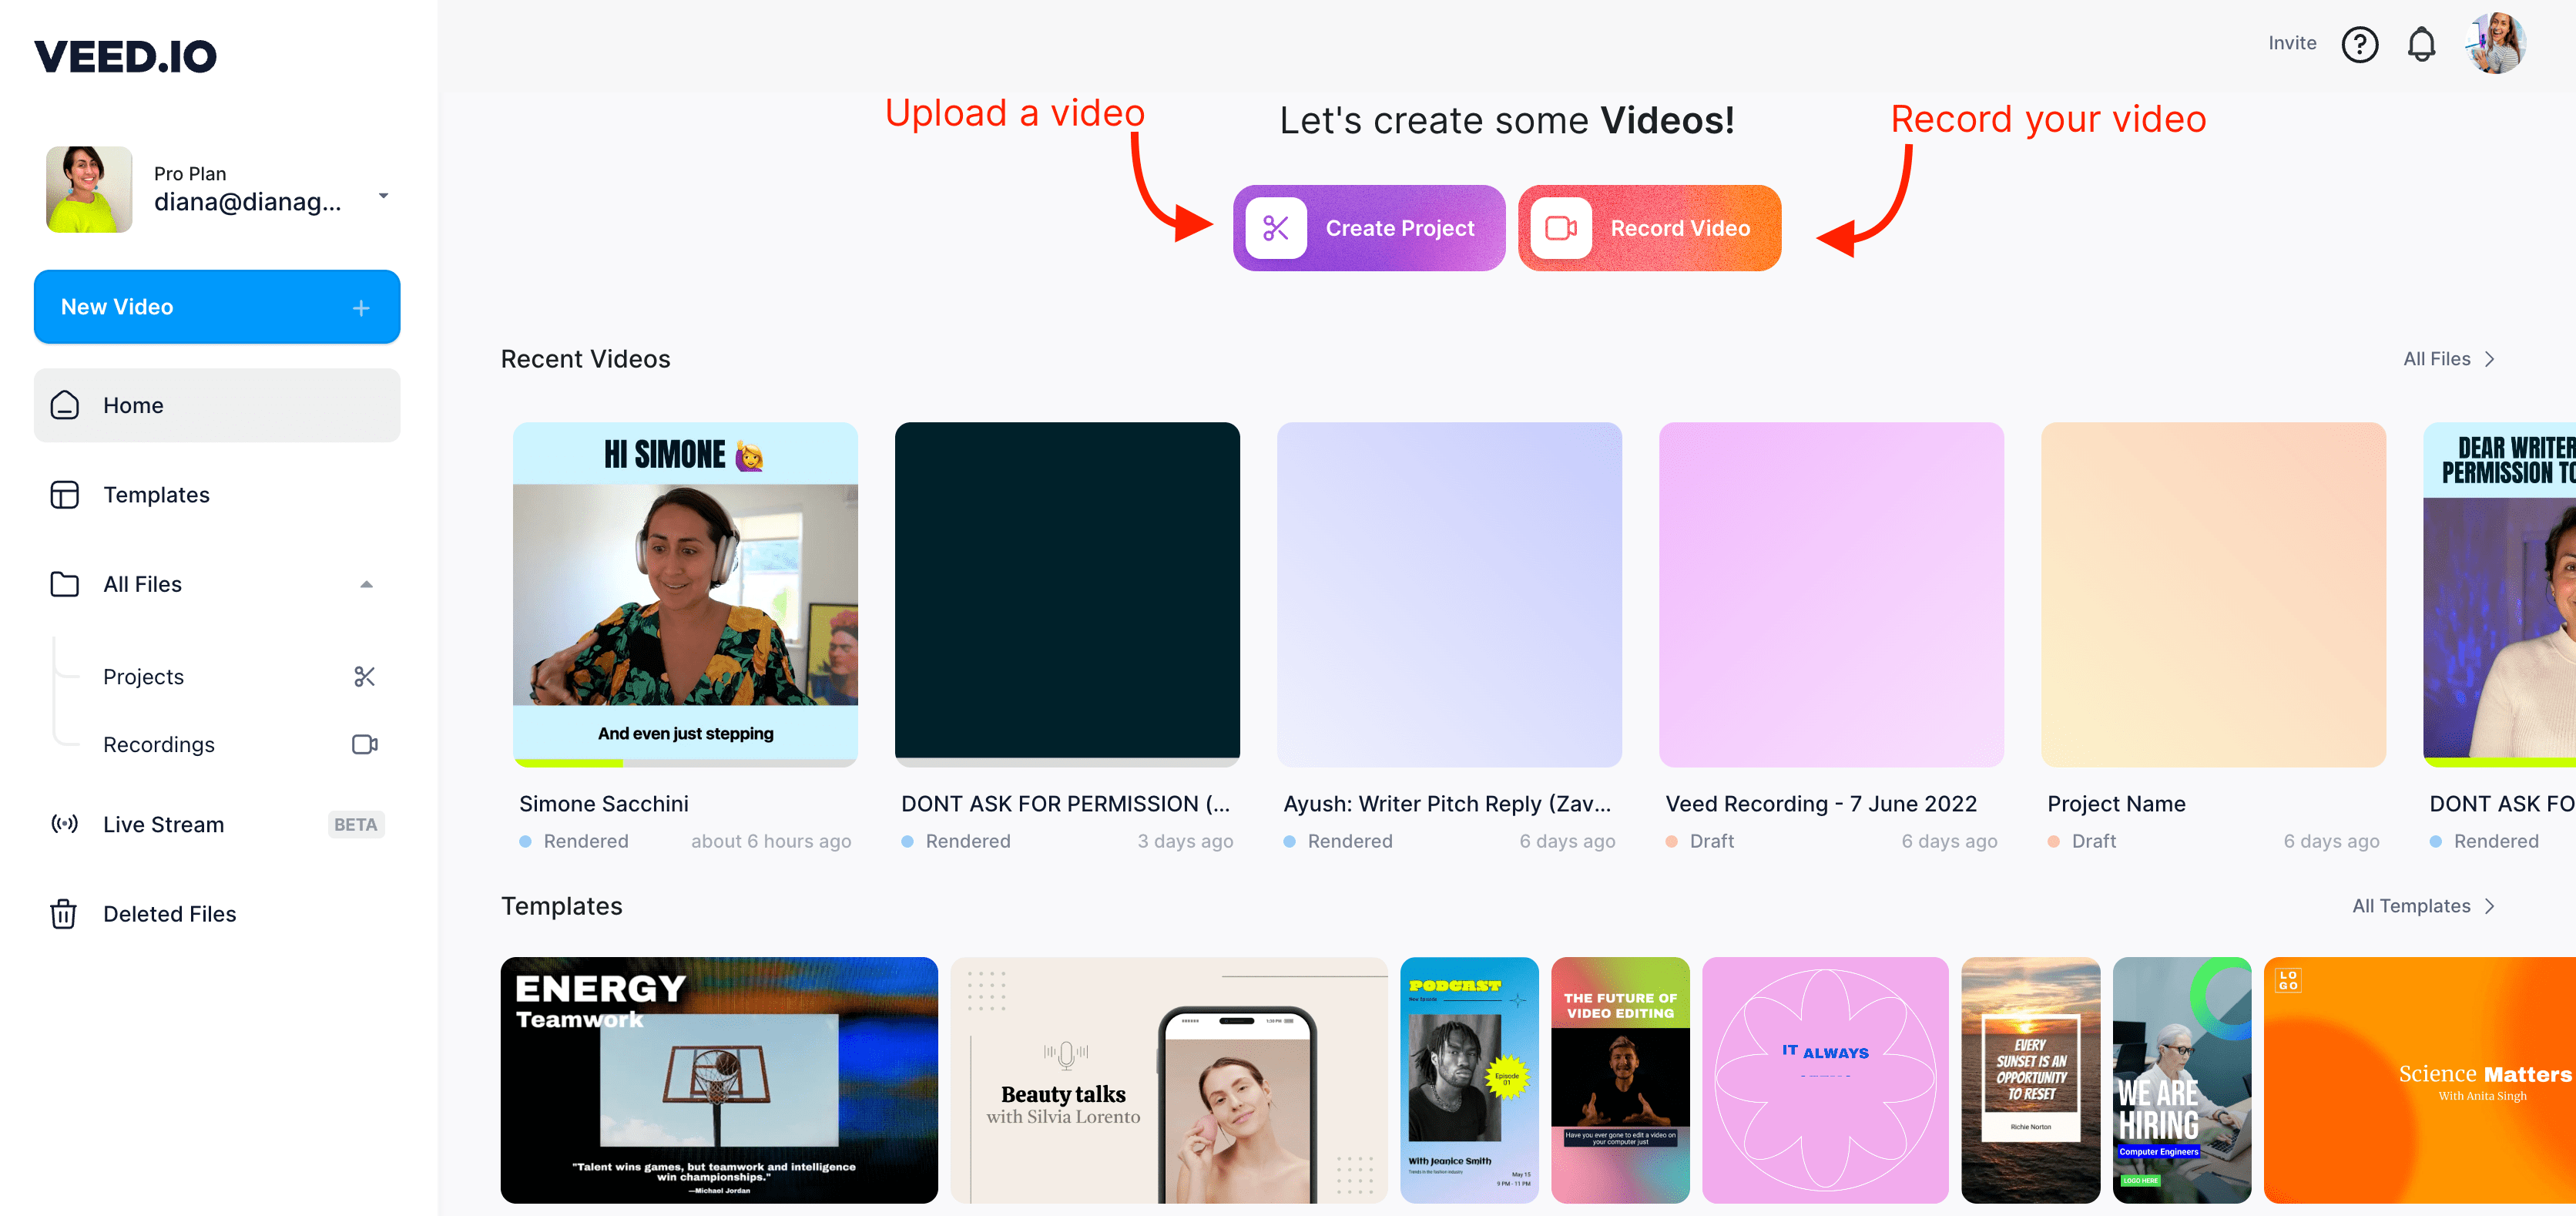
1. Upload your video to VEED
Head to www.veed.io and upload your video.
You can upload any popular video file such as .MP4 .MOV .AVI.
Plus, you’ve the option to upload your videos from your:
- Camera
- Dropbox
- Personal folder
- Device (phone, tablet, laptop, or desktop)
The best part? You can directly upload videos from YouTube using just the video link (URL). This makes repurposing YouTube videos into shorter, subtitled clips a breeze.
If you don’t have a video yet, you can use a video template from VEED’s template gallery.
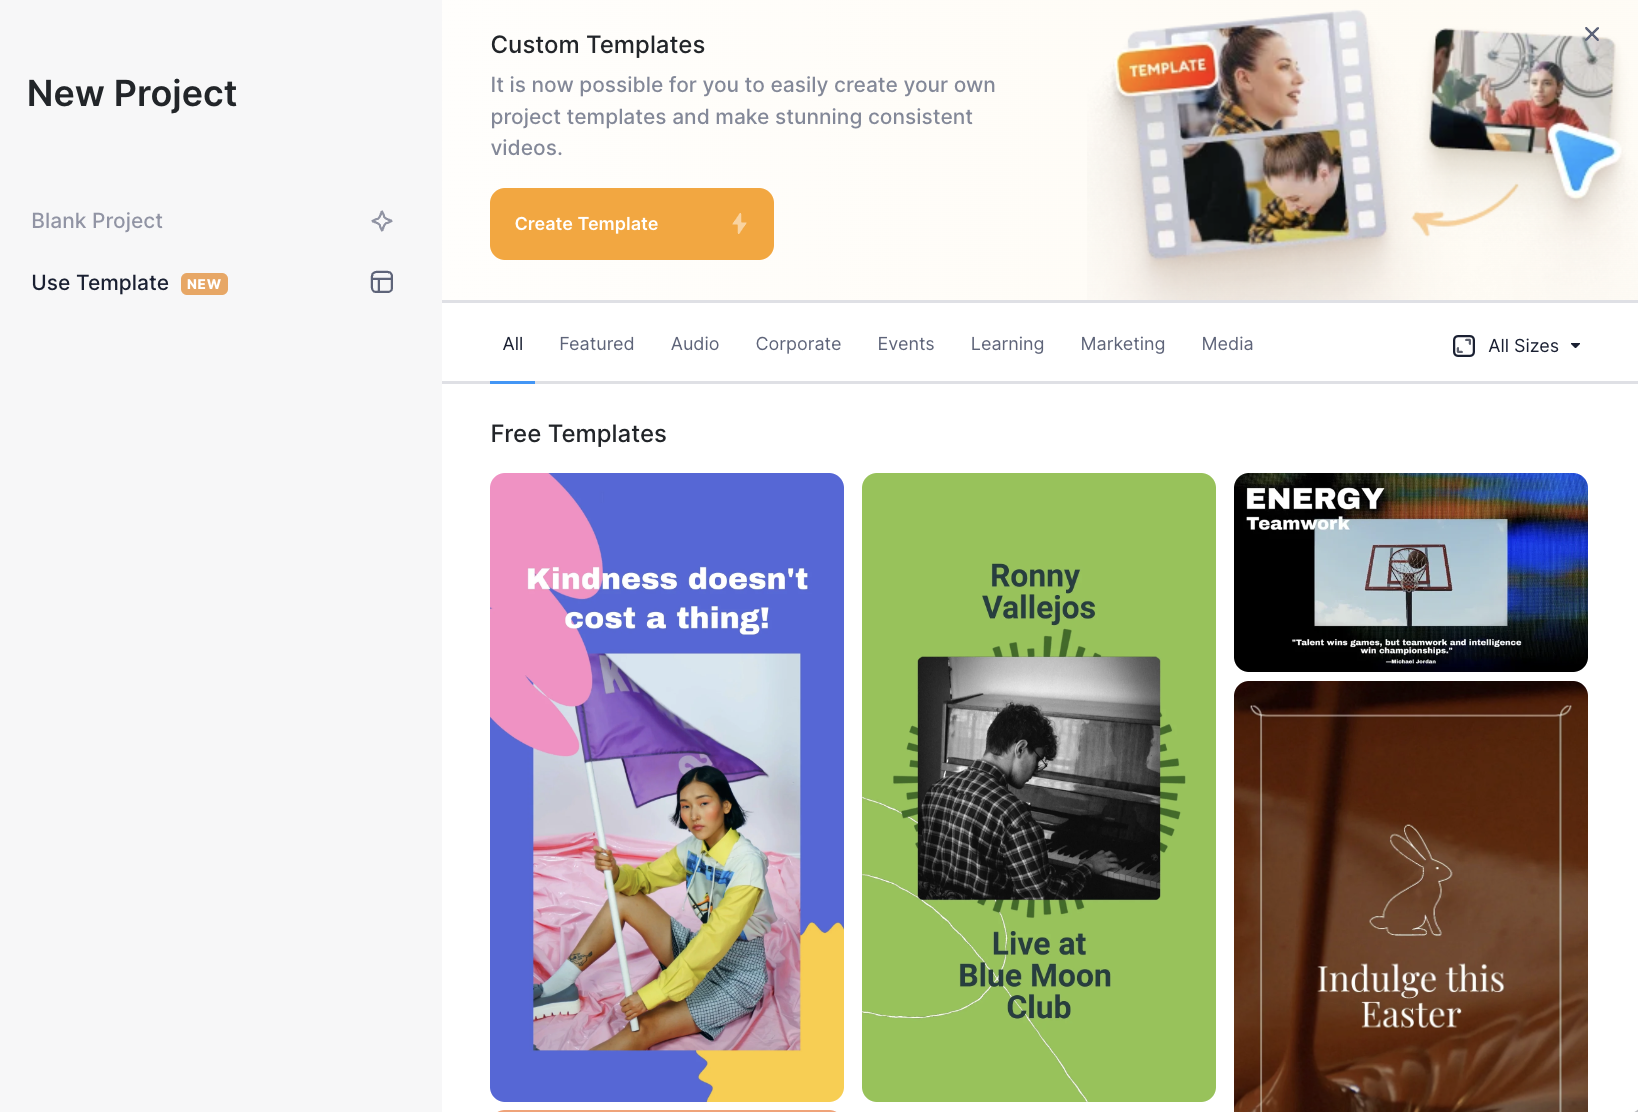
All you’ll need to do is to tweak the text and colors in the video template and your video will be ready within minutes.
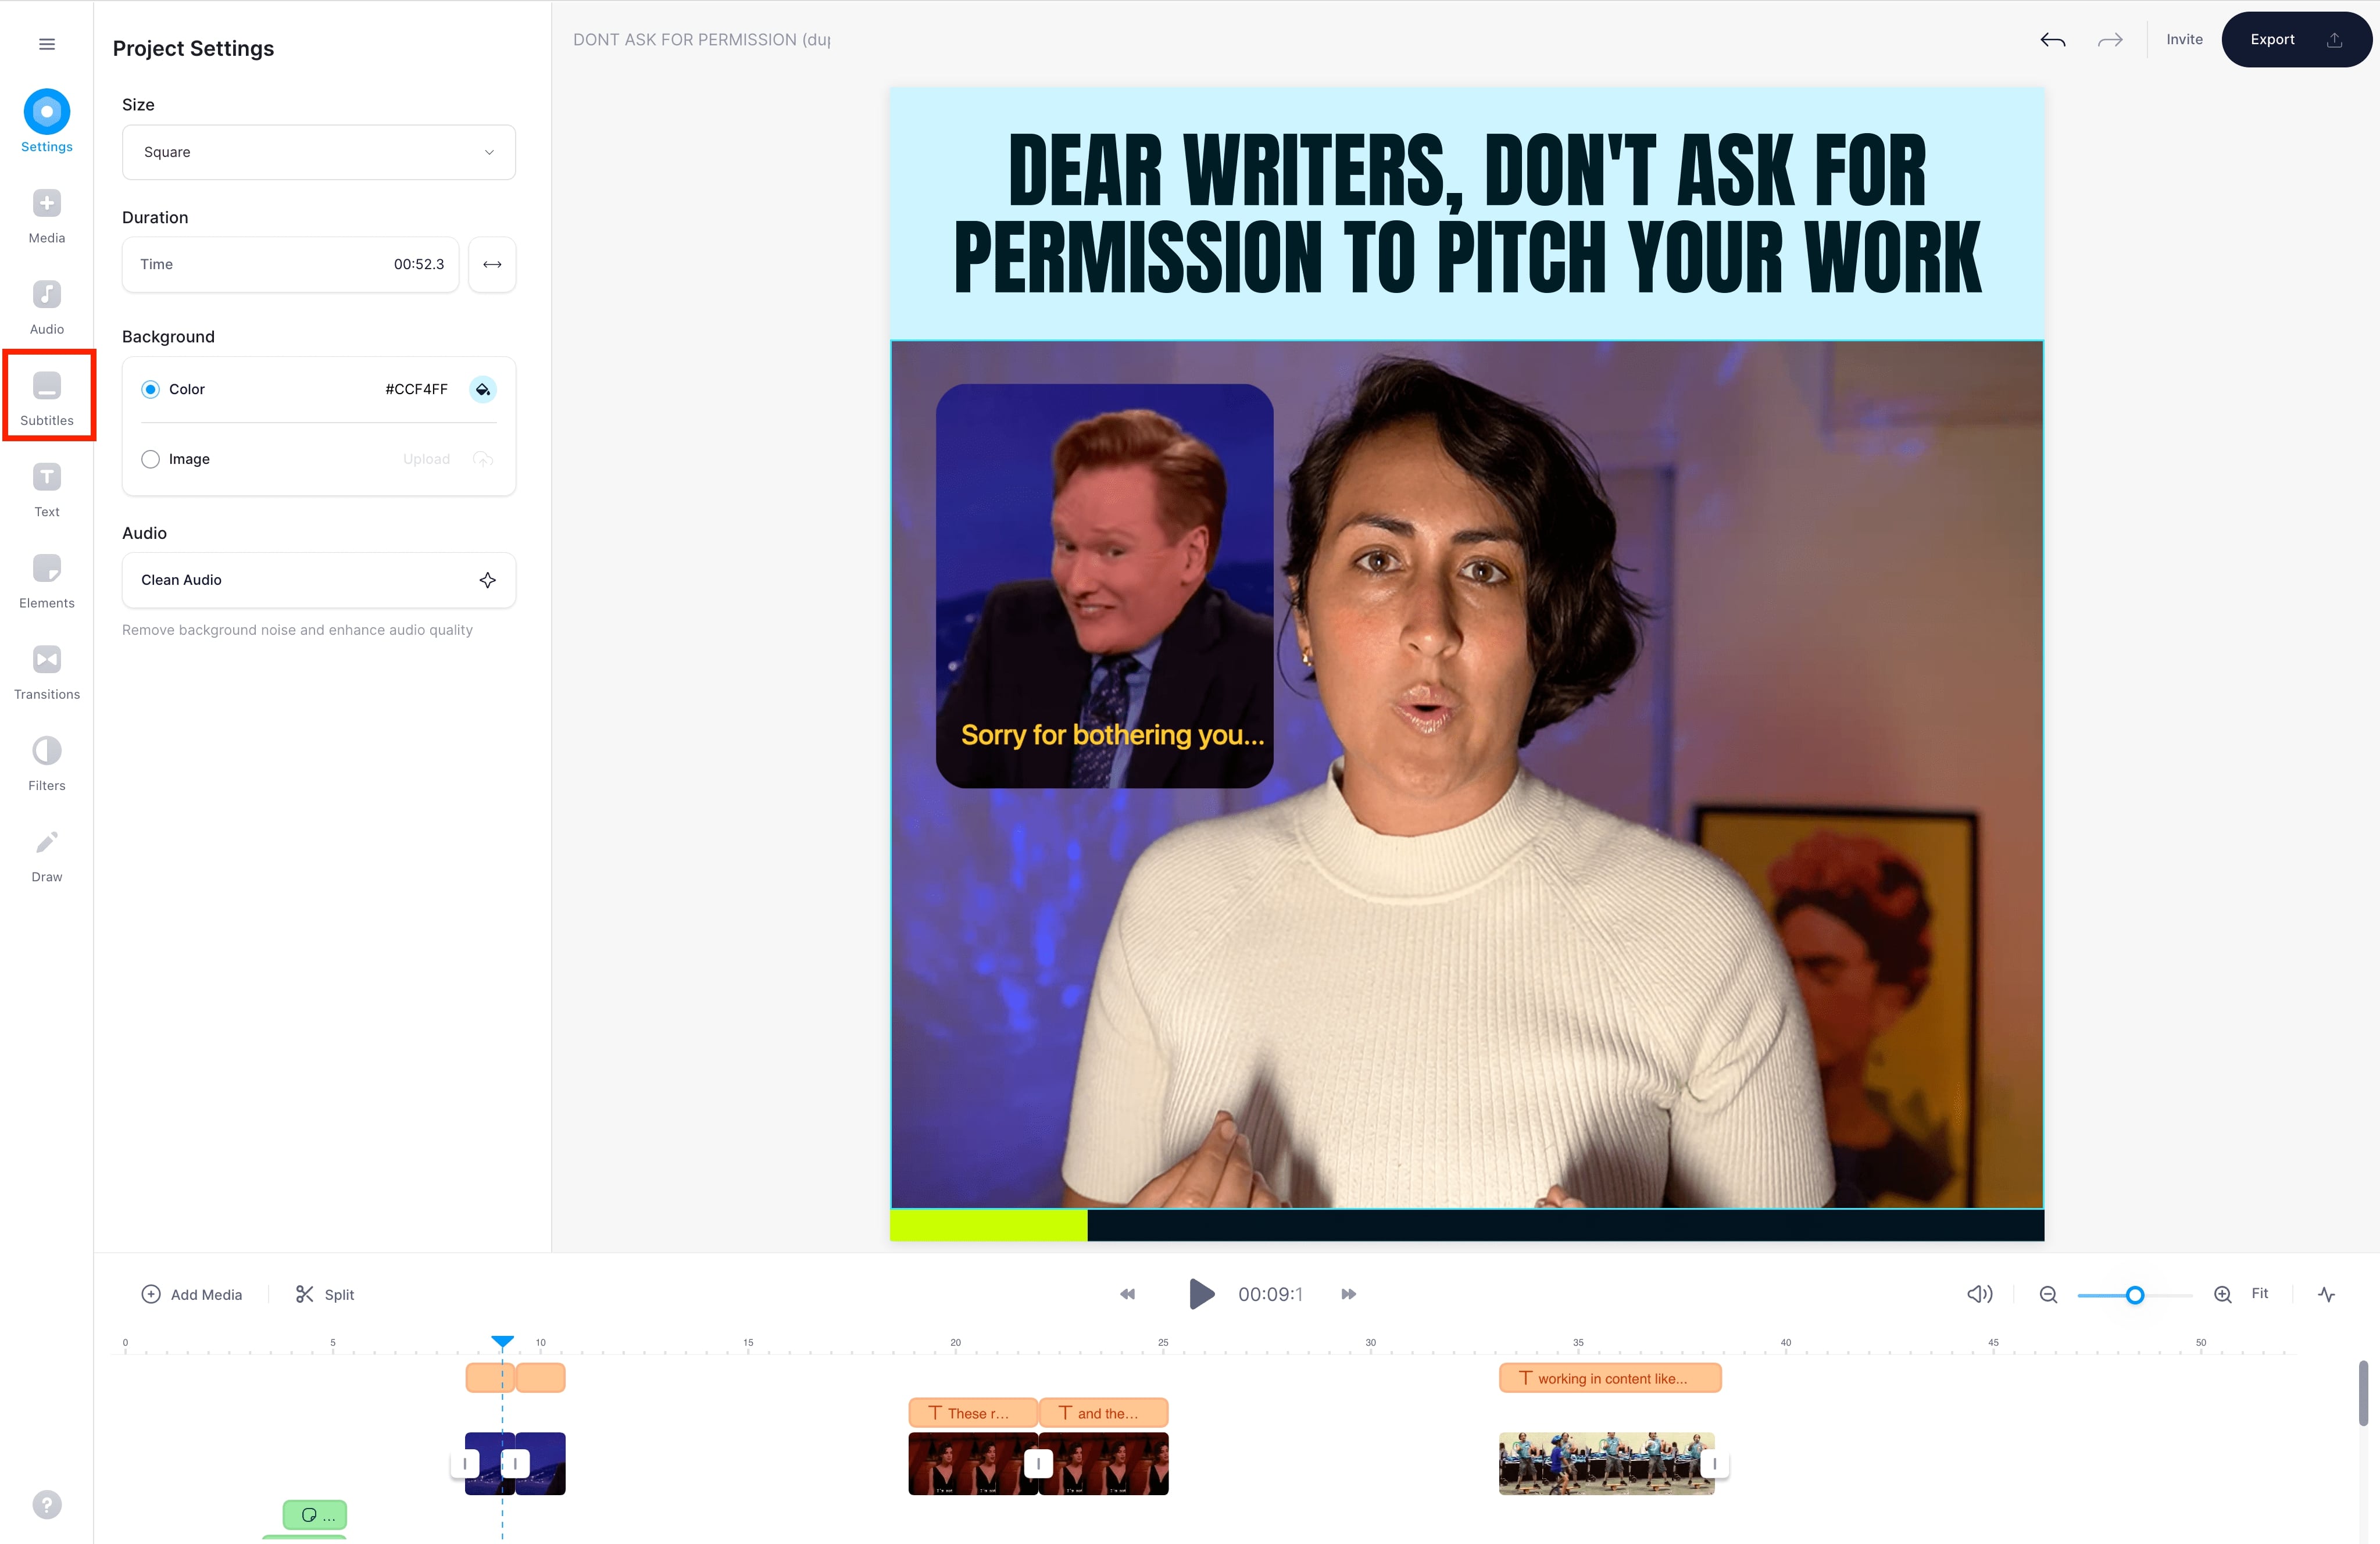
2. Click on subtitles and then select a subtitling option
Next, click on the Subtitles tab in the editor’s left toolbar to reveal the three options to add subtitles with VEED:
- Automatically add subtitles to your video
- Manually add subtitles to your video
- Upload an SRT file for tracing video’s subtitles
Choose whichever option suits you.
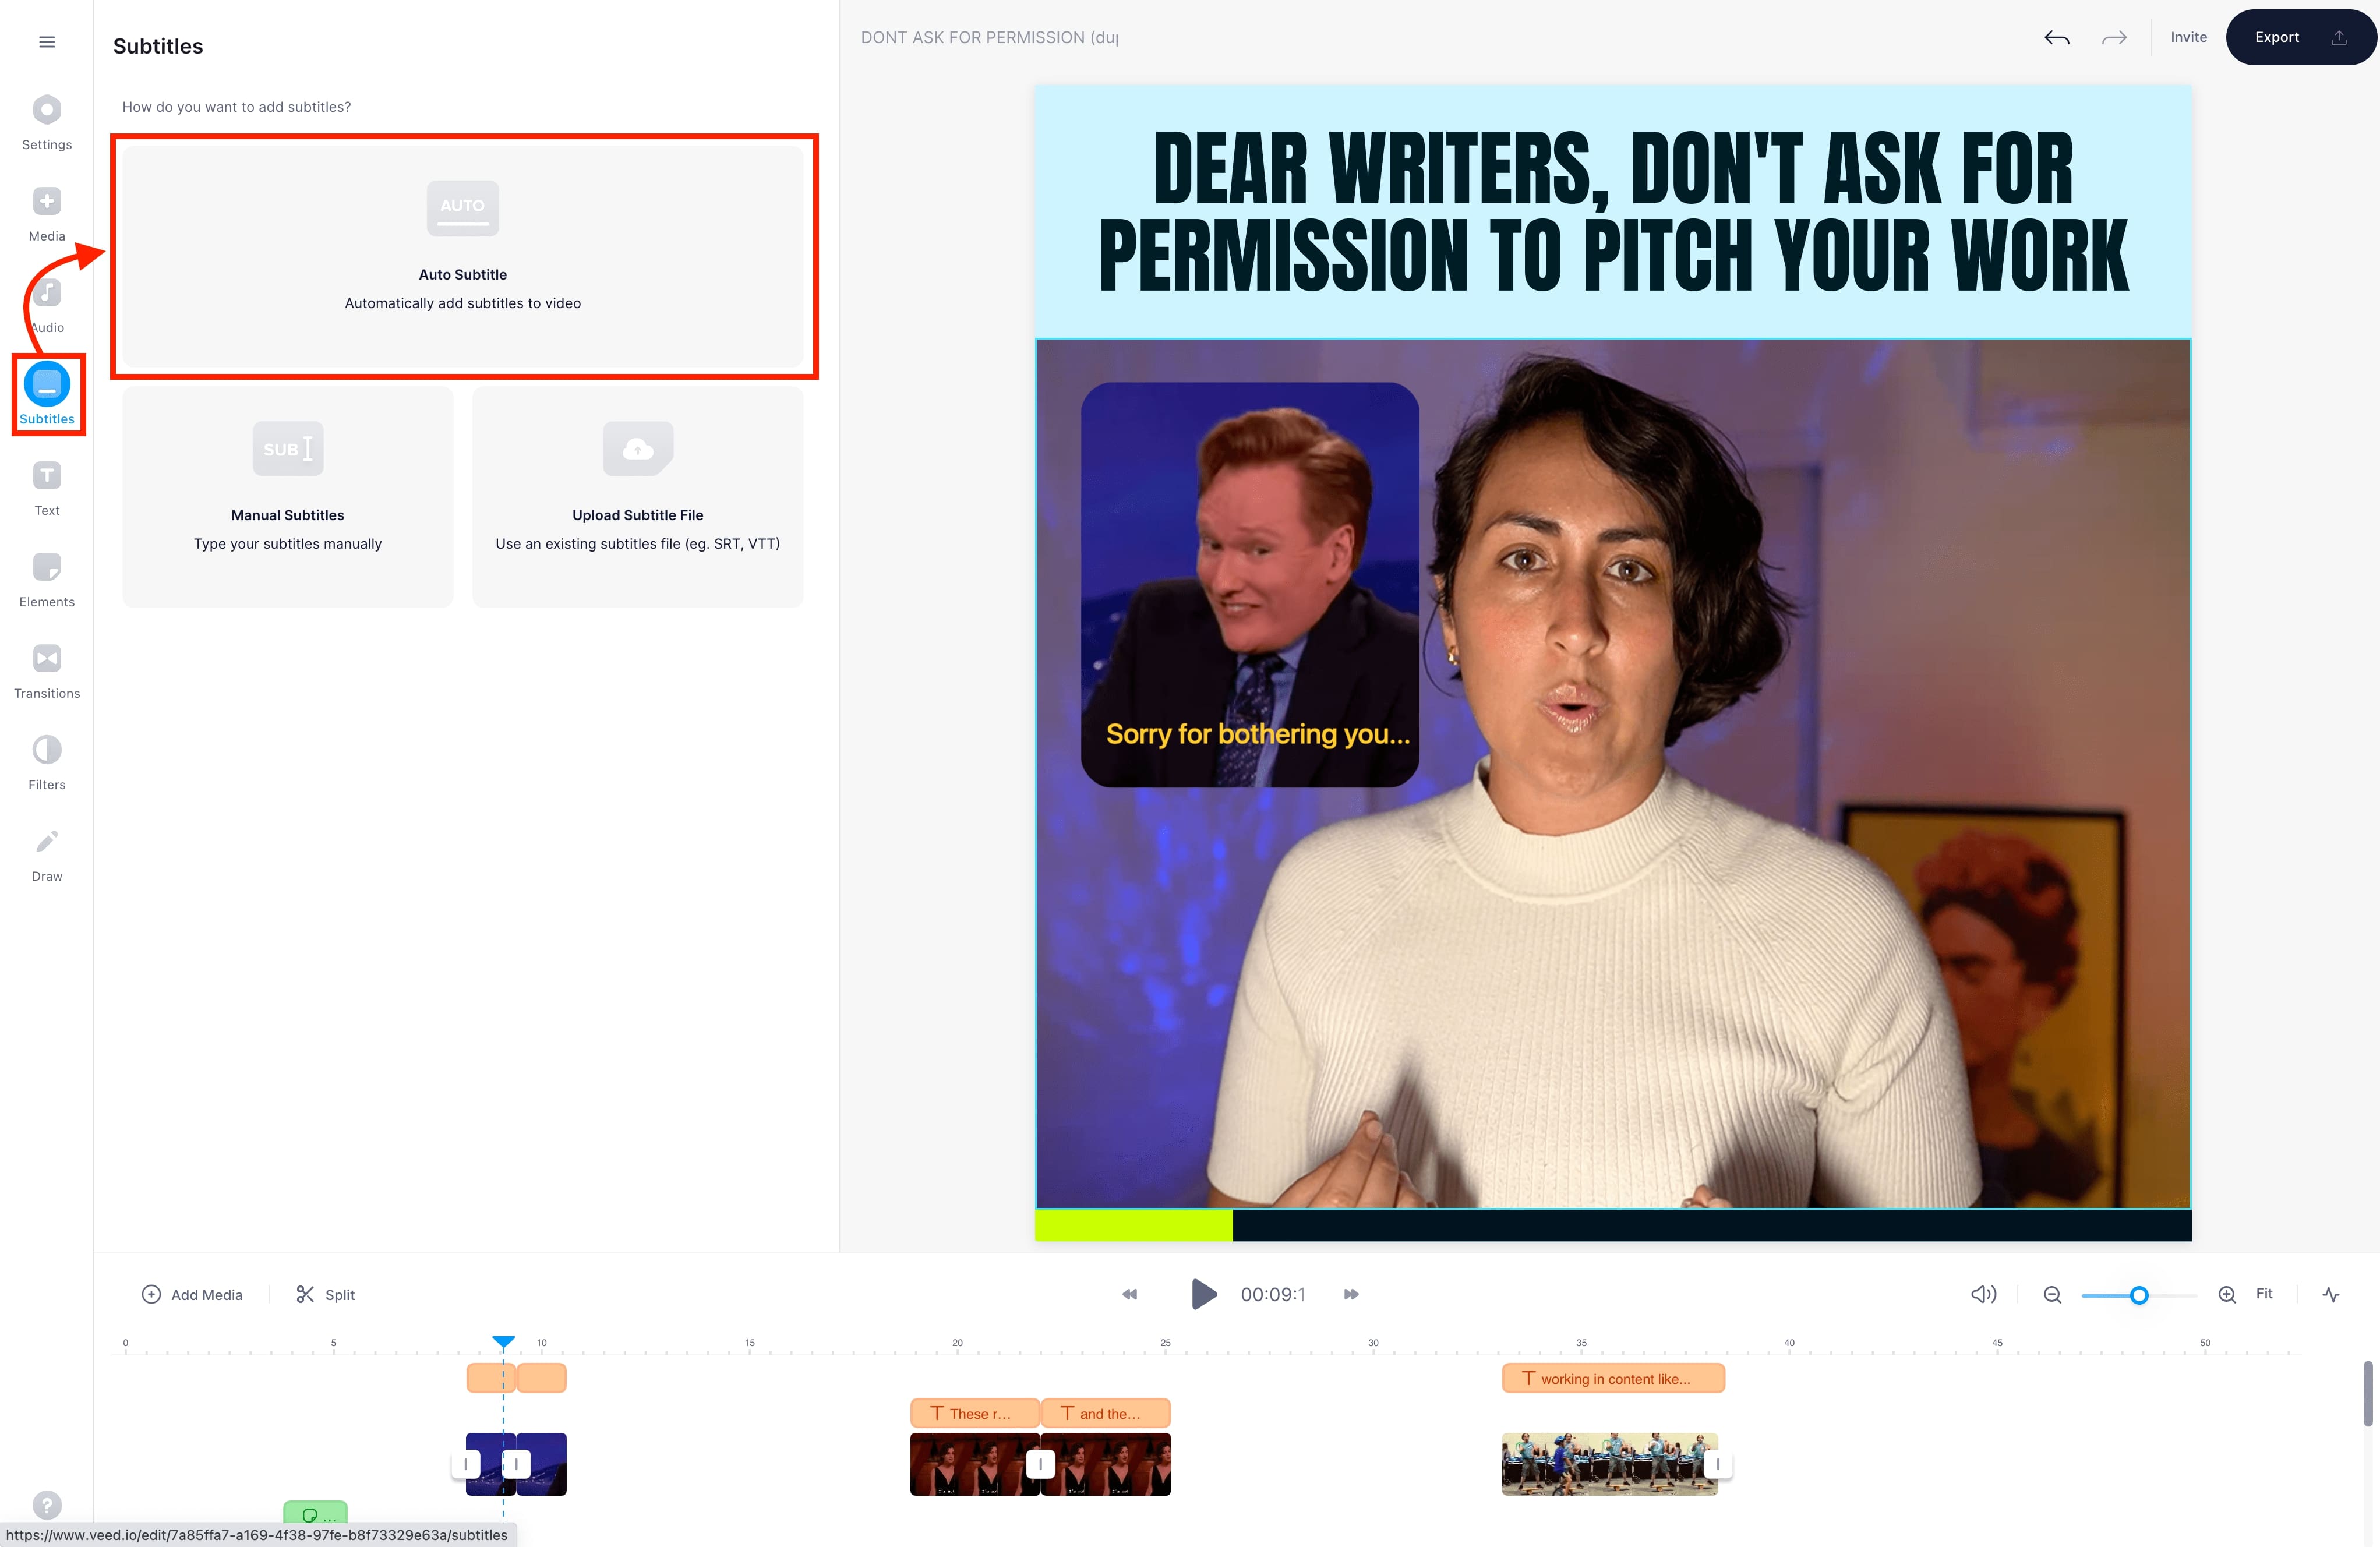
Keep in mind though: if you don’t have an SRT file ready, VEED’s auto-subtitles are the fastest option to add subtitles to your video as it uses AI to automagically generate captions. It then renders them permanently into the video. Alternatively, you can download the subtitles as a separate file (SRT, VTT, TXT, etc.).
3. Spellcheck and customize your subtitle
Mistakes in the subtitle text are common — whether it’s AI that generates them or you add them manually. So it’s important to take the time here to proofread the subtitle copy.
Next, format the subtitles. A few ways to do this:
- Split long subtitle lines to make them easy to consume
Within your VEED editor, click on the subtitles in the video to open the subtitles copy on the side. Now, spot a line you want to split:
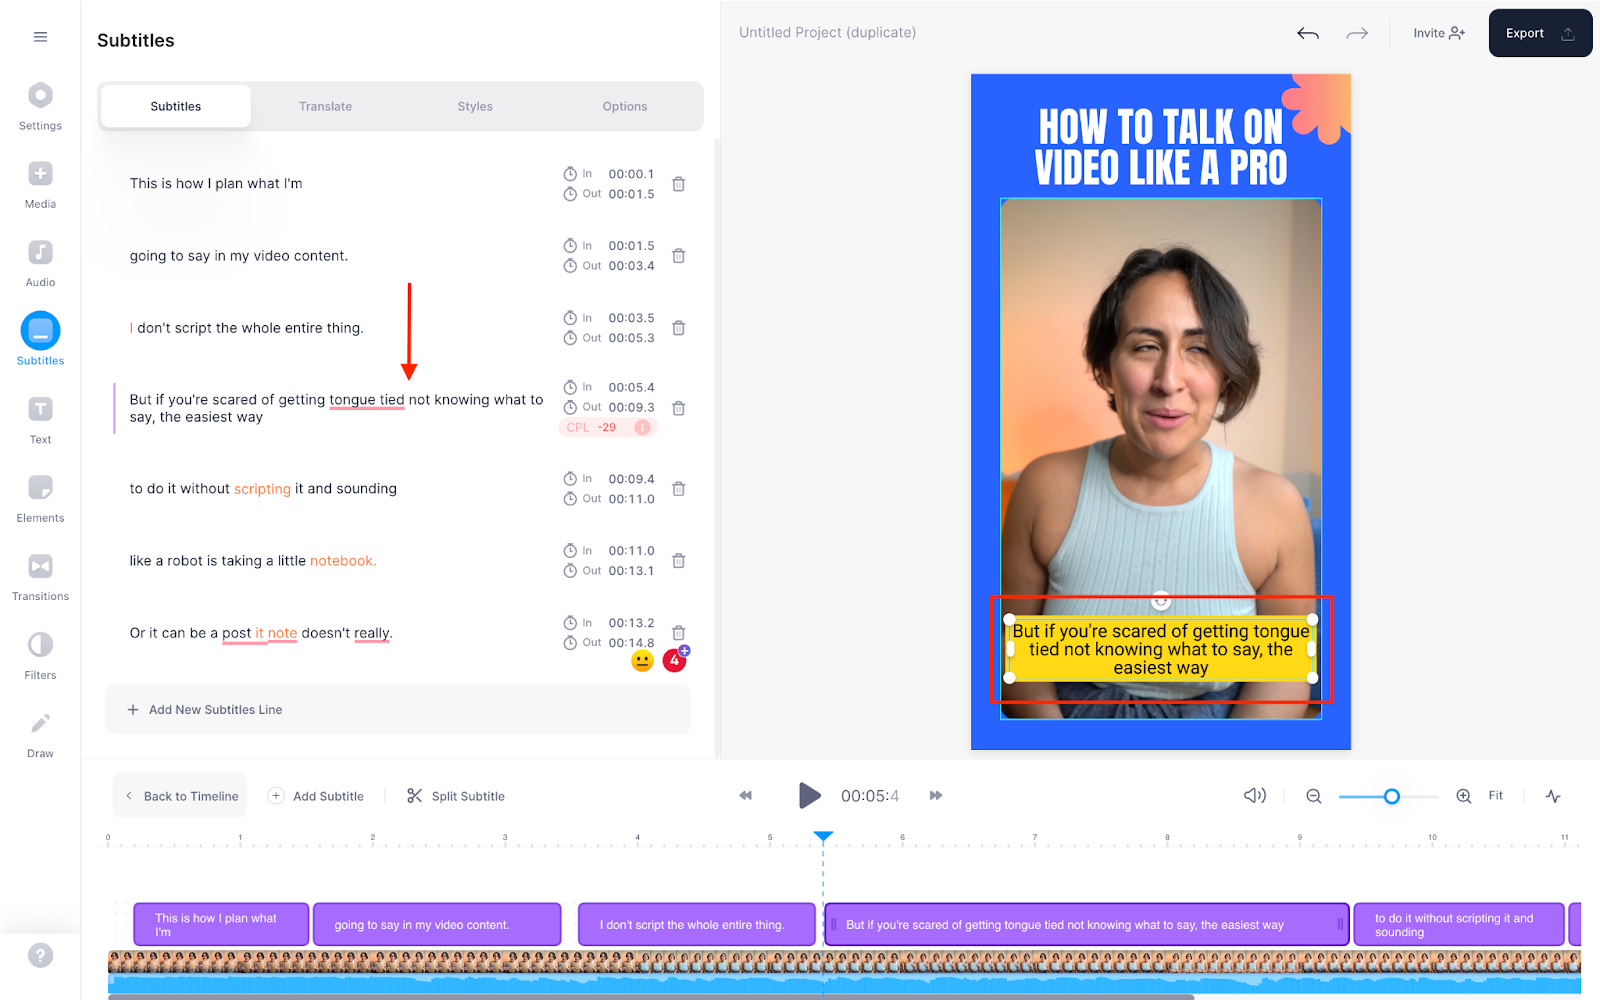
And, hit the enter key to split the caption.
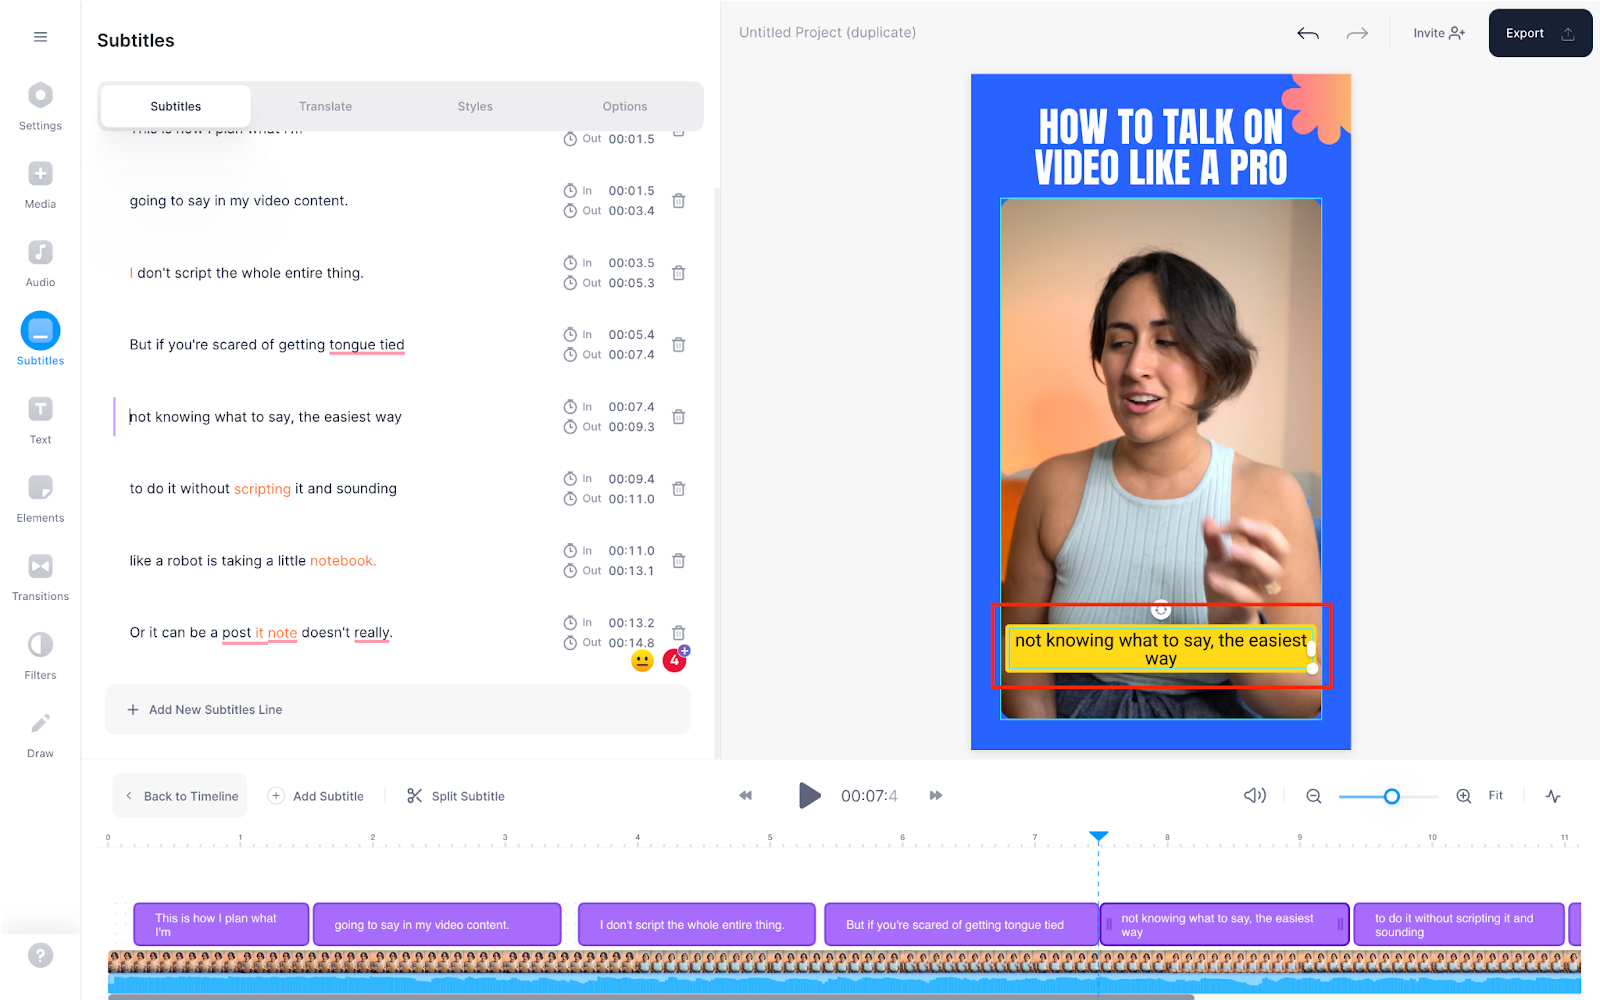
Simple 👏as 👏 that 👏
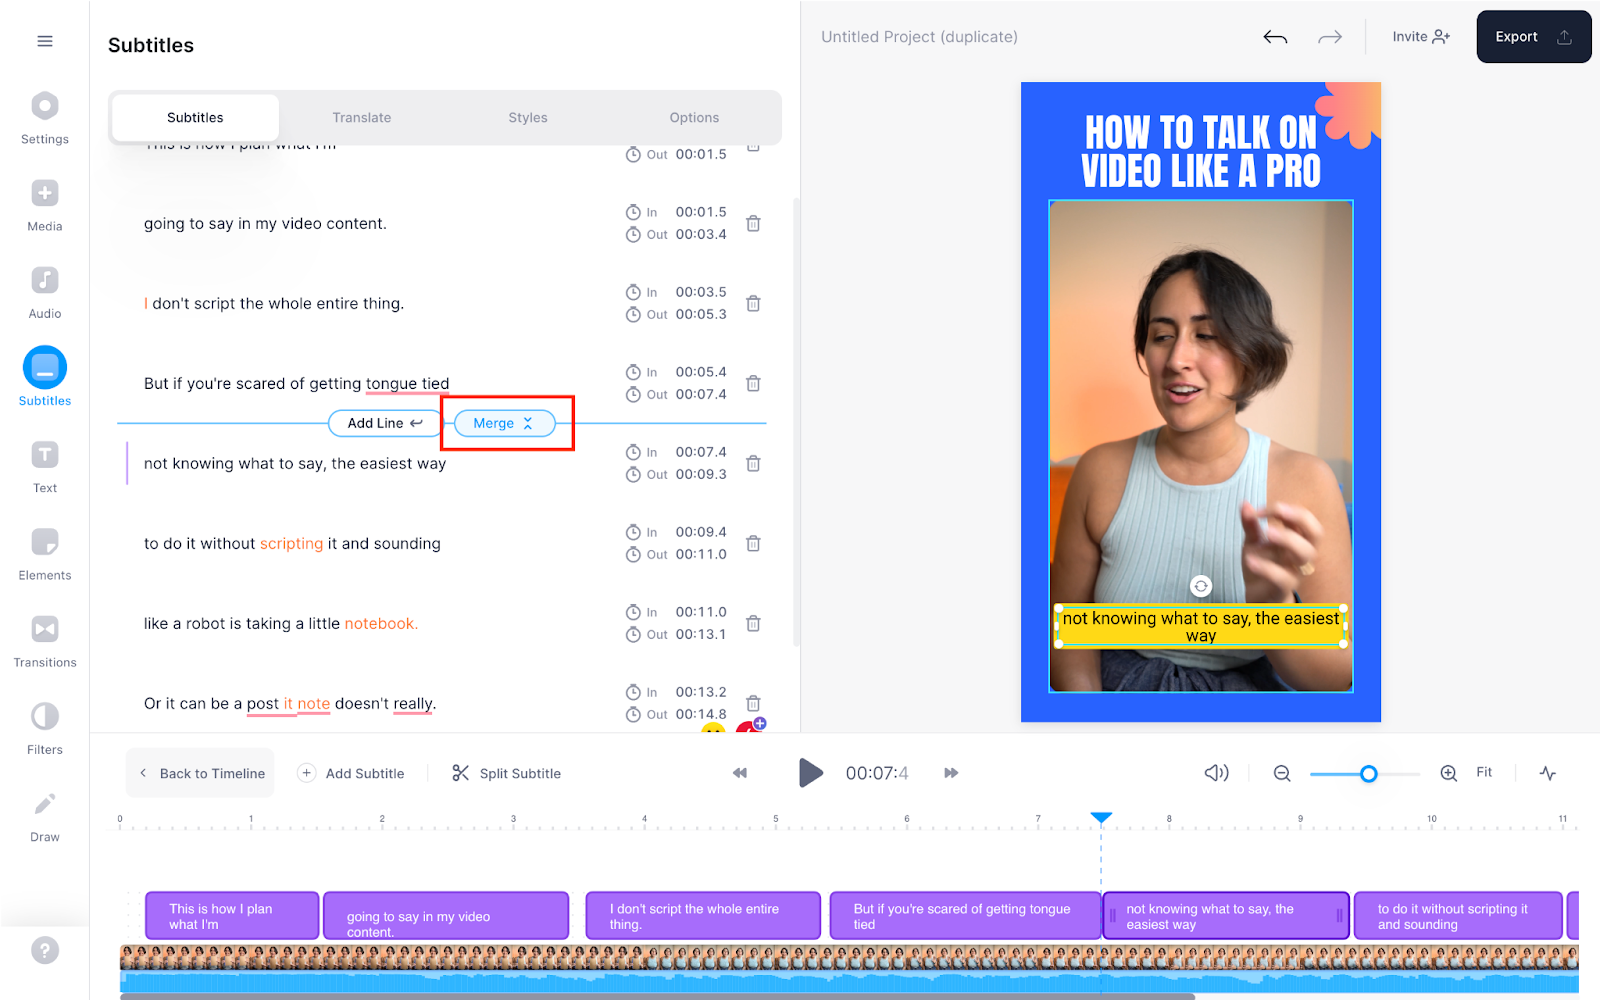
- Combine or merge short subtitle lines to improve readability
To do so, hover your mouse between two subtitle lines. This’ll show the merge button — click it to combine two subtitle lines.
- Merge three or more subtitle lines into one grouping
Lastly, if you want to group multiple subtitle lines, select the text to reveal the merge option. Click it and you’re done.

And finally, to spruce up your subtitle text’s look, head to Styles in the Subtitles section.
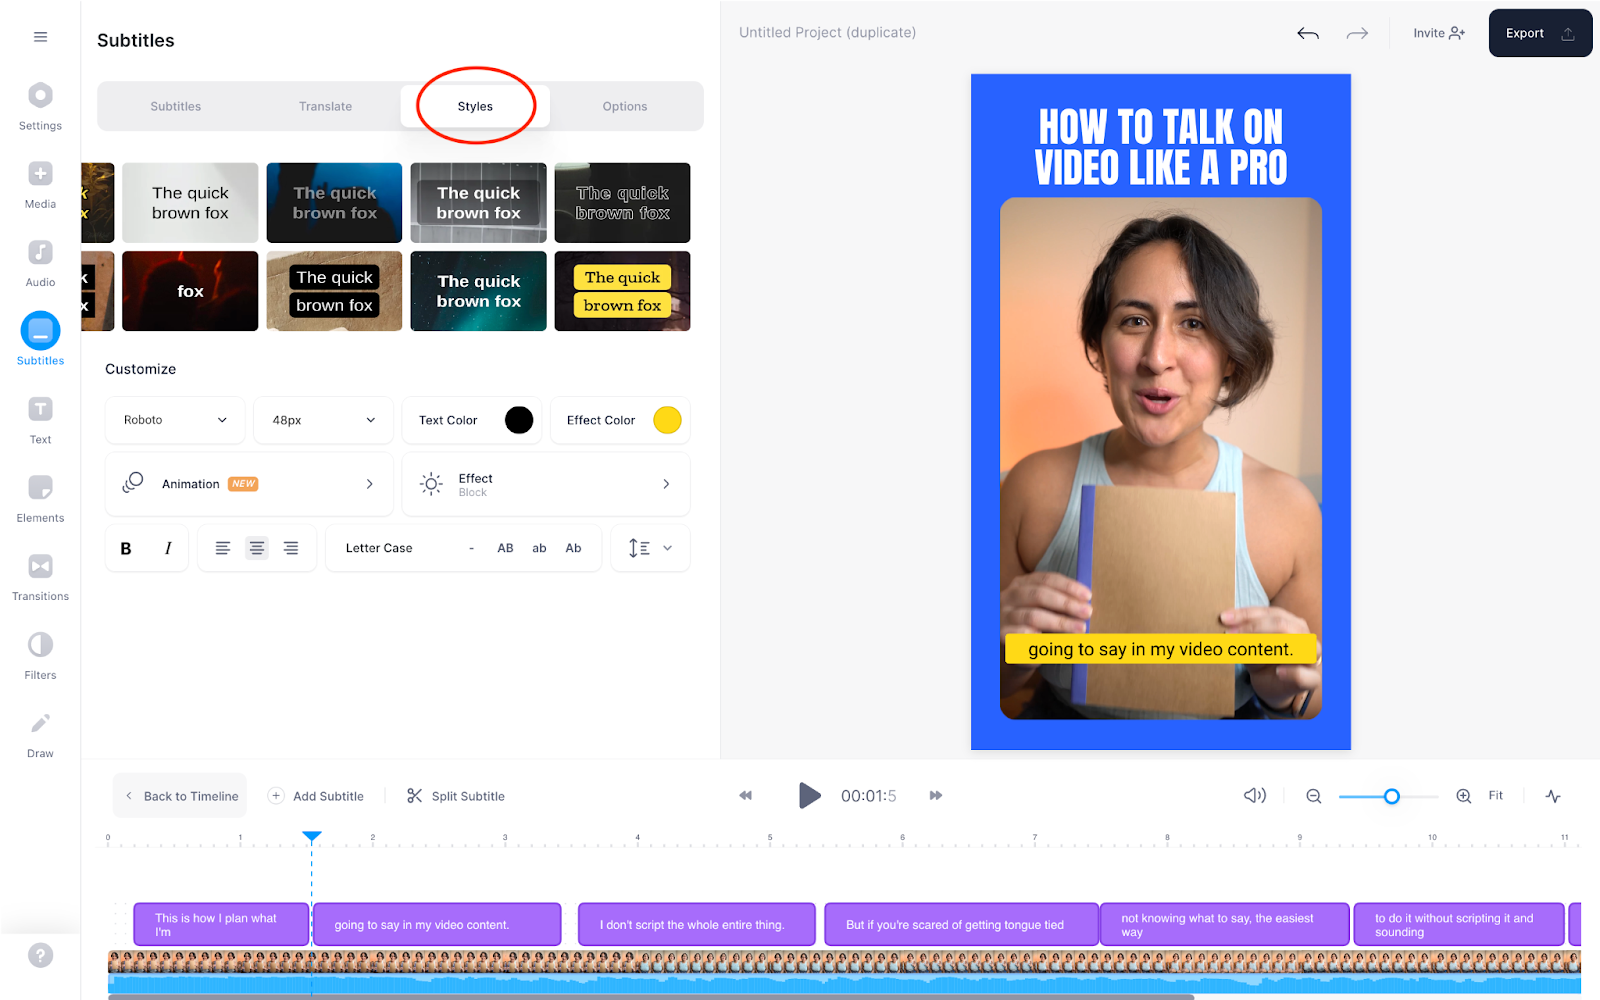
Here you can play with your font type, font size, color, text position, and line and letter spacing among other options. You can also add branded or custom fonts if you prefer.
P.S. Animated subtitles are coming soon!
One last thing: you can also add subtitles in a different language using the Translate option.
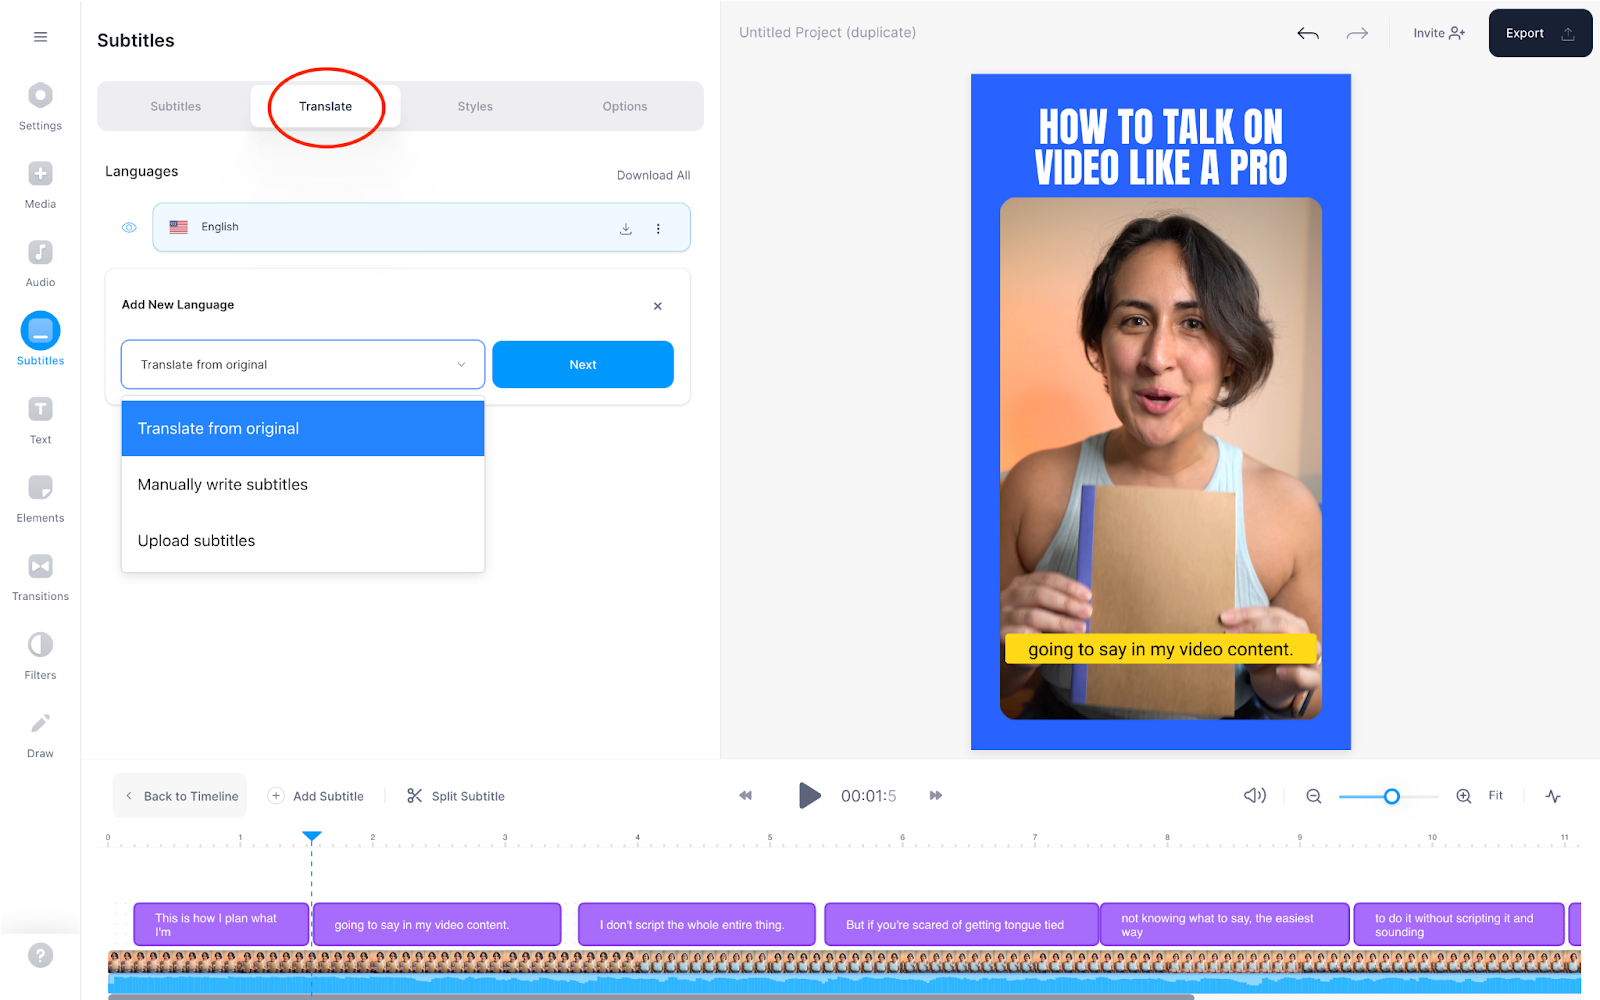
Select Add New Language here and choose from auto-translating the original subtitles to another language, manually adding subtitles in another language, or uploading a subtitle file with translated subtitle copy.
4. (Optional) Edit your video
Besides hardcoding subtitles, here's a quick glimpse of all the ways you can make a top-notch video with VEED – all while using only your email to log in to the tool.
- Record your video with the webcam recorder
- Access to a library of video templates
- Translate your subtitles
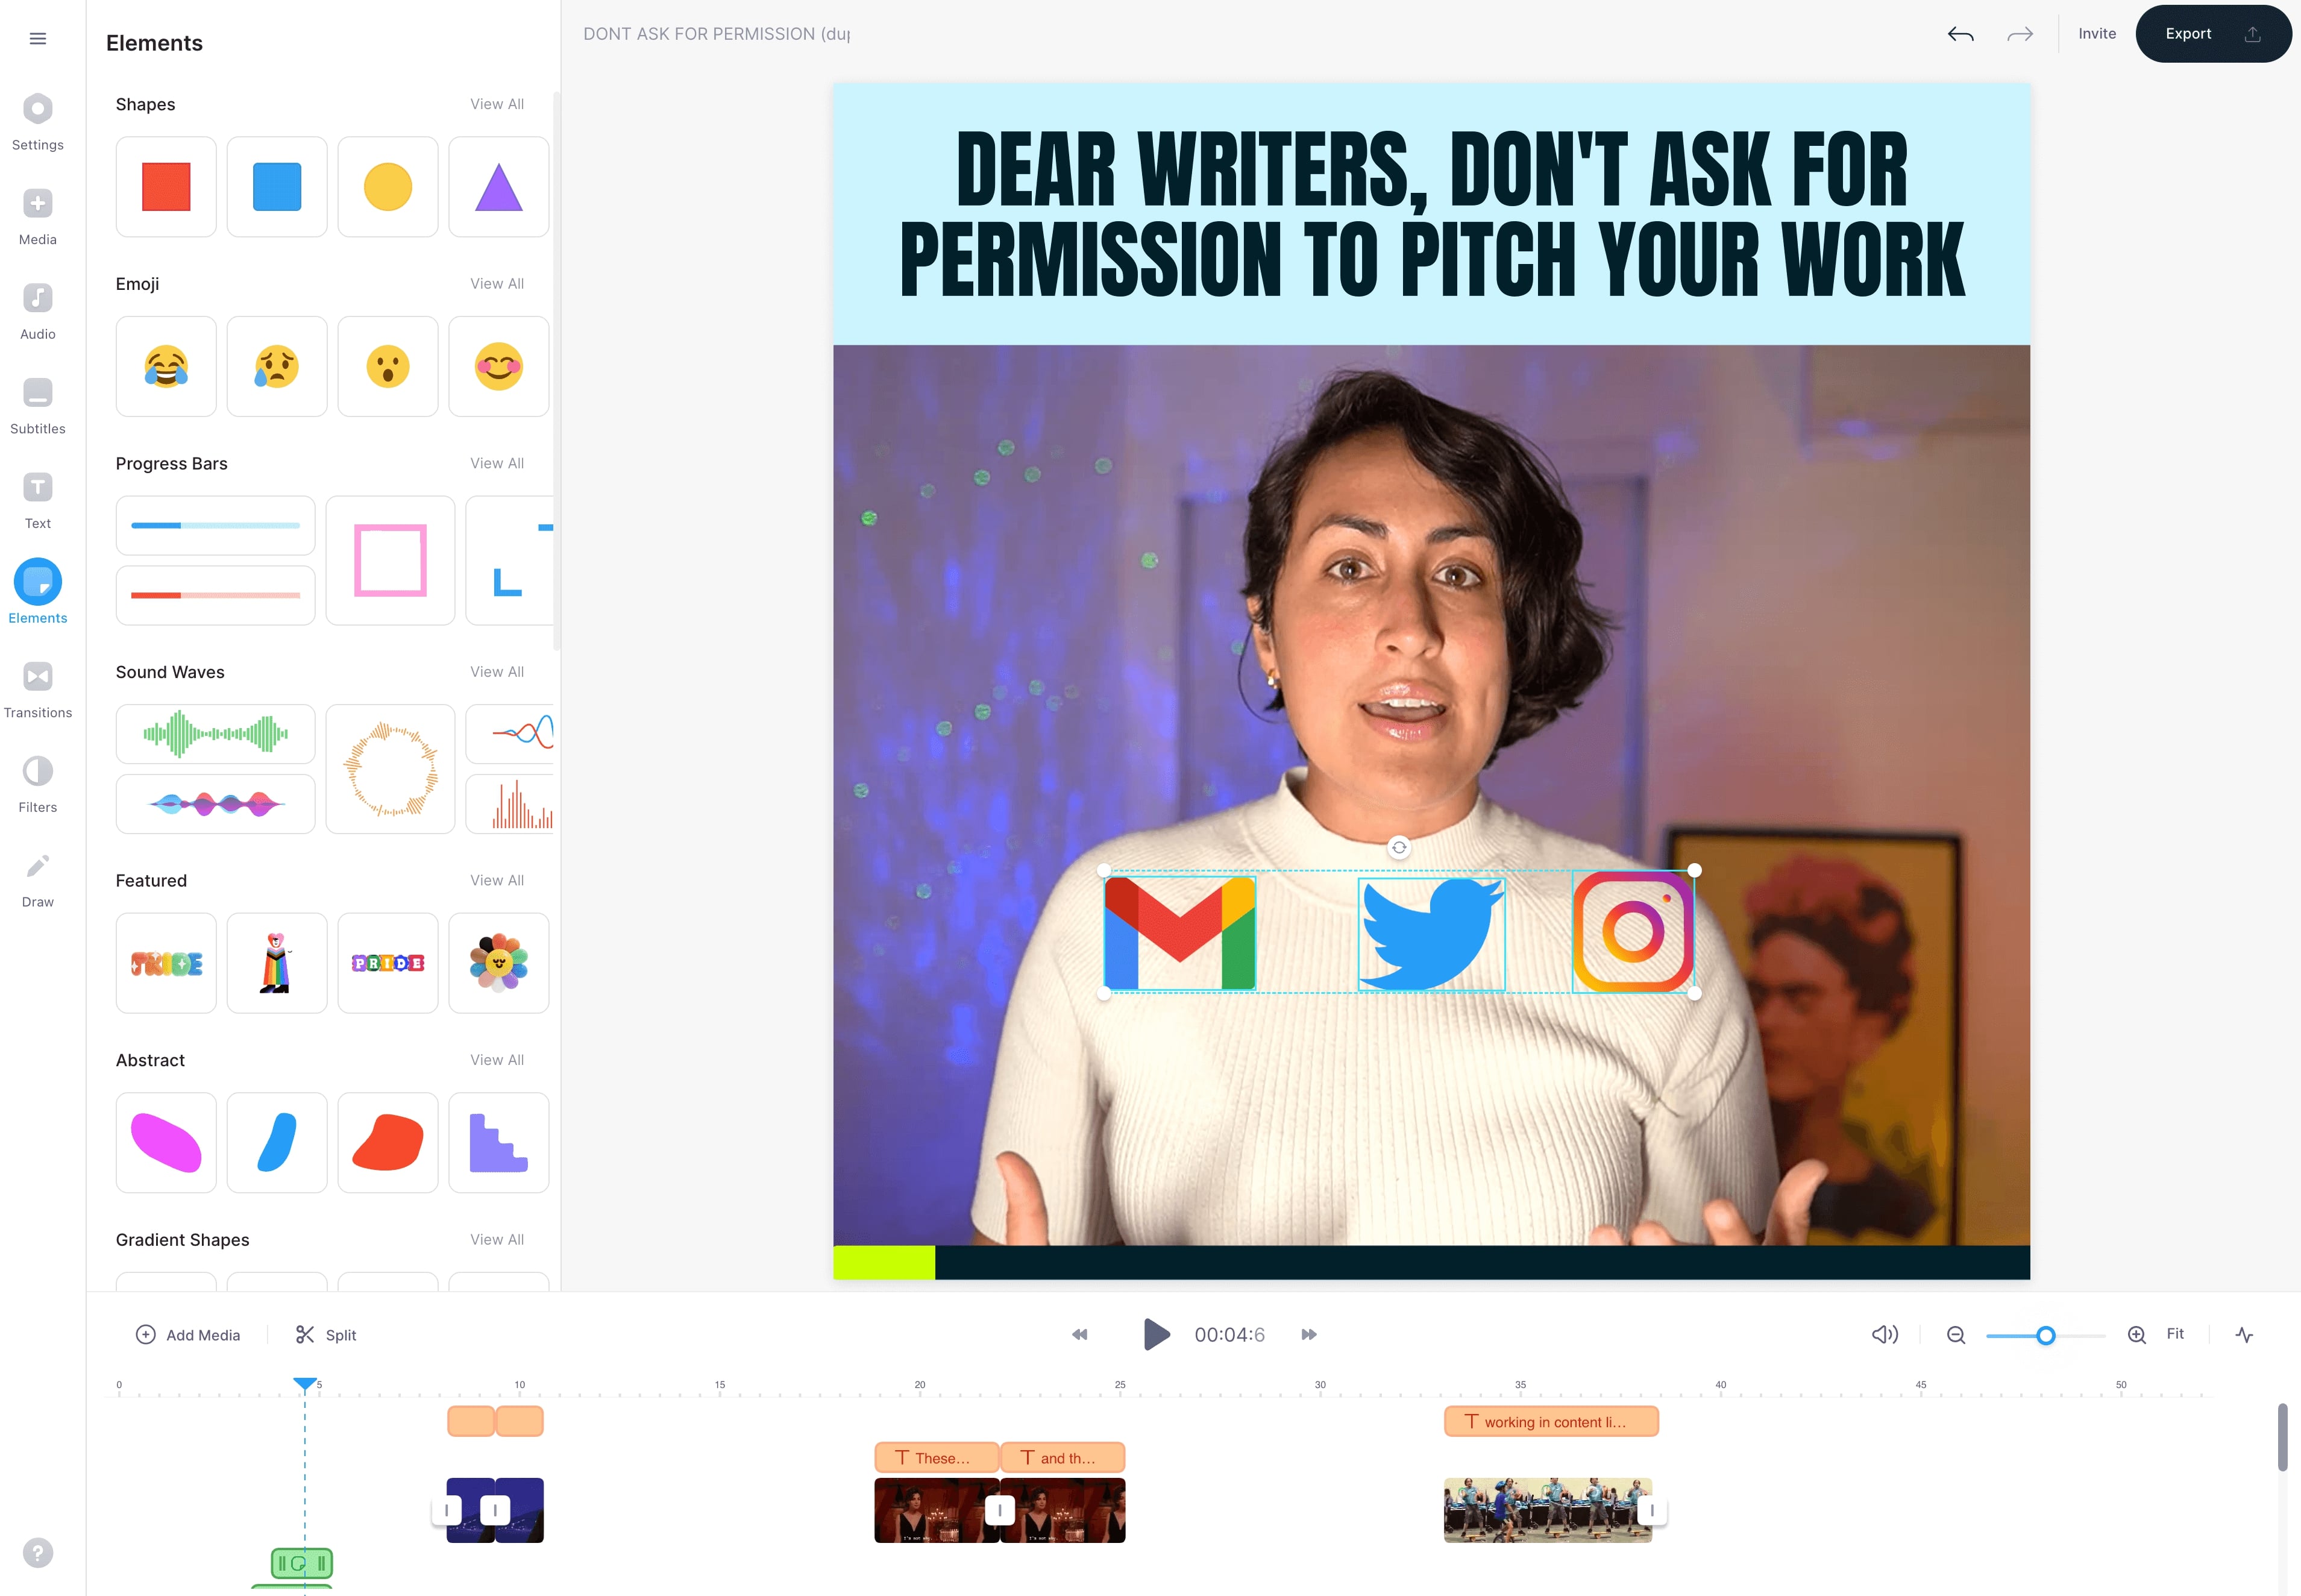
- Add music, sound effects, and stock footage from our media library
- Resize and repurpose video for all major social platforms by using the canvas resize feature
- Add filters and effects to your clips for a branded video experience
- Add an audio visualizer to your music or podcast video content
But if you just want the hardcoded captions skip to the next and final step.
5. Export and download your video with hardcoded subtitles
Last step: click on Export to toggle the export menu
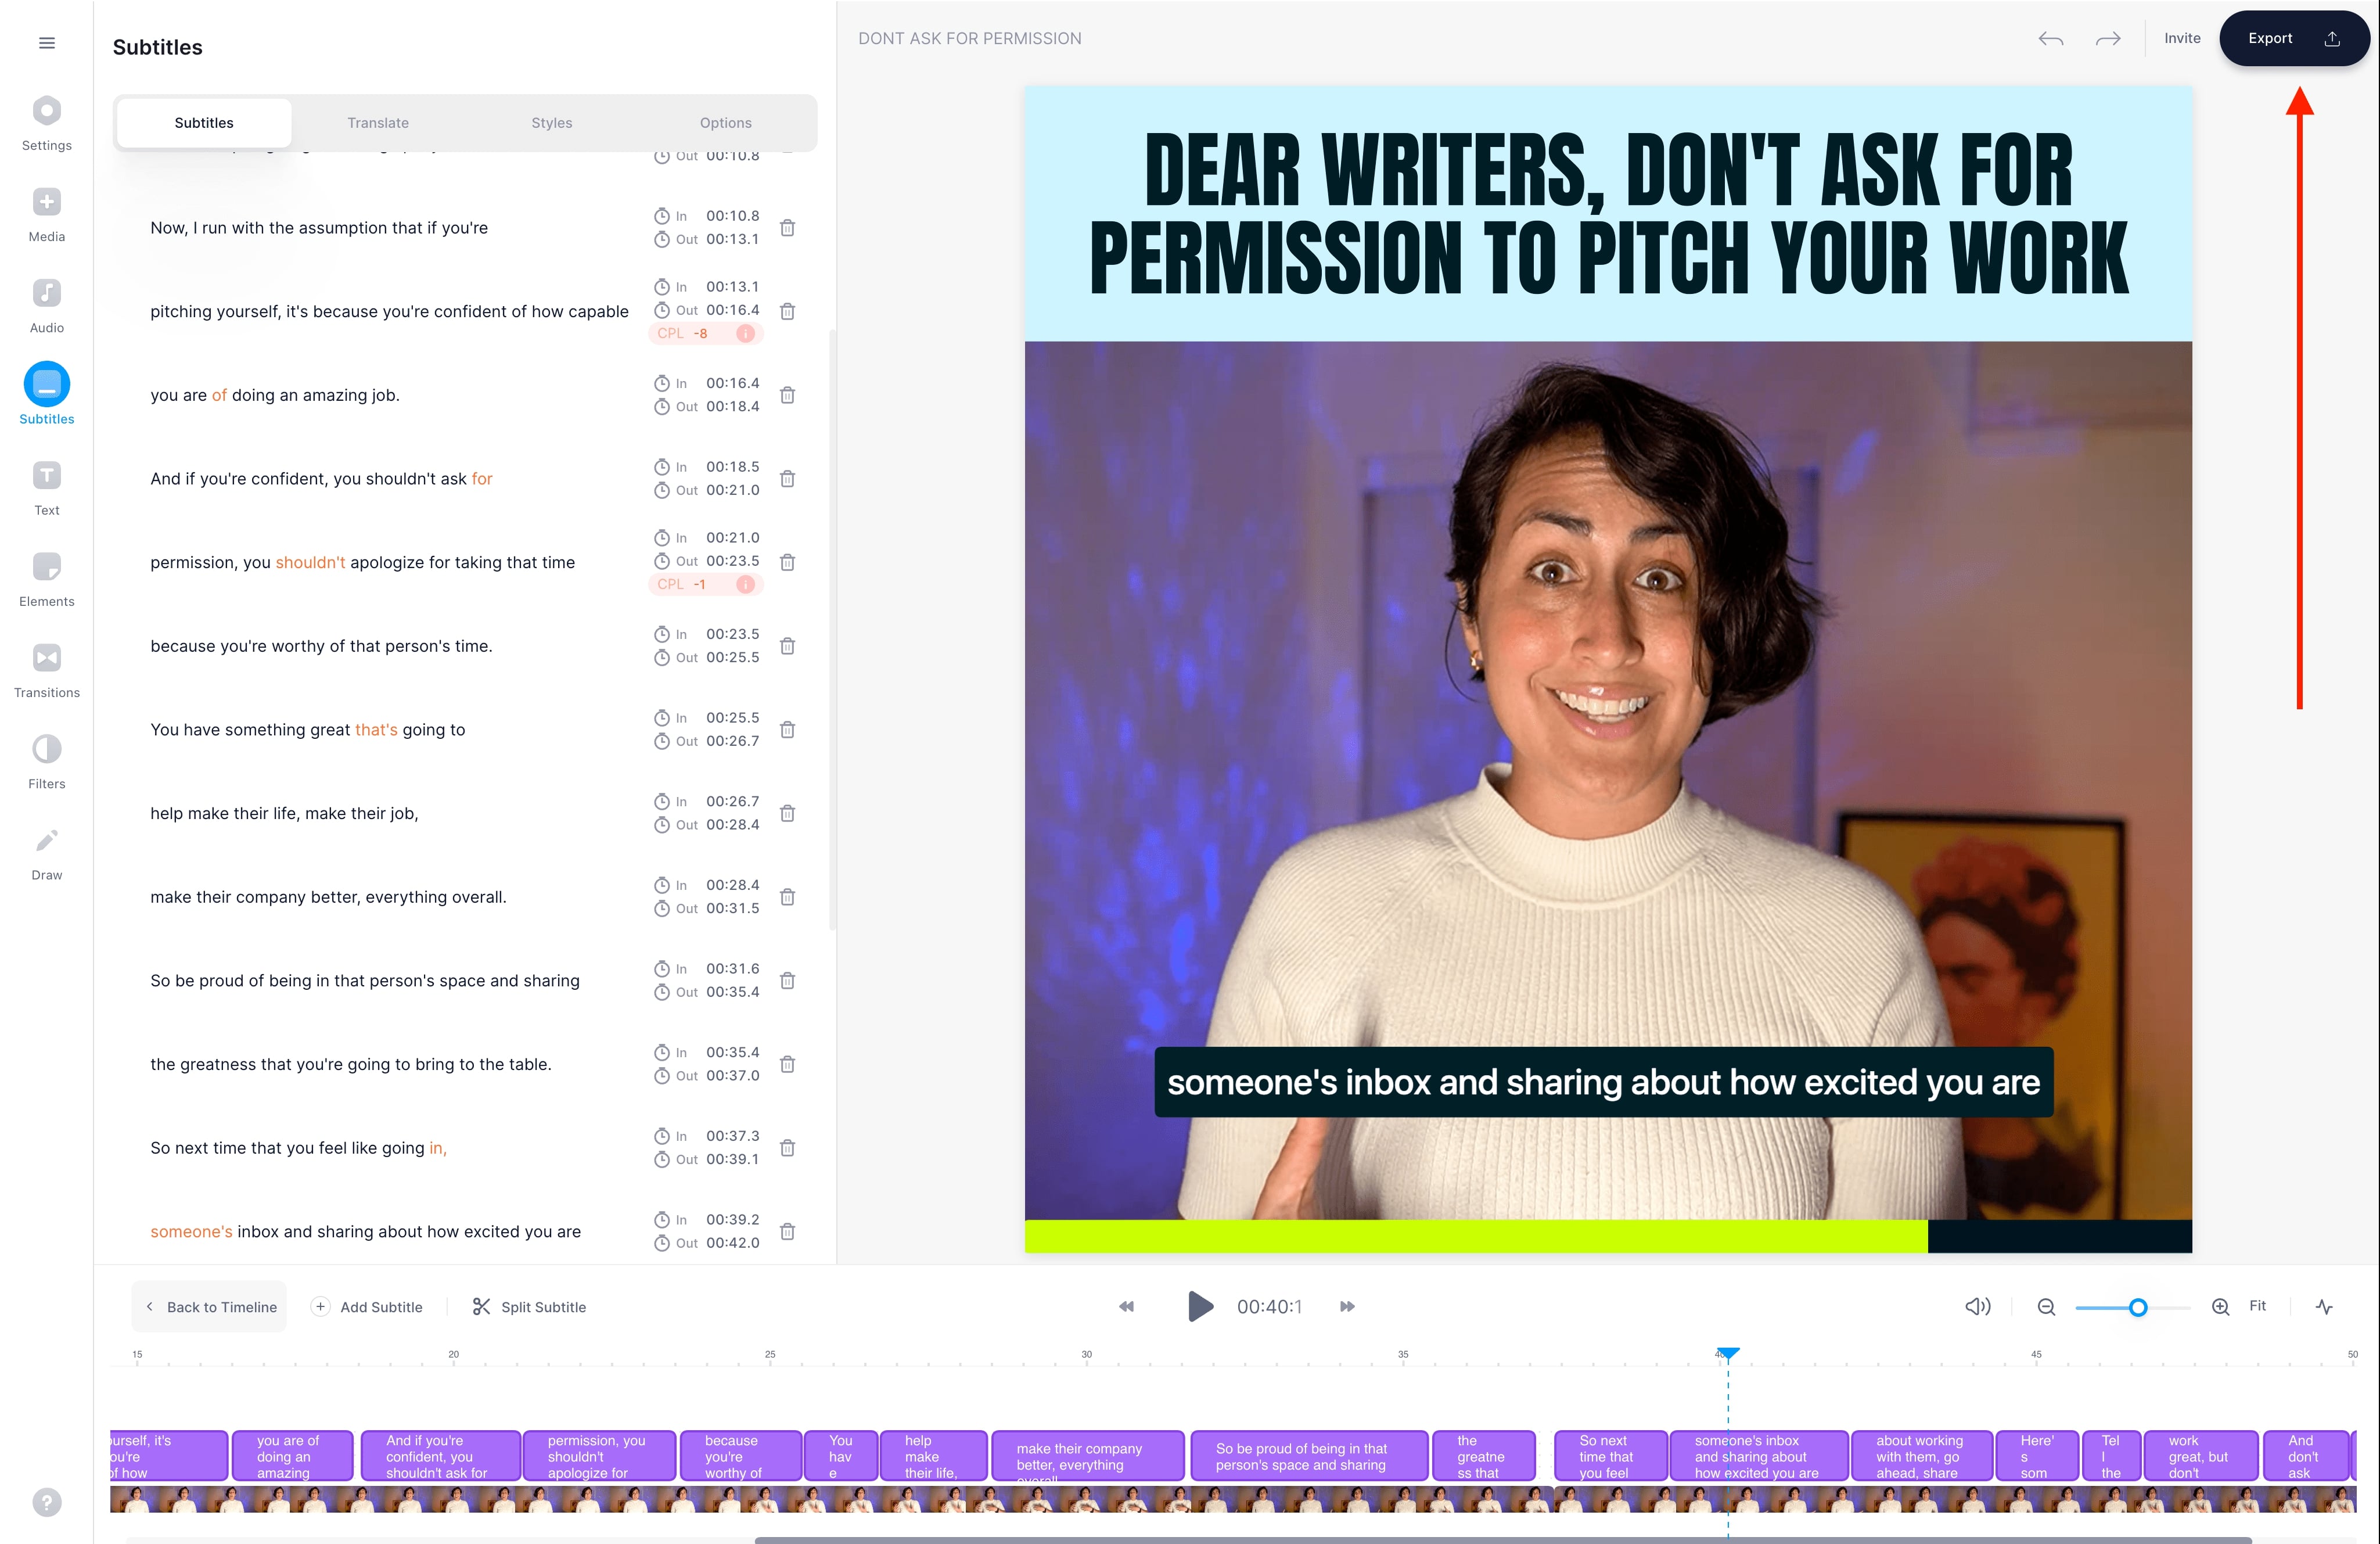
Make sure burn subtitles is turned on. You can also select an export preset if you want to play with your resolution settings. Click Export next.

Click the Download button on the download page to render the subtitles layered on top. And that’s it.
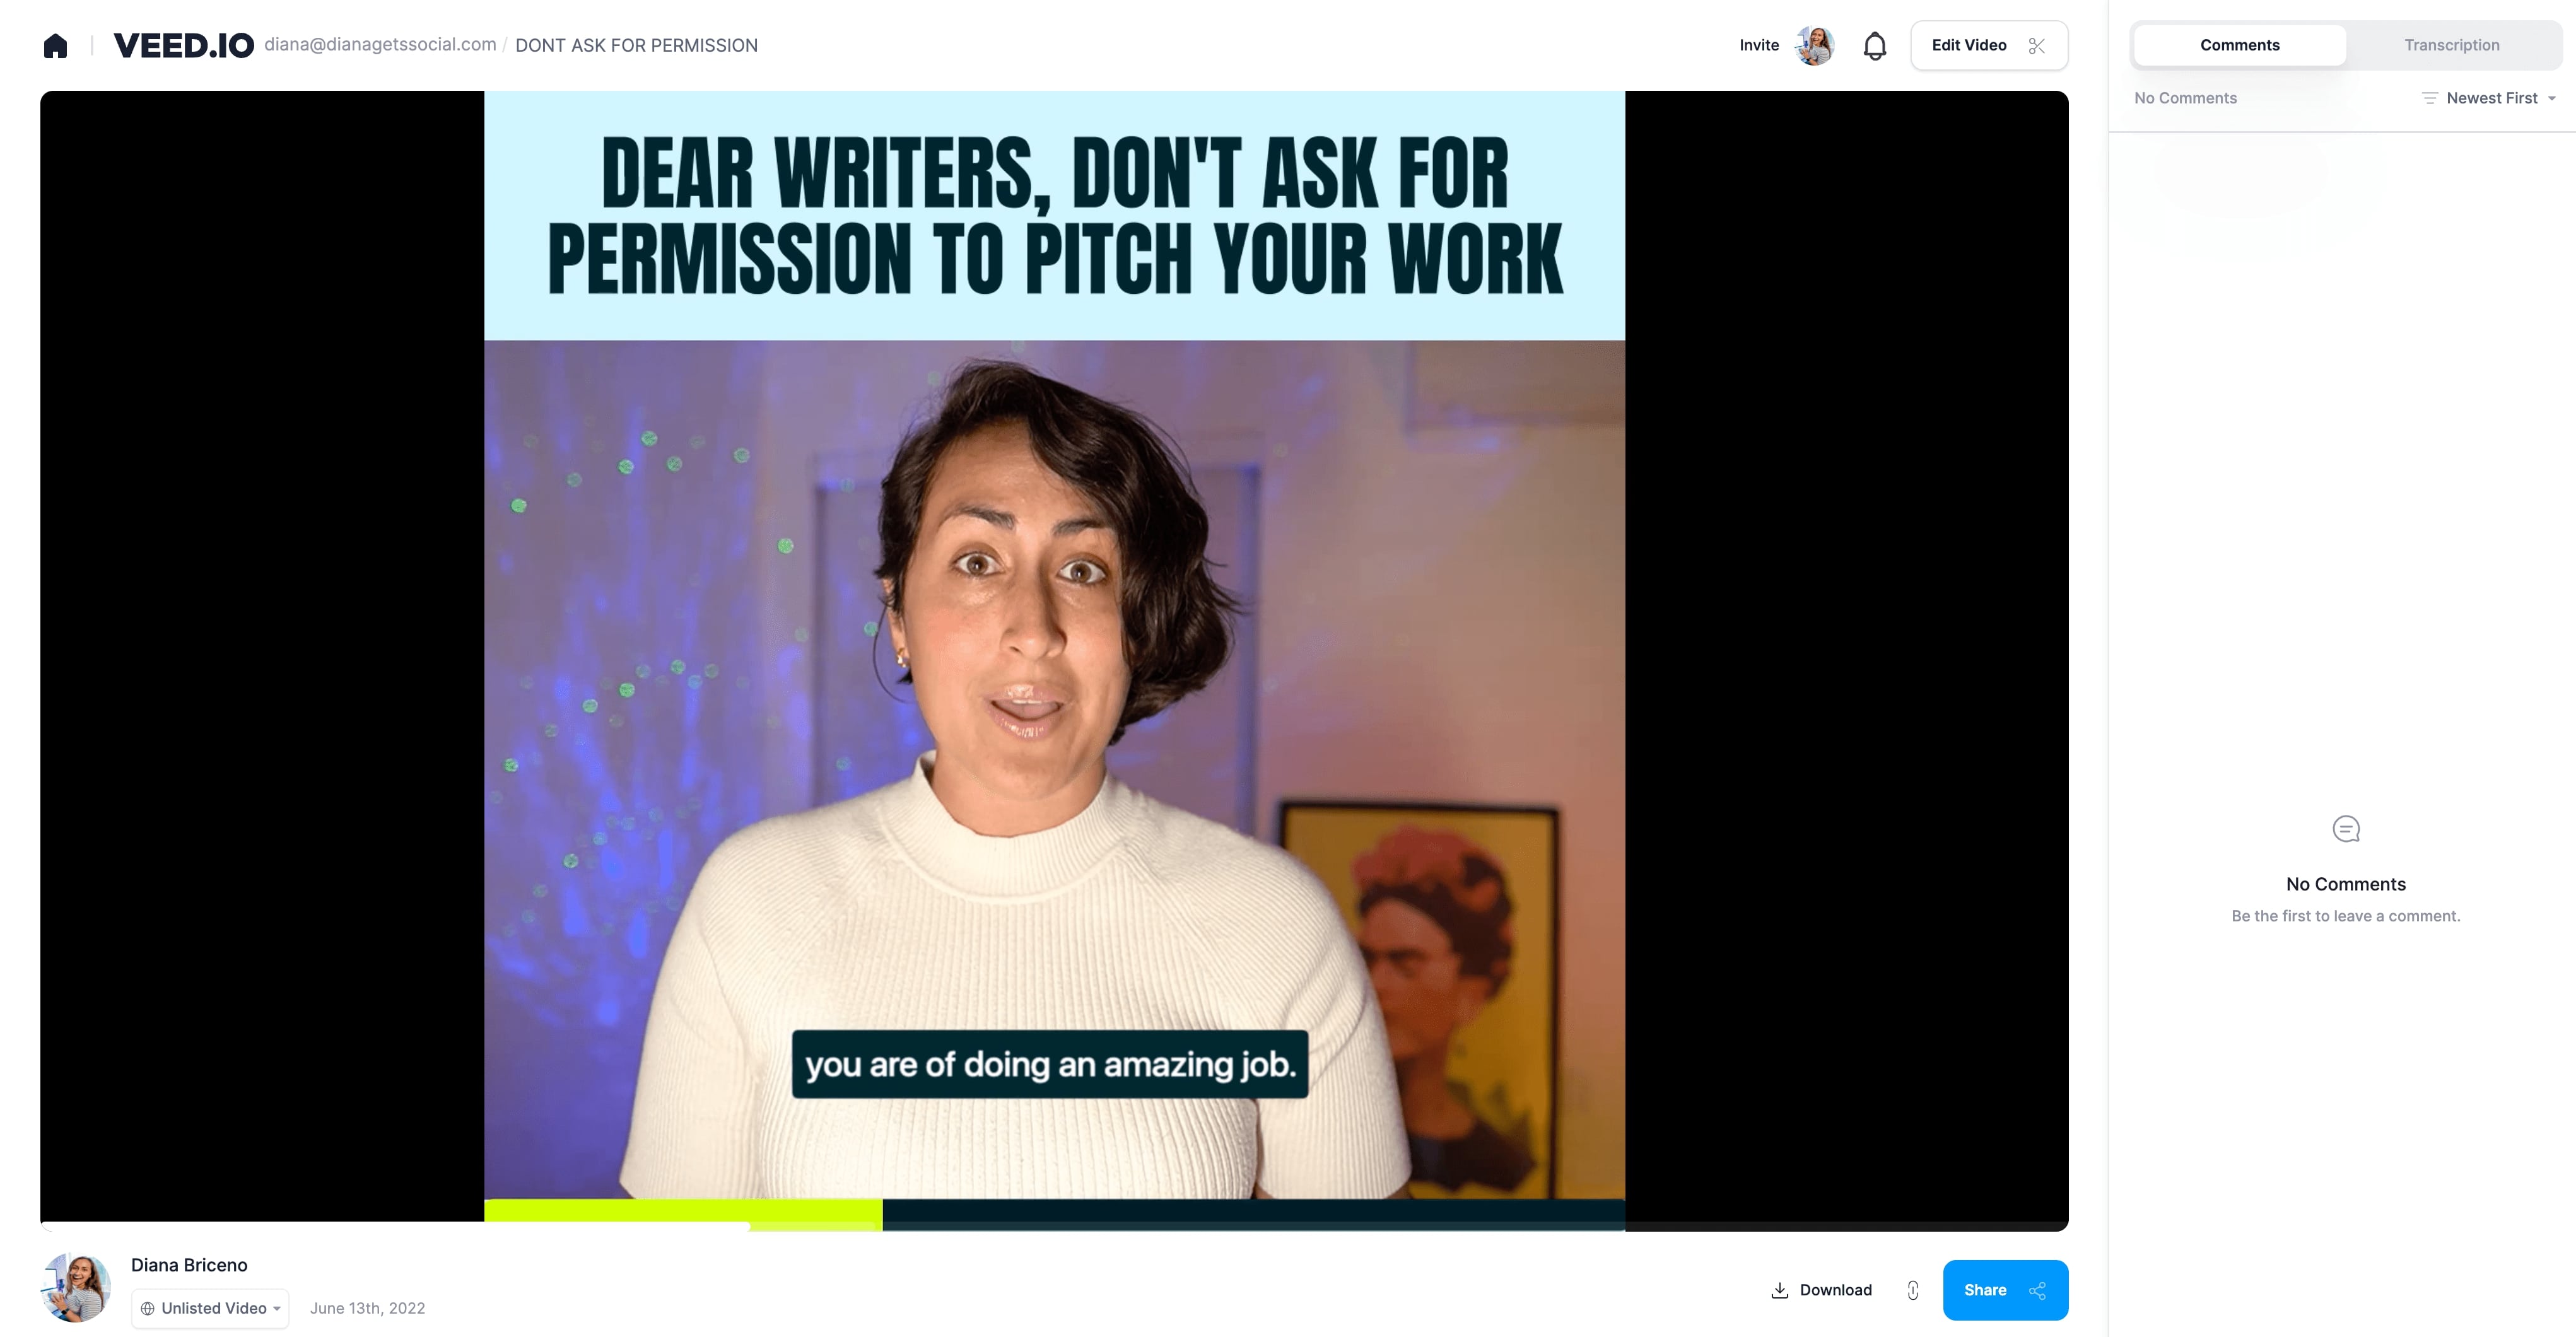
You can also get a shareable link to your video using the vertical link option to the right of the Download button.
[#TOC3]Best practices to format your hardcoded subtitles[#TOC3]
Avoid selecting whimsical decorative fonts that are hard to read (this includes fancy, cursive fonts). Here’s a complete guide to choosing readable subtitle fonts.
In short, though, these are 5 of the best subtitle fonts available inside VEED:
- Arial
- Helvetica
- Roboto
- Archivo
- Times
As for determining the font’s sizing, zoom out of your video to preview subtitles in the video’s original size. Adjust the size to make it legible as needed.
2. Improve legibility with a strong color contrast
Avoid text colors that blend in with your video’s background color. Use high-contrast colors so viewers don’t have to strain to understand the text. Use this resource on Web Aim to check contrast.
Still unsure? Add solid background to your captions so they’re easy to read.
3. Keep lines short and easy to read
We’ve already talked about how you can use VEED to merge short subtitle lines and split longer ones.
Other than that, avoid adding subtitle text on the far left and right edges to save it from getting cropped out by the video host destination.
Also, avoid squishing together letters in the text. Use VEED to adjust letter and line spacing for an optimal viewer experience.
Ready to add hardcode subtitles to your videos?
And that’s a wrap.
Remember: you need to embed subtitles in video for improving its engagement and accessibility. In fact, your audience will love you for this extra step.
Luckily, subtitling videos isn’t hard – thanks to VEED. So sign up for free and start subtitling videos today!


